Our boat Merci has ridden out several hurricanes, had a botched repair attempt, poor paint job and looks like she spent some time rubbing on some rocks. Other than that, the loose foam block, multiple hull punctures, ripped out bow handle and the homemade rudder attachment, she is in fine shape. There is damage to the hull gelcoat down to the fiberglass, so we are starting out with some exploratory sanding to see how much damage needs to be removed. Once we assess that we can draw up a game plan on whether we will need to fair the entire hull with a compound or just the seriously damaged areas.
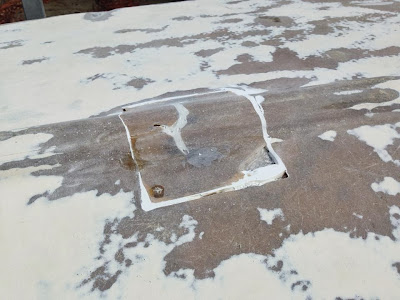
Started cutting holes for blind patches in bow, keel forward of daggerboard and keel under the cockpit, using a rotozip. Make sure the bit is set shallow so it does not cut into cockpit tub.
Found a lot of dirt in the hull, used to be mud.
Also found port bow flotation block is loose, tried to push it back into place from theis cutout but the old foam is in the way. Merci must have taken quite a tumble in one of the hurricanes to dislodge that block. This changes our plan for blind patches, as now we need to split the hull in order to remove the old 2 part expanding foam and reset the block.
Here is about 5 pounds of dirt that we have vacuumed out of the hull so far.
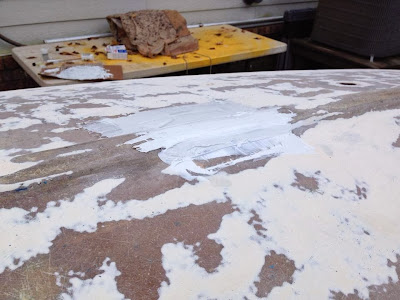
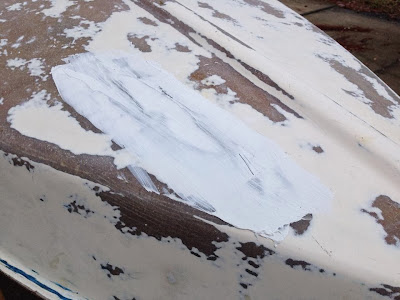
There are several experiments going on here.
1) I did some light sanding on the chine and sprayed it with blue rustoleum, to see if the paint would cover any of the scrapes. Answer is no. But now when I sand I will know I am getting to good base materials, through all of the chips, scrapes and gouges when all of the blue spray paint disappears.
2) Same idea with the red Interlux Brightside, how much would it cover? Not Much.
3) the white area is epoxy putty, would it fill in the gouges and smooth out the crunchy spots? Nope.
I sanded a test area with a random orbital sander and 80 grit pads, lots of them, from the port bow back about 6 feet. By watching where the red paint was disappearing from the valleys while sanding, it was easy to see where I needed to sand more. I left 2 hand size areas partially sanded, then rolled/tipped the area with Interlux Brightside Bluglo White. The fully sanded areas came out looking great, the partially sanded areas will need to be completely sanded down through most of the gelcoat. The great news is that the crunchy areas do not go into the fiberglass and epoxy and will not need to be faired! We will be able to see some dips in the gelcoat but the surface will be smooth.
I'll get a better picture, in this one the newly sanded area is so smooth and shiny that it picked up the reflection of the pine tree overhead. I'll also get some picture of how the sanding progressed, down through the red paint and gelcoat to the fiberglass and epoxy.
Built a work cradle that will support boat hull side up and deck side up, with removable bunks, it also has rollers and the sawhorses will come out if I want.
Split the deck/hull seam to get inside for hull repairs. For more information on splitting a deck,see the post on
Foam Repair.
Here are the areas to be repaired from inside. As it turns out all of the backer blocks are decayed, completely gone and will need to be replaced, so having the hull split will make that easy. The fiberglass hangar stuck to the deck is for the halyard cleat backer block. The pegs sticking through the hull in the background are the securing rivet nuts (rivnuts) for the coaming. The backer block hanger for the bow handle is broken and needs to be repaired. The hanger for the halyard block backer block is gone also.
INTERMISSION
This piece needed to be cutout, that is crushed and punctured fiberglass where the epoxy is clouded. It needs to be replaced.
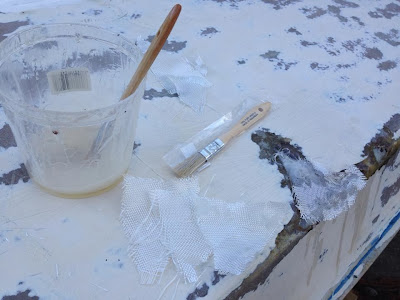
Cutting out a fiberglass cloth patch for the inside. Make it bigger than the repair area and cut out 4-5 layers. We only did one at first and it was not stiff enough.
I cut out the damaged area and taped this keel section back in place.
Epoxied the backer patch into place, 4-5 layers would be optimum. I was able to reach the area with a long handles brush, but needed to tape a stick to the mixing cup in order to get the epoxy poured.
Cut out a backer patch for the bow repair.
Made a backer patch for the keel repair under the cockpit. I used the cut out piece as a form, wax paper so I can remove the backer and slide it inside the hull.
Used cardboard and string to pull the backer patch tight inside the hull. Epoxied everything into place, tied it up with paint sticks while it dried.
Keel patch is drying, it will need fiberglass cloth added where damaged areas are cut out. Completed first sanding to see what areas need to be built up some more.
Added five layers of fiberglass to build up the bow repair, then sanded.
31 Oct 2013: Added 3 additional layers of fiberglass inside for the keel patch just ahead of daggerboard trunk.
To reach this area I needed a paint stick to position the cloth, a cup on a stick to pour the epoxy resin and a long handled brush to embed the resin.
I used one of the foam blocks to prop open the deck.
Also put 4 layers of cloth under the bow handle hole...
Then 4 layers in the hole and sanded. Test fit the bow handle.
...and then let Merci get a little sun.
While the deck was open we replaced the backer blocks for the bow handle, halyard cleat and halyard block. The old blocks were rotted away. This backer blocks are held in place by adhesive and a fiberglass strip.
I cut new backer blocks out of rot resistant cypress.
Secured new backer blocks with 3M 5200 Marine adhesive sealant.
Found one bridle eyestrap backer block in the hull, so those will be replaced also.
Finished the foam reset and epoxied the deck and hull back together. See
Foam Repair for more pictures.
The bridle eyestrap used to go here, in fact the old one is there in the bottom right of the picture.
Went throught the inspection port on the stern and tunneled through the foam to install new bridle eyestrap backer blocks, held them in place with screws while they dry.
Finished sanding the deck with 80 grit.
Flipped the boat and removed 2 coats of old blue paint and gouges in the gelcoat, had to sand through the gelcoat in a few areas.
Finished the port hull!
Finished the starboard hull.
Reattached the keel section with fiberglass cloth and epoxy resin.
After epoxy dried, troweled on first layer of marine epoxy putty.
Made a blind patch with cardboard, 3 layers of fiberglass cloth and a coat hanger.
Epoxied the blind patch into the hull, pulled it tight with the coat hanger.
Added 4 layers of 6 oz fiberglass cloth, bonded with West System 105 Epoxy resin and 207 Special Clear hardener. Polyester resin would bond better, epoxy resin is a little stronger. I used 207 Special Clear hardener because that's what I used for Zip's clear sealant coat. The 205 Fast hardener or 206 Slow hardener would work as well, but may have an amber tint. Buy cheap brushes and wipe up runs to reduce later sanding.
Chine patch drying.
Sanded the chine patch and added a layer of Marine Tex to fill the gaps.
Filed down the excess epoxy around the daggerboard trunk with a 4 in 1 file, then test fit a daggerboard.
Sanded the cockpit keel patch.
Filled gaps on the keel and hull patches with Marine Tex.
Dec 2013: First coat of Pettit EZ Prime rolled and tipped. It went on great and covered a lot!
Testing Pettit EZ Fair epoxy fairing compound. I really like how it dispenses in equal amounts from a caulk gun, mixes easily, spreads like peanut butter and the tube can be resealed.
I faired all of the patched areas and as many of the pinholes as I could find.
Second coat of primer. Used an Ace trim brush and 3/16 inch nap roller, worked very smooth. Also won a Pettit sweatshirt in a facebook contest.
Need to hit a few more areas with EZ Fair, sand and then we'll be ready for paint on the hull!
12 Jan 2014: Float test for Merci, she did great, no leaks!
She liked being ON the water vs being filled with it.
That takes care of the hull and foam block repair.
For the rest of the story check out Sunfish Pickin Pensacola Merci
Merci back on the water:
Bonjour!


