 |
| From Small Boat Restoration |
We modified Wave around 2014 with a new style rudder. Don't be confused by the deck paint and stripe, those are of Capn Jack's creation. And her current sail is a 1984 Riviera style. Oh, and her rudder is converted as well to the "new style," going on 50 years.
 |
| From Small Boat Restoration |


04 Jun 18:
We painted WAVE about 4 years ago with Interlux Brightside Medium Blue, a polyurethane topside paint. We keep the boat covered when not in use and it is holding up great. We app;ied it with a foam roller and tipped it with a trim brush. The paint was thinned about 5% with a temp of around 75F.
04 Jun 18:


29 Jun 19:
Took our 1965 Alcort Sunfish WAVE and 1982 AMF Alcort Sunfish PHOENIX out for a day sail Skipper raided the North coast of the bay and I searched for prizes on the South shore. 10-12 mph wind, light chop on the bay, 85F heat index, scattered clouds. Water temp 85. Wind usually dies around 1000 so we headed back. On the way back, PHOENIX and I caught a fish! Not on purpose! I was sailing close to a dock and didn't notice that someone had left some lines out. As I went by the two fishing lines slid across the the gaff, caught at the top of the mast and turned me into the dock. Thunk. I was able to sail backwards a bit, pulled up the daggerboard and used it as a paddle to get clear of the dock. As PHOENIX and I completed our donut, the fishing line slid down leech of the sail and caught on the boom end cap. As we sailed off the line ran over the end of the boom and up comes a fish on the hook, over the end of the boom and then it plopped back into the water. A yelled "Fish On!" to the neighbors and PHOENIX and I sailed home to tell the Skipper our fish tale. It was about an 8 inch bass, under a pound.


Marine Traffic Control Board updated.

Fish stories!

29 Jun 19:
Our 1963 Alcort Sunfish CHIP is ready for Sea Trials, so she needed to get off the finishing dolly and onto a Dynamic Dolly. I asked Skipper how to organize Sunfish TETRIS and she said she wanted her 1965 Alcort Sunfish WAVE to take a turn on he finishing dolly, get her purtied up like the other boats, fix the amateur patches I put on 20+ years ago. So first we dollied WAVE up to the Carriage House and dropped her in the grass. Next we used Skipper's field expedient Sunfish hoist to get CHIP off of the finishing dolly.

Lowered CHIP onto the Dynamic Dolly and rolled her out next to WAVE.

WAVE loaned CHIP her spars on deck Sunbrella cover, a fine cover that we got fro SLO Sail and Canvas. It has nice straps!

Rolled the finishing dolly out into the yard and walked each end of WAVE up onto the dolly. Rolled dolly into the Carriage House. WAVE telling fish stories to ZIP and WINNIE.

While we were in the Carriage House we shaved some yaks. "Yak shaving" is what we call it when we find other jobs to do while avoiding the primary job, which in this case was getting CHIP out back to the Sunfish Shack and finishing cleaning some air vents inside the house. Today's yaks to shave were cutting some 1/8th inch nylon line to make daggerboard retaining lines for WAVE and PHOENIX and whipping the ends of a couple of vintage Sunfish/Sailfish sheets.
We cut the nylon line to length and seared the ends. Line is long enough so that daggerboard can easily be removed, but not much longer than that. The retaining line is there to keep the daggerboard from floating away after a capsize.

Tied the line with a bowline. Make the little loop, the run the rabbit (end of the line) up through the hole...

...around the tree (long end of the line) and back down into the hole.

Snug down the bowline. Cut another line for PHOENIX. Yak 1 shaved.

Old School. Simple.


Yak Shaving Take 2. Wrapped the end of the sheet with a piece of gaff tape and seared the end. Then whipped the end with waxed line. Yak 2 shaved.
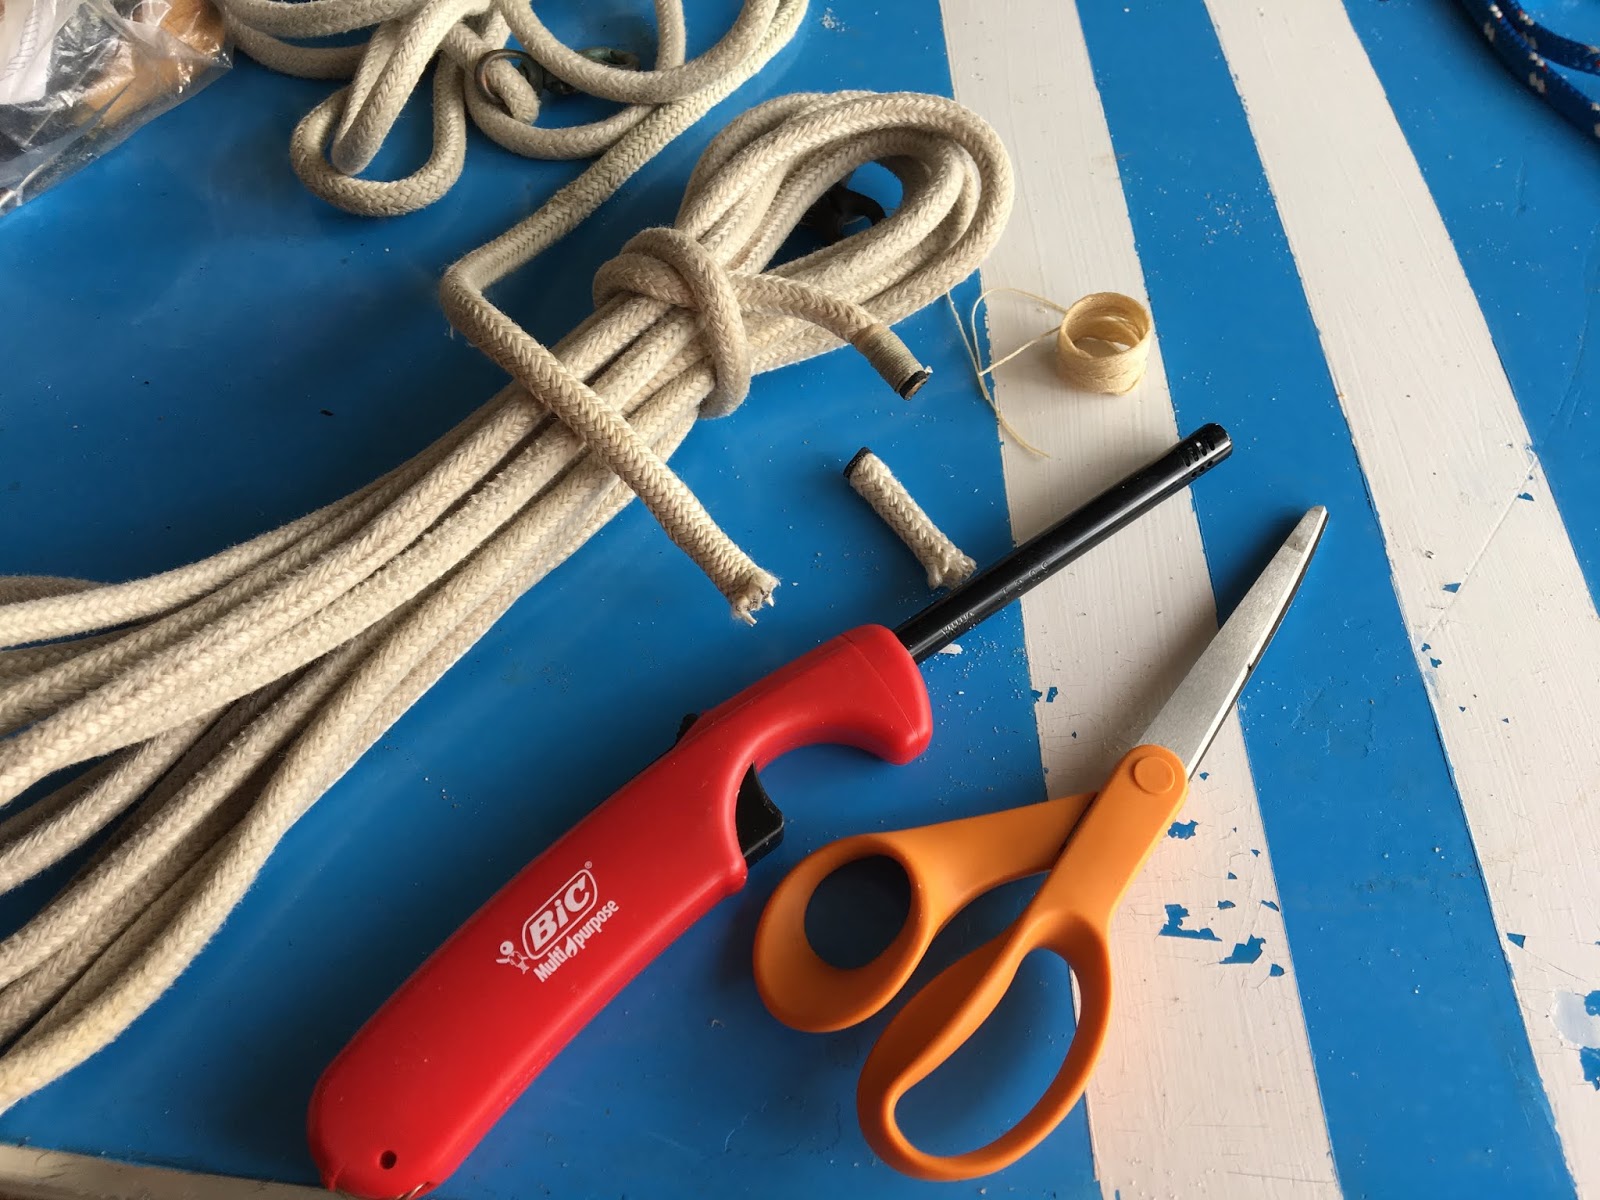
How to whip a line.

Back to our original unscheduled program, CHIP taking up WAVE's slip in the Sunfish Shack, ready for Sea Trials!
12 Jul 19:
Jamestown Distributors sent us some TotalBoat products for WAVE's repair, she needs a few things done. We are Ambassadors for the brand and get the supplies free, but before we came AMbassadors we happily paid for them. We have been happy with the products and especially Jamestown Distributors excellent Tech Team and website. We only put products on our boats that are going to last, and so far that has been experience. JD also sells other brands that we have enjoyed using in the past, Interlux and Pettit and also some RustOleum Topside.
Ding dong!

WAVE needs some fiberglass repairs, we will use THIXO (Thickened Epoxy) to bed the fiberglass cloth into a backer patch and build up repair areas.

The regular epoxy will be used to wet out the fiberglass cloth.

We have several old fiberglass repairs on the hull to clean up, once the fiberglass is repaired we will fair, prime and paint WetEdge BlueGlo White.

The other repair is internal, one of the foam blocks has come loose, we will reset it and fix it in place with flotation foam, it is a tenacious adhesive.


21 Jul 19:
Skipper learned to sail on Sunfish in college, who knew you could get college credit for that? PE, 4 electives! Then she helped teach the class. The College and University used the Sunfish, and that immediately became her favorite boats. After that she let her parents know to keep an eye out for one, and in 1994 they got a Sunfish from her Aunt. The family decided to name her WAVE, after a US Navy ship that her ancestor had sailed back in the days when ships were wood and men were steel. WAVE had travelled around a bit, had made it out to Hawaii and back. We hauled WAVE around from Corpus Christi, TX to Ft Worth and then out to Pensacola, Florida.
Over the last 54 years WAVE took some damage from a cannonball on her chine, and she fell over in storage and hit the edge of some landscape stones. I fixed the damage with a thick fiberglass bandaid and slapped on some paint. Her bow handle came off at one point and Capn Jack fashioned a beautiful and strong stainless backer plate. The parents found a beautiful Rivera sail. A previous owner sheared off the bottom of the metal DePersia bailer and thought best to fiberglass over it. She got painted and striped. We (I) put in a transom drain when she started leaking. And a few years ago we converted the rudder and she got a second rig, a Jolly Roger. Recently I noticed her starboard side foam bow block had come loose, probably from when the whale broached on top of her. So now she has a hodgepodge of paint, patches and holes and she rattles when flipped over. Despite all this, she is still dutifully hauling Skipper over crest and through trough. She is the Flagship, the Favored.


With CHIP finished there was a space open in the Carriage House, so we put her on the Finishing Dolly and got to work. First order of business was to do an air leak test, we will use the drain plug housing as the airport. Cordless shop vac will provide the air and a little Dawn dishwashing liquid with water in a spray bottle the bubbles. WE bought this screwdriver a few years back specifically for deck drain plugs, nice fat head to fill that screw slot.

WAVE is special. She has a deck drain plug on both sides. And a drain hole for the cockpit on the deck, placed so if you set the boat on its port side against a wall, the cockpit deck drain hole is at the low point on the port bulkhead. Maybe they new she was going to Hawaii and she was going to be hanging ten.
A few bubbles around the bow handle.

Now Skipper and I must have not slept well, because we tried the leak test with the shop vac hose on the cockpit drain hole first. I pointed in the general direction and she thought "I don't think that's right, but OK." I sprayed some soap on a known leak area and no bubbles. Hmmm. The I saw the hose and laughed. We then moved the hose to the hull drain and tried again. Still no bubbles. Hmmm. Then it dawned on me that I had not changed the hose around to the vac exhaust. More laughter and a comment that we should avoid power saws for the rest of the day. Tried again and voila! Bubbles from bow to stern.
Time to reseal.

I was a fan of transom drains until I spent some time inside transoms and saw all of the foam back there, especially on the 70s boats with tons of expanding foam, or in some cases 38 pounds worth. Once we learned to fix the leaks vs drain the boat I wished I hadn't done the drain. It is a big hole right at the waterline, and on some boats it is hard for the water to make it back there. We are going to remove the drain and fiberglass the hole back to factory spec.

Now this was a surprise.

The Sunfish have a hull vent hole, to keep the hull from bulging from hot air inside and popping a seam or loosening a block. Most of the time the vent hole is on the forward cockpit bulkhead. On some boats, like WAVE, the vent hole is right through the middle of the Serial Number plate on the deck. Turns out WAVE's was plugged, so we reamed it out with a 9/64th inch drill bit.

Took us years to notice that there is a Super Sailfish on the data tag along with the Sunfish. Too bad it doesn't come with the bigger daggerboard, it needs it.

Skipper got tired of lifting boats and flipping them, so she designed a boat hoist using Sunfish rigging.


While WAVE was airborne I fixed the bunk bungees, they are set to lightly pull the bunks flat when the boat is on them inverted. When the boat goes onto the dolly right side up, the bunks articulate to fit the V shape of the hull.

Smooth landing.


Time to remove these ugly patches.


1200 degrees ought to do it.


40 grit on a random orbital sander, getting rid of flaky paint, old adhesive, fiberglass patch bits and top layer of crushed fiberglass. We'll use a file to get the hull trimmed back to good glass.

So the bottom of the bailer was sheared off, so someone covered it with a big blob of Never Be Gone glue.

The inside of the bailer looked like this. I tried twisting, hammer taps and heat. Nothing worked.

Since I will be repairing fiberglass anyway, I drilled out bits of the bailer and bits of the boat. Finally if came out.


Removed the trim so we can sand the sides easier. Used a 9/64th inch drill bit to remove the rivet head and body.

We use a small block to tap the trim off. Be careful to not bend or break the trim around the rivet holes.

Sunfish Archaeology.
Sanded away old epoxy, patch residue, some paint, some more paint, some primer and some gelcoat. It's good to stop there, we're down to the crushed fiberglass on the first patch, where you see the woven roving threads threads and the glass turns from opaque to milky. Time to find the diamond file.

WAVE telling tall tales...

40 grit to sand of fiberglass patch remnants and uneven primer/paint. Halfway done on this bit.


Keel cleaned up.


The Dust Deputy has been working great. There's about 2 inches of paint, primer, epoxy and gelcoat in there so far.

19 Jul 19:
Used the Skipper's hoist to flip WAVE.
Then grabbed our Kobalt heat gun to remove old fiberglass patches.
22 Jul 19:
Worked on WAVE, removed the gudgeon and transom drain plug

Sanded a bit.


Sunfish bits


23 Jul 19:
More sanding to remove old paint on WAVE and we uncovered the shadow of her old Hawaii registration numbers, HA 1988 B. She must have had them for a while, the surrounding gelcoat is pretty sunburnt.

And her vintage alcort sticker shadow.


We also uncovered the Blood Stripe that Capn Jack had painted on her back in 1994. We painted over it around 2000, and are going to put it back with her new paint scheme.

The stripe started 36 inches back from the bow and ended 18 inches shy of the transom.


23 Nov 19:
WAVE has a few areas of fiberglass damage, some will require that blind hole patches be installed inside the hull, where the area is not accessible from the other side. To do this we followed the LASER PERFORMANCE Repair Manual and made blind patches, they are inserted through the hole in the hull, pulled snug against the inside of the hull with strings and tied off until the epoxy dries.


There are a couple of spots where there are gelcoat cracks, we'll skim over those with a sealer coat of thickened epoxy.


I made a mistake installing a transom drain plug, the plan is to repair the transom and get rid of the big hole at the waterline.

Aft keel.

Bailer hole.

A walkaround.
Good shop tables are hard to find!
We filed out the broken fiberglass bits, then sanded the edges with 60 grit on a DeWalt random orbital sander, hooked to a Dust Deputy cyclone and ShopVac. We taper the edges down so that fiberglass cloth can be overlapped. Protective gear includes a hat, goggles, respirator, gloves and a long shirt.


The starboard forward block is loose, we'll push it back in to place after the bottom is fixed.

The center forward foam block is in good shape.


We get a lot of our supplies from Jamestown Distributors, and they picked us to be on their Ambassador Team. We use their TotalBoat products alot and like them, they ship free and the cost is low. They provide some of the products free for us to use, we like that, especially the THIXO, very happy with its performance.

We also like to take the shipping boxes and repurpose them, today this box will be cut up to make up a blind patch.

The blind patch consists of a cardboard backer, that helps keep the woven roving fiberglass cloth stiff. The entire patch gets saturated with thickened epoxy, strings pull the patch flush against the inside of the hull.


We put copious amounts of TotalBoat THIXO on the cardboard, then lay the woven roving fiberglass cloth over the top of that and press the cloth down into the THIXO.

More THIXO is dispensed onto the blind patch.

The patches are inserted into the hull and pulled tight against the inside, tied off with the strings to keep the backer in place while the epoxy dries.


Added THIXO to the edges of the bailer hole.

We might try something different, use a thick layer of THIXO to replace the fiberglass cloth. I'll have a better idea when I sand the repair.
25 Nov 19:
Trimmed the strings and removed the paint sticks, sometimes bits get left behind in the epoxy. Those will get sanded off.

WAVE was moved outside on the finishing dolly for sanding with 60 grit on our random orbital sander, we used the French doors today.

Sanded the repair areas to get them flush. While I was sanding I found an area that I missed, so I made another blind hole patch for that.


WAVE is all different colors, which makes it harder to see areas that need to be faired, so we put on a "Show Coat" of primer, to show us where the hills and valleys are. We used TotalBoat Topside Primer applied with a Mighty Mini roller cover, all available from Jamestown Distributors.

She's mostly one color now!


26 Nov 19:
Trimmed off the strings and paint stick prior to sanding.

Mixed equal amounts of TotalFair epoxy based fairing compound, applied with a spreader to fill low spots on the hull.


27 Nov 19:
Sanded the fairing compound with 60 grit on a random orbital sander.


Applied second coat of TotalBoat Topside Primer with a Mighty Mini roller cover.


The chine repair has a small depression, I'll build that up with a little more TotalFair.


Missed on spot on the transom too.

The mid hull repair is looking great.


05 Dec 19:
Sanded the primer lightly with 120 grit. Applied first coat of TotalBoat WetEdge BlueGlo White with Mighty Mini Roller covers from Jamestown Distributors.
Skipper wanted to paint the chine repair, she waited patiently until I got there.


05 Jan 20:
Float Test for Skipper's 1965 Alcort Sunfish WAVE before we put the finish coats on the hull. She passed with flying colors!
Had to get her off the finishing dolly, flip her and get her onto the beach dolly.


11 Jan 20:
Scuffed the first coat of paint with 120 grit, to knock down any bumps. This also flattens the sheen, making it easier to see where the new shiny paint is being applied and prevent "holidays" (missed spots). You can see the difference between the glossy area that has the reflection of the pergola and the flattened area this side of the sander.

120 grit, sold at Lowes. DeWALT 5 inch random orbital sander.

Personal Protective Equipment for today's sanding party. The respirators with exhaust valve help reduce fogging of eyewear. The shirt keeps paint splatters of our Sunday Finest.

Current occupants of the Carriage House, WAVE and the keel batten for the Pascagoula Catboat.

Left side painted, compared to the scuffed right side. The flat sheen helps see where paint has been applied so we don't miss spots, aka holidays.

Today's kit. Paint supplied by Jamestown Distributors, thanks #totalboat !

Second coat of TotalBoat WetEdge BlueGlo White, single part polyurethane.

Second coat of TotalBoat WetEdge BlueGlo White, single part polyurethane.Still drying and self leveling, it fills in a little more with each coat. We will LIGHTLY sand one more time to remove small dust and debris bumps, then apply the third and final coat.


04 Mar 20:
Scuffed the second coat of paint with 120 grit sandpaper. Wiped off the dust with a towel. The scuffs help see where we need to put the next coat down.

Slapped some paint on Skipper's 1965 Alcort Sunfish WAVE, rolled and tipped the third (and final) coat of TotalBoat WetEdge BlueGlo White.


17 Mar 20:
We let WAVE sit a few days so the paint could harden. Depending on temperature and humidity, hot and hig, it can take a few extra days. She looks pretty good.


18 Mar 20:
Bottom paint is dry so we rigged Sipper's hoist and flipped WAVE.


Sunfish bits.


Hull tour.
A bedtime story.

27 Mar 20:
WAVE had a loose XPS foam block, so we decided to hold it in place by adding more expanding foam.
The block is on the starboard side, bow end.

We chose TotalBoat marine grade, 2 part foam that adds 2 lbs of buoyancy per cubic foot. The rubber mallet was used to tap the block into place. The foam is very sticky so wear a long sleeve shirt.

We put WAVE on the hoist and turned her on her side, so we could pour the foam downhill. Poured the hull side first, then the deck side next.


Foam is drying, time for some small jobs. Reinstalled the drain plug.

Took the tape off of the bailer hole. WAVE did have a half broken bailer in there, we removed that. We epoxied it closed, an if we ever need to install a bailer we can drill a new hole.

Here's how a blind patch for a fiberglass repair looks from the inside. We can also see the remnants of the wood block for the keel hardware and hang fiberglass hanger that holds it in place.

1965 WAVE had the old style rudder, and we converted it a few years back. That style hull with the notch requires a special gudgeon backer plate.


We'll be looking for trim rivets next, reinstall the trim and install the gudgeon.

29 Mar 20:
We hope everyone has battened down the hatches and is ready to ride out the storm. Boaters are a resourceful bunch. Set the watch and take care. We have doubled up all lines and will entertain the usual visitors with mess abouts as they present themselves.
Big news, the grapes are coming in.

Mast step had some resin chips, so we repaired the chips with THIXO thickened epoxy.


Now on to rivets. The deck edge and trim should have nice clean holes like this.


Unfortunately sometimes the trim has been drilled all the way through, steel rivets have been used or rivet remnants remain. This has to be cleaned up and rivets replaced with aluminum rivets.


Here's our riveting video about rivets.
The fiberglass Sunfish built 1960 to the mid 70s also have rivet nuts for the coaming.
Rivet nut video.

She's off the Finishing Dolly and ready for rigging!


30 Mar 20:
We rigged WAVE to make sure we had all the parts. We did. Skipper likes the old school daggerboard retainer.


Musings about the swivel cam cleat.

SCOUT approves.


WAVE is back in the Sunfish Shack, next to PHOENIX.

Soon girl.

11 Apr 20:
When we restored WAVE we sanded off all of the old paint and found gelcoat shadows where her Hawaii registration had been. We thought it would be a tribute to put the numbers back on, but in stealth mode.

HA 1988 B.

We also swapped her cover to a spars on deck cover from SLO Sail and Canvas. It covers more of her side and will protect her red racing stripe from the sun.

24 Nov 20:
We had reattached the starboard bow block in the Spring...sigh....now the port bow warrants attention. Mast tube is in good shape though.


02 Dec 20:
Used a jigsaw to trim off broken fiberglass from WAVE and PHOENIX. Took trim off of parts boat SALLY and split hull/deck seam, cut forward deck section off for use on WAVE.


03 Dec 20:
WAVE did sail this Spring, we didn't post photos because the pandemic was new. But here she is early 2020 after her 2019-2020 restoration. She'll be back again soon.


04 Dec 20:
Let the jigsawing begin. 2 decks to make one.


The new deck piece will rest on the hull flange and backer plate.

Aft section of backer plate fastened with TotalBoat 5:1 High Performance Epoxy, thickened with silica filler to peanut butter consistency.


05 Dec 20:
Worked on Skipper's 1965 Alcort Sunfish WAVE today, first we cleaned up THIXO squeezeout along the backer plate seam edge with a DeWALT 20V oscillating multitool, with the Porter Cable cordless shop/vac nearby to collect dust. Next we applied TotalBoat THIXO to the backer plate and then the new deck piece seam, oops not the deck edge seam. Wiped that off and applied THIXO to the inner deck seam of the new piece. Layed down strips of 2 mil poly sheet to keep fairing boards from sticking to the THIXO, then placed 10 pound sandbags on the boards to palace light pressure on the seam while the thickened epoxy dries. Put on the first coat of TotalBoat TotalFair, an epoxy based fairing compound that fills nooks and crannies and sands easily. OBTW Skipper made my mask, it is great to keep out dust while sanding and sawing, triple layered cloth with a nice leather tie. Does a better job than the N95 masks for this application.


09 Dec 20:
Sandbags off, deck shape looks great.


19 Dec 20:
Removed the clamps and shaped the seam edge with 40 grit on a Black and Decker belt sander.


20 Dec 20:
We love mixing TotalFair, reminds me of kindergarten fun


Great gear tip that we read about in Small Boats Magazine.


26 Dec 20:
Time to reattach the forward port side internal structural foam block, which also serves as flotation. We turned WAVE on her side today so we could pour the adhesive foam in and let gravity do the work of moving it between the structural block and the fiberglass hull.

Found some artifacts rattling around inside the hull, on of them Capn Jack's bow handle backer plate. Video: Flotation Block and Hull Repair https://youtu.be/dNZZ6dT6jpc
The Sunfish made from 1960-2020 have 6 internal extruded polystyrene (XPS) structural foam blocks inside, 3 forward of the cockpit and 3 aft. These blocks are made from closed cell foam to resist water intrusion, and are held in place by 2 part marine grade flotation foam. The 2 part foam was at first poured, in the 1960s and early 70s, then a foam gun was brought in and as our friend, who worked at Alcort, Howie relates, "foam went everywhere."


27 Dec 20:
Sanded deck this morning, applied final coat of TotalFair, let it dry 8 hours in 70F.


02 Jan 21:
I roll and tip everything, but end up putting too much paint down. Skipper did the painting today, thinned the TotalBoat WetEdge how she likes it, skipped the roller and the coating looks great. Thinned with TB Brushing Thinner, 2 caps into 1/3 quart. She started off with about 1/3 quart of the paint in a paint cup and added 2 capfuls of TotalBoat Brushing Thinner, thinned to where the paint ran steady off of a paint stick before it changed over to drops.


Skipper applying the second coat of TotalBoat WetEdge Blue Glo White to her 1965 Alcort Sunfish WAVE. After painting 3-4 feet she wanted the paint a bit thinner, so she added another half cap of thinner to the cup, which had about 1/4 quart of paint in it at that point. Once she had the first few feet of paint laid down she switched direction of the brush strokes, started the stroke on the dry hull and drew the paint back over the wet edge to avoid brush tip marks in the section that was drying, lifting the brush at the end of the stroke to get a feather edge.


09 Jan 21:
WAVE received a wonderful gift from SLO Sail and Canvas, a new Sunmaster Polyester Spars On Deck cover made in Charcoal Gray. We told them how WAVE's cover was damaged during the hurricane, but played a hand in protecting her, and they sent her a gift replacement.


09 Jan 21:
Rolled first coat of TotalBoat Topside Primer with a Mighty Mini Roller.


12 Jan 21:
Scuffed the first coat of Interlux Brightside Medium Blue on WAVE with 120 grit on a DeWALT 20V random orbital sander to give it some "tooth," as Capn Jack would say. The sanding creates a profile that the second coat of paint can mechanically latch onto.


14 Jan 21:
Repainted bow stripes with TotalBoat WetEdge BlueGlo White, 2 inches wide, 2 inch spacing. Used 3M Fine Line tape, it worked great.


Sergeant WAVE reporting for Sea Trials!
WAVE is ready for Sea Trials and she will need her slip in the Sunfish Shack back soon, so that generated a round of TETRIS. CHIP was in her spot, so CHIP got pulled out to move to MADISON's spot, But there was a wagon, RED 1, in front of MADISON, so RED1 1, and RED 2, got moved back to the porch as did the power washers and the carpenter's bench, which all had been removed when we painted the porch. MADISON was pulled up front to the Wheel Deck for repair to her damaged chine.

15 Jan 21:
One of the members of The Sunfish Forum mentioned that WAVE should get a medal from King Neptune is she doesn't sink during Sea Trials, good idea, so we set to designing one. We like this one.


19 Jan 21:
Skipper launched in WAVE for a Functional Float Check (FCF), thumbs up from Skipper, WAVE passed the FCF so we continued on for Sea Trials. Temp 64F, winds SSW 5 gusting 9.


03 April 21:
Still moving bits around as the Armada shifts Homeport from the Gulf Squadron to the Atlantic Squadron. Carriage House was getting a little crowded with 2 Sunfish on dollies and a lawn tractor, and we wanted one of the Sunfish easily accessible for nice sailing days ahead before the final move.


22 Oct 22:
Weather forecast is good for tomorrow, so we loaded Skipper's 1965 ALCORT Sunfish WAVE onto the utility trailer. Gave us a chance to check out how the 6x12 trailer will work hauling a 14 foot boat, and everything fits great. Plenty of room and easy to load. The spars mostly fit within the trailer bed if laid diagonally.


Ready to toll tomorrow afternoon!
21 Oct 22:
The weather forecast held, so we took Skipper's 1965 ALCORT Sunfish WAVE out to the James River for the first time. Plenty of sunshine, or Sunfish-shine on the water. Winds 6-8 knots with a light swell.

One of Skipper's favorite things to do while I'm taking pictures is to sail straight at me and see if I move. WAVE's favorite too.

I took WAVE out for about 20 minutes, did a few tacks and rounded one of the channel markers, Green 5. Then, as tradition holds, we did a few jibes on the way back to the beach.


So to recap, WAVE has now sailed the Pacific during her time in Hawaii, tacked and gybed in the brackish waters of the Gulf of Mexico and now can add an Atlantic estuary to her resume. Probably appropriate that Skipper wore her GANNET hat for the sail today, a gift from our friend Webb Chiles, a serial circumnavigator and his Moore 24 GANNET.

15 Jun 23:
We plan to go sailing on Skipper's 1965 Alcort Sunfish WAVE in a few days, and to get to the water we'll be using the new MicroSport trailer. We like to have everything on the boat checked out before we get to the beach, so we do a little land sailing at the house to check that we have all of the boat bits...important things like PFDs. the halyard, sheet, rudder, daggerboard, coffee...
For the next sail Skipper chose to fly her alternate mainsail, I rigged the boat and Skipper worked the sheet from her deck chair.


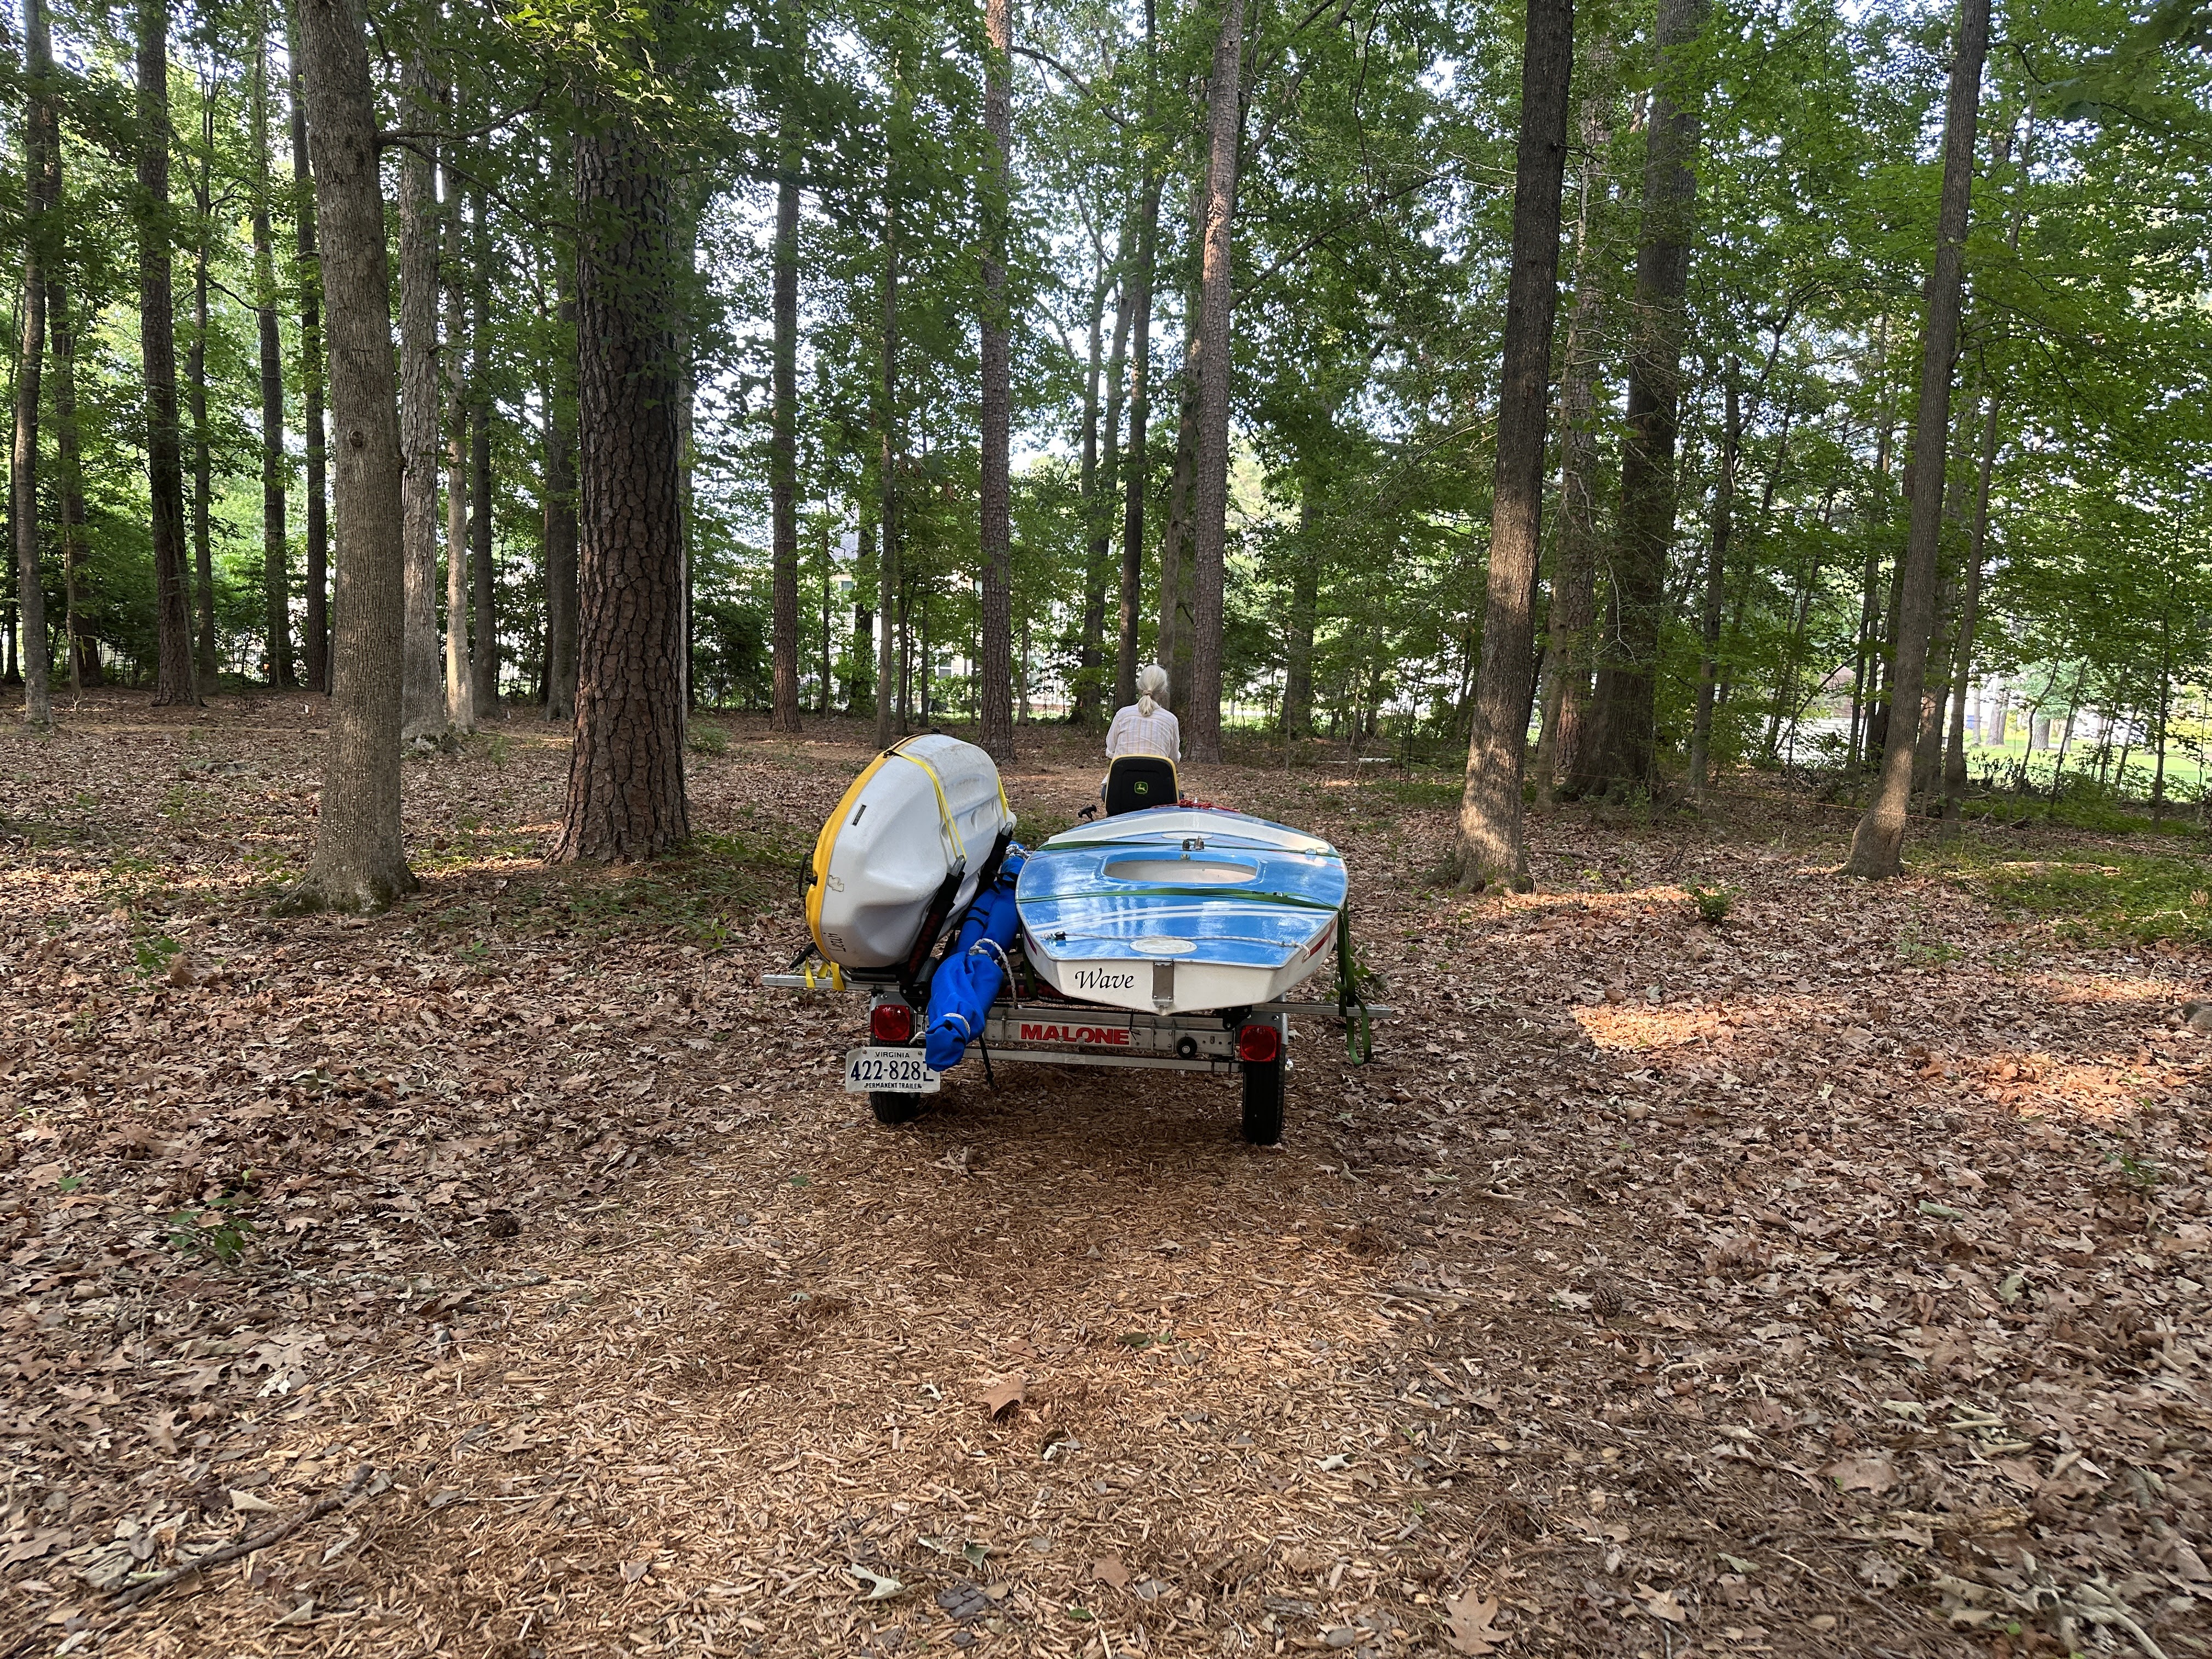
29 Jun 23:
It was time to road test the new Malone MicroSport so we headed out to our spot on the lower James River with our Sunfish WAVE and Icon kayak SACAGAWEA. The trailer rode smooth and quiets, the boats stayed strapped securely to the pads and racks and we were raiding the beach in no time flat. The beach is mostly coarse sand with a good amount of pebbles and also remnants of crumbled brickwork from an old waterfront oystering business. Hard to medium packed sand and a shola bottom make this beach a good spot to dolly launch


02 Sep 23:
We were saddened to hear that our poet-pirate jimmy Buffett had crossed the bar, but memories of his sailing spirit motivated us to head to the beach and launch a couple of our little boats. Hitting the waves today were Skipper's 1965 Alcort Sunfish WAVE, sporting her Jolly Roger colors and our Pelican Icon kayak as the photo ship/target.

Skipper has her groove back, trying to run me over like she used to do. I hid behind some poles to fend off her attack.
Video: https://youtu.be/OciQholaJr0?si=5Rd3WTxF3TWlQGS6
I turned a trick on WAVE after Skipper was done.
Video: https://youtu.be/cvhL8C57Vys?si=ubtXNacwZ5QAT0m9


No comments:
Post a Comment