Nutshell Pram EXCUSE ME

 20 Jan 22:

In our search to find small boat plans that would be easy to build and fit in the back of a pickup, we came across Joel White's Nutshell Pram, the 7' 7" model. It would be a good boat for many purposes, as a tender, sail trainer, fun rowboat for kids. The plans and builder's guide was ordered late in 2020 from the WoodenBoat Store, then the project was postponed by our punt build and a homeport change. 

We're reviewing the plans, considering a build. 


FMI: WoodenBoat Store for plans, patterns and How To Build book by Maynard Bray

 27 Jan 22:

Here's a little information of the plywood we chose for the Nutshell Pram build, marine grade okoume.

Video Link: https://youtu.be/Wmnbhd8dnlU


We purchased okoume plywood for the project from World Panel in Windsor, NC, along with a few pieces of solid fir and mahogany. We picked up the materials ourselves but World Panel ships in the US as well, and they have another store in Riviera Beach FL. 

27 Jan 22:

(Builder Note:) It will save time to make the laminated frame and forekeel first, that way they can be drying while the molds are cut out and the ladder frame assembled.) We cut out the building molds for the Nutshell Pram today, they are temporary pieces that help define the shape of the boat while it is in the first stage of construction. The plans call for 1/2 or 3/4 inch plywood, or they can be put together from pieces of solid wood. 


The full size patterns for the molds comes with the set of plans.


We pricked the corners and centerline marks for the molds into the plywood with an awl.


Then we connected the dots with a straight edge and Sharpie. 


I marked the wrong line here, but caught my mistake before I did any cutting.


Cut the lines with our DeWALT 6 1/2 inch left handed 20V circular saw. 


Here are the two finished molds. 


 27 Jan 22:

There are 8 sheets of plans and patterns for EXCUSE ME from WoodenBoat.


 28 Jan 22:

The plans call for a forekeel and a midships frame to be shaped out of thin strips of wood, laminated together with adhesive. In order to do that we first needed to make a bending jig to hold the wood and adhesive to shape while the adhesive dries. We traced the pattern onto some scrap 1/2 inch thick plywood with a pen and carbon paper.


It is necessary to trace the full inside curve, but for the outside straight lines it is only necessary to mark the corners.


We measured the widest point of the finished piece to figure out how many laminations we would need. We came up with 2 inches, but SPOILER ALERT, we should have made the lamination about 2 1/4 inches as we ended up being about 1/16th inches shy on this corner, aka a knuckle. 


Here are the two bending jigs cut out


Some tools that we used, the drills were used as paperweights.


To make the strips we first cut a fir 2x4 to 1 inch wide. We also measured around the outside of the finished piece and added 4 inches to the length make sure we had plenty of material. 


Next we turned the one inch wide fir on its side and ran it through our DeWALT table saw, cutting 1/8th inch wide strips until we got about 2 inches worth of strips cut.


What we forgot to factor in is that these strips would be squeezed together with clamps, so 2 1/4 inches worth of loose strips would have been better.


Here are the longer strips for the midships frame and shorter strips for the forekeel.


29 Jan 22:

We added clamping blocks to the bending jig. Spacing is arbitrary, with enough blocks around the curves to ensure the proper bend.


Before the laminations are clamped to the bending jig, we covered the jig with a plastic trash bag, to keep the adhesive from sticking to the jig. We chose TotalBoat THIXO as the adhesive, applied to both faces of the strips and smoothed with a paint stick to ensure full coverage. The pre-thickened resin mixes with hardener from separate cartridges through a mixing tube. Today we tried out the THIXO Pro tubes, which have more volume than THIXO from a single 2 part tube, but also requires a special dispensing gun. THIXO also comes in a single tube that can be dispensed with a regular caulk gun or High Thrust 25:1 caulk gun. The High Thrust gun makes it easier to squeeze the caulk gun handle. 


30 Jan 22:

We worked on the forekeel today for EXCUSE ME, but first a couple of close up photos of the midships frame clamped and drying.


Here's a photo of the fir strips that will be used.
 

The blocks that are used to form the inner curve of the keel.


Here's a video on the materials and techniques we used to laminate the frame and forekeel.


We used a paint stick to spread out the thickened epoxy onto both faces of the fir strips. This ensures full coverage when the strips are clamped together.


All 15 strips epoxied together, ready to go onto the clamping jig.


The first two clamps are the hardest, an extra pair of hands is useful to control this octopus. 


Every clamp or two it is important to makes sure that the strips are laying flat vertically. We take a scrap piece of 2x4 and press down from the top, tighten the clamps and move on to the next few clamps. 

Here's a few tips on lamination: 

Video link: https://youtu.be/7OZ_1mz2qFA

The jig was then taken inside the house to dry in a climate controlled, 72F space. 

30 Jan 22:

The pram has a bow and stern transom, we traced the patterns onto a 3/4 inch thick sheet of marine grade okoume plywood. The plans call for 1/2 a sheet of 4x8 plywood, hard to find, and we can tell you that there is a LOT of plywood left over. Maybe it will be made into a daggerboard or rudder.


We traced out all of the full curves and made makes at the straight corners. Be sure to trace the alignment line for the cleat and the centerlines and the bevel marks.


Centerline on the top of the transom shows where to align the piece on the building ladder frame.


Bottom centerline. Also there is extra wood left for the bevel that is to come.


We used the DeWALT 20V 6 1/2 inch blade circular saw to cut most of the arc on the tops of the transoms and the straight lines...


...and then the DeWALT 20V jigsaw to cut the tighter corners. This is the stern transom.


Here are the tracing marks for the bow transom, including bevel allowance per the pattern. The marks for the straight lines were then drawn with a Sharpie and builder's square.


Bow transom marked and ready for sawing.


Jigsaw for the tight corners.


Two transoms and two molds ready. 


Current state of the Mid Atlantic Carriage House.


04 Feb 22:

Time to plane down the excess epoxy and wood strips for the forekeel and frame. We ran them through our DeWALT planer, decreasing the cut 1/32nd of an inch each pass, and flipping the workpiece before each pass. Since the curved frame was not too wide, we were able to guide it through with no issues.


Once we got the excess epoxy cleaned off and the sides of the frame and forekeel flush, we traced the pattern shape onto each piece.


Then connected the dots.


Here's a spot where I should have had a few more layers of fir. We should be able to work around this small gap with a wood shim and thickened epoxy.


I like using Sharpie markers because the line is easy to see and it is about the width of the saw blade. Plus I can't cut more precise than that. If we ever go into business, the two leading name choices for our business are "Galloping Horse Marine Construction" or "Sharpie Marine."


We trimmed the laminate blanks to the pattern lines with a circular saw and jigsaw.


Started gathering lumber for the ladder frame, aka building jig aka strongback.


 06 Feb 22:

Today we cut the ladder frame sides to length and screwed in the cross supports.


Used the 3 inch bevel from the WoodenBoat store to find the stern transom angle...

...and transferred the angle over to the ladder frame stern transom support. You may choose to level the ladder frame fore/aft and side to side at this point, but we are going to level right before we install support legs to the molds and frames, then check level again.


Attached the temporary wooden cleat to the inner transom face. You may want to bevel the transoms before they are installed, we are going to do it after they are attached to the ladder frame. We also cut the cross pieces, measured where they are located on the frame per plans and screwed them into place. Also attached a temporary spall to the miships frame.


Installed the bow transom and planed the first two plank bevels per the pattern lines.


Laid out the centerline between the two transoms and marked the centerline with sharp pencil at each point vs Sharpie. Using a sharp pencil is a trick that Louis Sauzedde taught us, more accurate than snapping a chalk line. FMI: Tips From a Shipwright)


Screwed the forward and aft mold and midhaps frame to the ladder frame cross pieces.


Stern transom is temporarily screwed to the ladder frame supports.


The wooden cleats that we attached to the transoms earlier are used to help align the transoms to the ladder frame crass pieces.


Aft mold attached to the front face of ladder frame cross piece. 


Midships frame spall attached to aft side of ladder frame cross piece.


Forward mold, aka Mold #1, attached to aft side of ladder frame cross piece. 


Bow transom.


The bow transom has a wooden positioning cleat as well, and angled ladder frame cross piece. Bow transom angle taken from the patterns and plans.


Next we'll level the ladder frame and add braces to the molds and frame per the plans. Then check level again before the bottom plank is installed. 


 07 Feb 22:

Time to make sure the ladder frame is level, so that the transom and mid frame will be level.


We used some wedges to level the ladder frame fore and aft, and side to side. The screwed the ladder frame to the strongback that it is resting on. 


We also added braces to the molds and made sure that they were plumb.


Predrilled and counterbored holes to attach the forekeel.


Forekeel will be attached with TotalBoat THIXO Flex thickened epoxy and #8 silicon bronze screws.


Another bead of THIXO was added to the aft face of the bow transom. 


Then we screwed the forekeel to the transom and wiped off any excess epoxy that squeezed out.


The aft end of the forekeel rests in a notch on Mold #1. Now would be a good time to put some clear tape over the mold notch, because when the bottom plank is epoxied and screwed onto the forekeel,  excess epoxy can squeeze out and adhere the forekeel to the mold...not desired...ask us how we know...


Measured and drew the lines for the bottom plank. Skipper may or may not have noticed that I borrowed her new kitchen crocks to aid in the process.


The bottom plank is dry fit, screws are piloted and counterbored, and then all the sawdust is swept away before the epoxy comes out.


Now is a good time to reach underneath the boat and clean off excess epoxy. Easier than sanding later.


The screws can be left in or removed after the epoxy dries. We plan to leave them in, so we counterbored the hole with a Fuller combination pilot bit and counterbore. We will fair the hole with epoxy based fairing compound, TotalFair. We also used silicon bronze, best for use below the waterline. 


08 Feb 22: 

The Builders DVD arrived. And it had a lot of great visual and verbal information that was not in the Builder's Guide. Plus it was fun to see how they did things 40 years ago.

08 Feb 22:

 We worked on the bottom plank bevels today, necessary so the lower edge of the garboard plank has more surface on the bottom plank to adhere to. First we made some battens and attached them to the jig on the face of the molds, frames and transoms where the inner face of the garboard plank will lay.


We used a straight edge, lined up with the inner edge of the batten, to determine how much of the bottom plank edge to bevel off. 


We'd normally say good enough for government work, but today we'll see good enough for epoxy work.


Bow bevels.


Richard noticed that the forekeel bevel doesn't line up with the centerline mark. We'll shave a little more off the port side of the bow transom. 


Side bevels on the bottom plank. 


End of day.


 09 Feb 22:

Traced out lines for the planks from the plans.


Then we cut out the garboard, middle and sheer planks with a DeWalt 6 1/2 inch 20V circular saw. The smaller diameter blade makes it easier to cut the curved line.


5 of the 6 planks came from one sheet of 1/4 inch thick okoume plywood.


Here's a few tips on cutting the planks and a discussion of what's next for the Pram. The first 4:48 is shaky due to the saw.

Video Link: https://youtu.be/WfDSzZE4Ndg


 11 Feb 22:

Placed the first garboard plank on the building jig to check the shape. Used one of our lap clamps to hold the plank in place at the mid frame while we checked the fit.


Then we dry fit the bow and the stern to make sure we had proper overlap of the bottom plank and that the upper edge of the plank (when the boat is upright) came all the way to the knuckle in the transom, where the next plank will overlap. Stern shown below. When the fit was right we drilled a pilot hole and counterbore for a #8 x1 inch silicon bronze screw, that will be our alignment hole when we permanantly install the plank with thickened epoxy.


Checked the bow fit. A good tip is to make some pencil marks for where the transom are and also mark which edge of the dry plank gets adhesive. Otherwise one may lose track of which edge to apply the adhesive to...ask me how I know...


Next we took the dry plank off and applied THIXO thickened epoxy adhesives to the bottom plank lap and the garboard plank faying surface (contact points). Right about now is a good time to lay some plastic film over the molds, so that the planks do not glue themselves to the molds.The plank is permanently screwed to the transoms and frame. We used deck screws and fender washers as temporary fasteners while the epoxy dries. Think of them as clamps. Once the epoxy is dry the screws are removed and the holes are filled with thickened epoxy.


Used this folding rule to mark 6 inch spacing for the temporary fasteners.


After the planks are clamped, rech inside and clean off any excess epoxy.


Our friend Richard has built 4 Nutshell Prams, and he offered a tip to use blocks of signmaker's PVC foam board as backer blocks for the screws. The PVC will not get glued to the boat like a wood block will. We found a product at our local sign shop called Palight and it worked great.


Trimmed the planke end with a crosscut saw.


The bow end takes some creative cutting. We used our DeWALT oscillating multitool to make a plunge cut directly down to the centerline of the forekeel. then cleaned up the cut with a chisel. For the opposite side garboard we dry fit the plank, marked the centerline with pencil, took the plank off and rough cut the line with a jigsaw. Then we dry fit the plank again and tuned  the cut with a hand plane.


You'll end up with a small gap along the forekeel that is filled with thickened epoxy. the plank edges will be filed flat later and a brass or bronze protective rub strip will run along the keel and cover the garboard plank seam.


TotalBoat THIXO thickened epoxy adhesive used for the seams. It has excellent gap filling qualities, which we need :) It comes it 2 part single tubes with 185ml of product, and on this build we have been trying out the 2 tube (resin and thickened hardener) THIXO Pro system and dedicated Pro gun. The Pro tubes hold 460 ml of product, 2 1/2 times more. If you plan to use more than 3 tubes of the smaller THIXO tubes, this would be the better route to go. The Pro gun is around $80, but it is High Thrust 26:1 ratio caulk gun that makes it easier to dispense the thick product, compared to the bottom of the line standard 7:1 ratio caulk gun. This makes the job easier, especially when the product is cool and harder to dispense. And while the THIXO costs a little more than hand mixing resin, hardener and filler, there is no guesswork involved with THIXO as to how much resin and hardener to mix, how much filler to add and time saved standing around stirring a pot of epoxy in a cloud of filler dust. The THIXO system is also applied in a very precise manner, which limits waste. FMI: https://www.totalboat.com/product/thixo-pro-21-epoxy-system-2/


End of day. All stop. SCUPPERS has the watch.


13 Feb 22:

Yak shaving is when we start off to do one thing and end up doing 2 or more other things, while avoiding the original task. Today we planned to attach the middle planks to the Nutshell Pram, but when I walked into the Carriage House it was almost 80F inside. Partly because it was 72F outside and also because the Carriage House has a charcoal colored metal roof. So the first order of the day was to open the Carriage House windows for the first time for some cross ventilation. 


 It was so nice outside that we decided to liberate the deck furniture cushions from the loft and put them to use, but first I needed to replace 3 slats on the love seat.


Since it was so nice outside, we rolled out SCUPPERS, then we rolled out EXCUSE ME, to hold a lapstrake convention in the driveway.


We also pulled out the DeWALT table saw on its portable stand, to cut out new slats from 1x4 pressure treated pine.


The deck furniture was left at the Florida place we bought in 2011, and it has weathered multiple Gulf Coast Hurricanes. During Hurricane Sally most of the pieces floated from the backyard up into the front yard, where we rescued it. When we moved we thought it best to rescue it all the way to dry ground in Virginia. Slats replaced, and a few more deck screws added to tighten everything up. Then it was time to a Gatorade and Fritos break while Skipper burned stuff in her burn keg.


I took the old broken slat and made a knick knack shelf.


During our back porch yak shaving, we discussed the need to get a rescued wisteria plant outside for some fun, and back into the ground next to where the pergola will be built. It will go next to a corner post, so I grabbed a tape measure to figure out where the post would be, but then needed to move the kayaks out of the way to make the measurement. We found the spot for the wisteria and dug a hole, planted the plant and looked at the muddy kayaks, which will need to be somewhere else while the pergola is built. That led to the next yak, making a storage rack for the kayaks. We found some malingering 2x4 lumber and cut out support arms for the kayak's rack.


The new fence osts were pressed into service to hold the support arms and kayaks CLARK and SACAGAWEA. We put them high enough off the ground to avoid rain splattered mud and discourage critters from building condos underneath. Eventually the utility trailer HUEY will be parked next to the kayaks, HUEY is the prime mover for the kayaks.


Yak shaving complete, we turned our steely gaze to the middle planks on the Nutshell Pram. Here are some helpful marks to make on the inside of the plank, denoting where to dispense the thickened epoxy on the transom. Another helpful mark would have been to mark which edge of the plank to to smear epoxy onto, I got it upside down and had to scrape off the epoxy from the wrong spot, and re-apply it to the correct edge.


EXCUSE ME heading back to her slip after her driveway cruise. 


SCUPPERS has the watch again.


14 Feb 22:

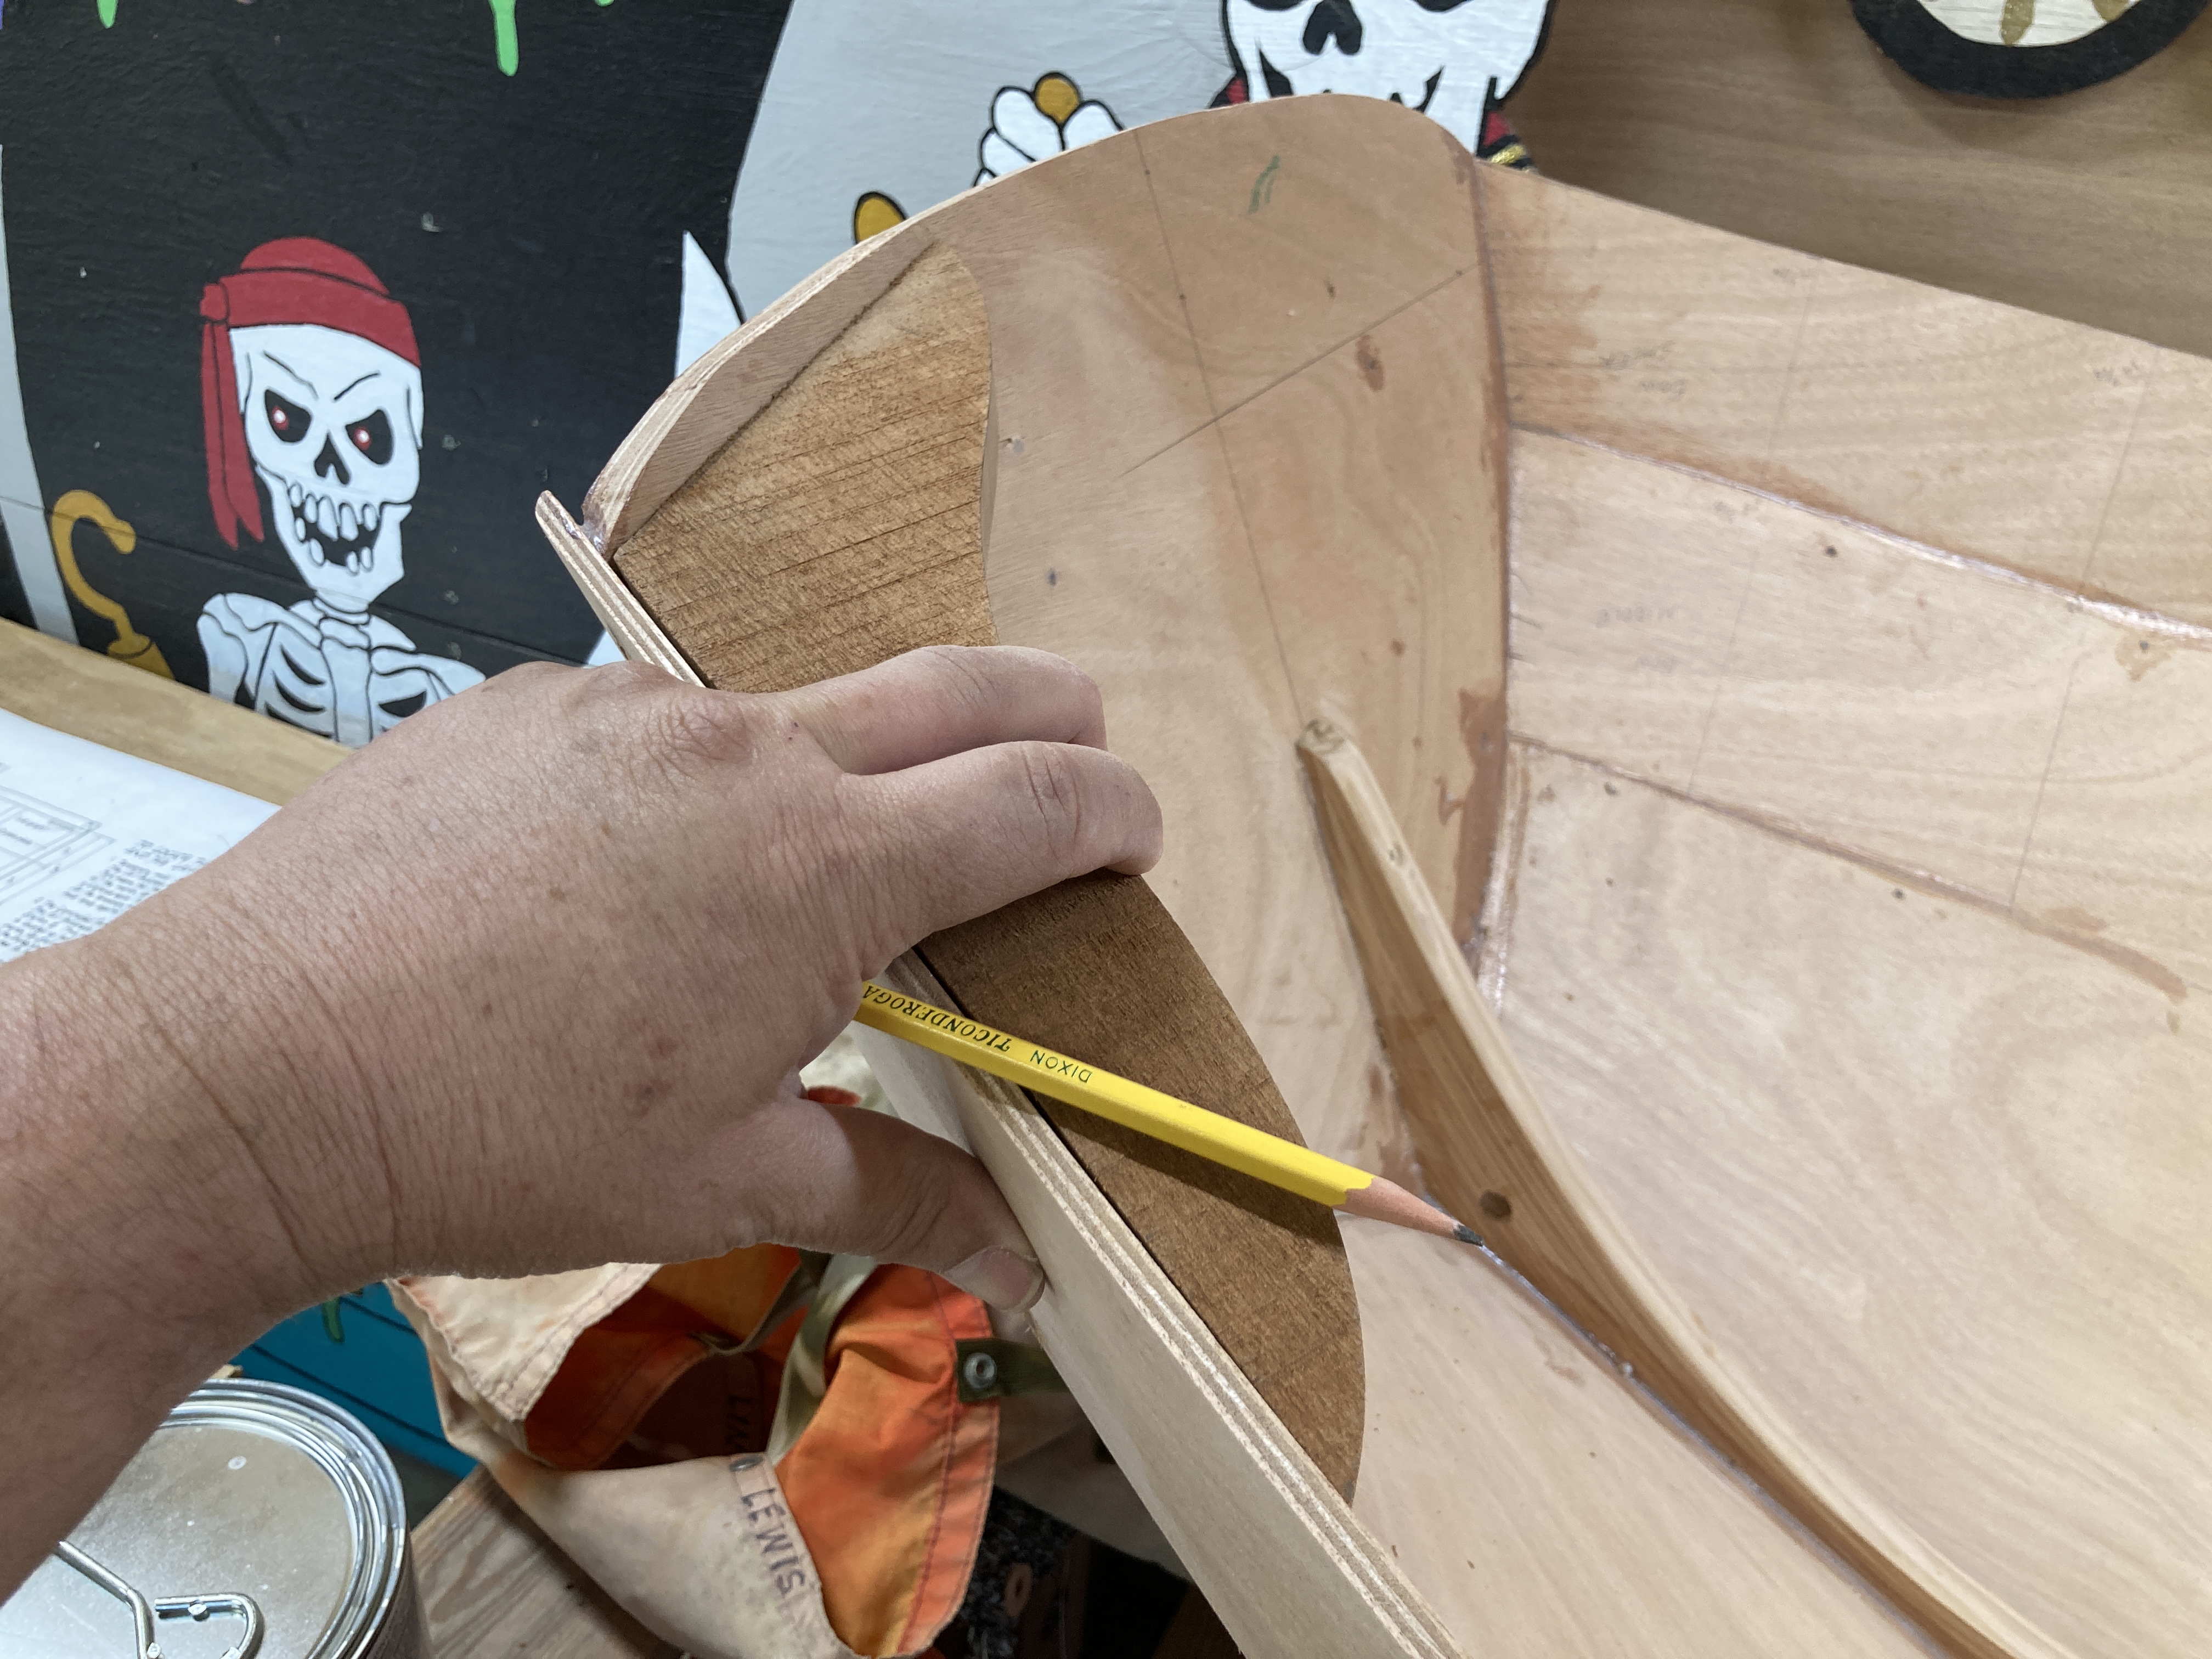
Let's see, what to do today? Planking? That's it. A few notes follow as we continue planking our Nutshell Pram EXCUSE ME. One note is that it's a goo idea to mark which edge of the plank gets epoxy. We had a work slowdown today when i gooped the wrong edge, it's easy to get confused as the plank gets taken off from dry fitting and hauled over to a work table. So a little pencil mark helps, as do a few scribbles as to where the transom surface will get epoxy. 


When we are finished dispensing epoxy from a tube, we just leave the mixing tip on vs putting the shipping  cap back on. The old epoxy hardens, and when we're ready to epoxy again we put on a new mixing tube.


When the old mixing tip comes off, we see fresh thickened resin and hardener waiting to spring into action.


New mising tube.


A video: https://youtu.be/ULc7sXbjqCk


We apply a small bead of THIXO to the seam the spread it out with a paint stir stick to ensure full coverage.

Another video: https://youtu.be/VmZuQ0590eY

We hope you remembered to cover the molds, so they don't stick to the hull :)


A tip from Charlie, this screw acts as a third hand to help hold the plank during dry fit and again during final attachment of the plank.


Planking tips video: https://youtu.be/VmZuQ0590eY


Hey Webb, the Whisky Plank glued and temporarily screwed!


The bottom of the sheer plank and middle plank overlap a bit, the designer says to add some thickened epoxy here to increase the seam strength. Smooth the bead with a nitrile gloved finger to attain ludicrous speed in the pram.


Pause for celebration with libations.

 15 Feb 22:

Cold outside today, in the 40s, so we set up a little space heater under the hull for a few hours to help dry the epoxy. The heat rising raised the hull temp enough to keep the cure going on the epoxy.


One step today was to start filling holes where temporary fasteners had been removed. To do this we filled a syringe with THIXO thickened epoxy and cut the tip to a size just a bit smaller than the old screw holes, then injected small amounts of epoxy.


We planed the lower edge of the garboard flush to the bottom panel with a hand plane, then finished off the seam with 120 grit discs on a DeWALT 20V random orbital sander. One seam had some voids where we didn't get the epoxy in the right spot, so we injected more epoxy into that seam and clamped it again with deck screws, fender washers and PVC foamboard backer blocks.


A few of the screws were named for friends and family. 


 16 Feb 22:

EXCUSE ME came off the molds today! Skipper and crew helped with the turnover.


The molds were broken down, and  we'll store them for a while in case we decide to go into the Nutshell Pram business.


 24 Feb 22:

Contemplating quarter knees, there are three bevels to contend with, the plank/transom bevel, the transom bevel and the side plank bevel. One tip was to make cardboard templates to get the plank/transom bevel.


Started with the bow transom.


Another method is to use a bevel gauge and transfer the angle to the work piece, cut the piece a little big and then plane down to fit.


We'll stare at this for a few days, then make a cut or two or three.


 08 Apr 22:

Finished pondering the quarter knees and made the first cuts from mahogany. We used a cardboard template for the side plank to bow angle. 


Now we need to find the bevel for the side, and then the bevel for the bow. For those wondering, the quarter knees help tie the side planks to the bow and stern transoms.


 15 Apr 22:

Time to shape the quarter knees for the Nutshell Pram, the knees reinforce the connection of the gunwale to the transom. We started by finding the angle between the transom and the gunwale with our pocket bevel, and cut out that angle on a piece of 1 inch thick (4/4) mahogany. Next we drew the curves of the inner knee shape, the part that faces the inside of the boat. This shape was constrained in one direction by the width of the board that we had, about 7 inches wide, but the side that ran along the gunwale could be as long as we wanted. We referenced the plans, drew out traditional knee curves in the inner face and cut the inner knee shape.

In this photo we have jumped ahead to the finished knee for the port side, bow transom knee. The bevels for the transom and gunwale have been cut so that the knee fits with a slight rise going up the face of the transom. Another option would be to run the knee straight across, parallel to the waterline, but we liked this look better.


This is the bevel for the gunwale.


This is the bevel for the transom. 


We found these bevels both by using the bevel gauge and marking a line to cut to, and also did some of the marking by using the boat as a reference. You might need to zoom in to see the pencil line that we marked to use as a cutting guide. A pro builder might have chosen to cut this these bevels with their bandsaw or jigsaw when they originally cut out the knee, but we wanted to sneak up on it.


We shaped the bevels with a Stanley #5 plane, making several trips back and forth to the boat to check the fit. 


This video may help explain the 3 bevels needs for the quarter knees: https://youtu.be/LPCFqfJTjl8


So let's look at the stern transom now, here is the first gunwale-transom bevel. We used the bow knee to get the same basic lengths along 2 edges.


We also copied the inner curve on each tip from the bow knee, then free handed the rest of the inner curve to make the stern knee shape.


We cut out the blank with a jigsaw, and then shaped the next two bevels (transom face and gunwale face) with the hand plane.


 25 Apr 22:

Bevel Tips Part 1:


Bevel Tips Part 2:


Marked and planed the bevels. Go slow and check often, it's hard to add wood back.


We chose to angle our knees up a bit more than plan. 


Rounded the inner face edges with a De WALT Random Orbital sander before installation.


Attaching the knees with Frearson Head silicon bronze wood screws. Drilled a pilot hole and countersink firat with a Fuller Combination bit.

Video: 

Stern quarter knees.


Bow quarter knees.


25 Apr 22:

Plans call for a 5/8th inch wide by 1 inch tall, one piece gunwale, attached to the outside of the sheer plank. We decided to rip 3/8th inch strips and have both an outer and inner gunwale, to create a handhold. Ripped the pieces on a De WALT portable table saw.

Video: Nutshell Pram EXCUSE ME 25 Apr 22 Gunwales


We wanted to use a #10 screw because it had more meat on the screw, to hold the inner and outer gunwale together, but all we had were one inchers, and they stuck out a bit. We fixed that with a belt sander


Gunwales taking their position. The outers are full length, inners come up to either side of the cooler


Nutshell Pram Even More Gunwale Tips


Musings on gunwales and our construction standards: If They Don't Like It, Galloping Horse and Great Spirit: https://youtu.be/vLM1BOowF2Y


More Musings on gunwales and our construction tools and materials: 


Wear your PPE!


30 Apr 22:

 We started looking at plans for the daggerboard trunk and daggerboard, and noticed that the plans called for the daggerboard to be made out of 2 layers of 1/4 inch plywood. My brain remembered that we had daggerboards from early Alcort Sunfish that were close in size to the Pram daggerboard, but they are 3/4 inches thick. So I checked with Maynard, one of the design team for the Pram, to see if an ich here or there would matter, and he said it would be fine.

We used the new daggerboard to make sure we made the trunk wide enough front to back, the Sunfish daggerboard is 9 inches vs the design 8 inches, The Sunfish daggerboard is also 31 inches vs 28 a little extra daggerboard will be fine and it still will fit behind the aft seat when not in use.


Cut out the trunk sides with a circular saw.


Used the daggerboard to set the width for the trunk end posts, plus 1/8th inch.


We cut a small bevel on the top of the trunk bed logs, to help shed water to the bilge.


Mahogany is dusty, be sure to use PPE.


While the saw was out we cut slats out of teak, to be used for the seats. 


Calibrated seat slat width gauge, 1/4 inch.


Coated the inside of the trunk with THIXO. It will also get a coat of paint.


 03 May 22:

We ordered the line for EXCUSE ME, we selected New England Rope Vintage 3 Strand, purchased from R&W Rope. We usually order extra for sail ties and longer bow line.


07 May 22:

Time to assemble the daggerboard trunk for EXCUSE ME. We loose fit the pieces and drilled countersunk pilot holes for the silicon bronze wood screws.


Pieces of the trunk will be held together with THIXO adhesive and screws.


Now is the time to paint the inside of the trunk. We used TotalBoat Wet Edge Kingston Grey.


28 May 22:

EXCUSE ME got her new line today, some 3/8th inch New England Rope Vintage 3 strand. It will be used for the bow line, halyard,  sheet and bridle.


 22 Jun 22:

We picked up some spruce today to butcher into spars for EXCUSE ME's new sail.

Mast:


Boom:


Yard:


 22 Jun 22:

Almost finished, it needs reefing lines, spars and a trip to the beach to check out the shape in a sea breeze.


Read the full article when it is published 01 Jul 22 at Small Boats Magazine

 23 Jun 22:

We cut up some lumberyard 2x4 spruce for spars today, we picked the best boards we could find with as few knots as possible along the edges. We cut the yard to length first with a small circular saw.


Before we cut to width to make the square blank, from which the round spar will be shaped, we marked where the yard taper from middle to end begins. The small knot will be removed as we round the spar. And if it becomes an issue, we'll select another piece and try again. These spars are very small so it won't take long to shape them. One trick folks try is to buy a 2x6 versus a 2x4 in hopes of finding clearer grain to select from.


We found the maximum width of the yard and used the DeWalt portable table saw to make a 4 sided blank to that measurement. With the yard squared we marked the taper on the end. 

There is so little taper that we worked the corners off with a spokeshave, then mostly rounded the yard. On a larger piece with more taper, we could use a batten for draw the taper on the sides and shave the excess off with a bandsaw, the shave the adjoining sides, use a spar gauge to 8 side the spar, sand etc...but that would be some very fine cutting on this small of a spar. Old Timers might even leave the mast or boom square and just go sailing, what's a few ounces of weight between friends?


 24 Jun 22:

So once the sail is made it's time to outfit it with a lot of string and bronze bling. The lug rig needs a halyard, sheet, reefing lines, ties for the peak, throat, tack and clew, lacing line for the yard, snap schles for the sheet and boom and some thimbles for the sheet. 


Reef line...in case you need to reef 37 square feet...We used New England Rope Vintage 3 Strand, whipped the ends.


Sheet snap shackle.


Luff reef line.


Yar outhauls and lacing.


 24 Jun 22:

The Nutshell Mast is 8' 5" long, and the widest diameter is just above the base where it flares to 2 3/8". The bulk of the mast is 2 1/8" though, so we decided to make the blank 2 1/8" and save on some carving. It should be plenty strong, as a comparison our Sunfish mast is 2 1/4" diameter and it carries 75 square feet of sail, twice that of the Pram. We just have to remember down the road to cut the mast thwart hole to 2 1/8". 

We cut 2 pieces to length, then ripped them 2 1/8" on one side and 1 1/16" on the other. For adhesive we used TotalBoat THIXO Flex dispensed from their 2 component epoxy resin and hardener cartridge in a 25:1 High Thrust Caulk Gun. 2 beads of epoxy per face then we spread it with a paint stir stick to ensudre full coverage.


We laid down some plastic sheet to keep the mast from sticking to the floor, a little of the plastic stuck to the epoxy though, not an issue as it will be sawed or sanded off. Poly sheet would work better. We clamped the mast every foot or so and used the plywood floor edge line as a visual guide to make sure the mast blank is mostly straight


When tightening clamps a small amount of epoxy squuezeout should be seen, then it is time to stop clamping, the thickened epoxy has filled gaps at this point. Any further clamp pressure could force epoxy out of the joint. Plus as the wood absorbs the epoxy some of that small bead will be drawn back into the seam.


Here is a small spot where no epoxy squeezed out, so we later added a dab of epoxy with the caulk gun.


24 Jul 22:

We have to taper and 8 side the Nutshell Pram mast, thought this might be a good time to get an electric plane, we chose DeWALT because it matches our battery system. The first job for the plane was to remove excess epoxy from the mast blank, it made short work of it.


25 Jul 22:

Once we get the Nutshell Pram mast tapered we need to mark it so we can shape it to 8 sides. A spar gauge is the way to go, so I made one.  But I had to overthink it for a while...

Marked and cut out a piece of spruce to make the guide. Used standard 7-10-7 dimensions, gleaned from Greg Rossel's book on boatbuilding.


Now what size hole to drill for a Ticonderoga #2 pencil. Turns out it wasn't 1/4" or 5/16". So off to the hardware store, thinking maybe 9/16" would work. Not wanting to make 3 trips, I bought 2 other bits as well.


9/16" bit did the trick. Drilled one extra hole just to confuse people. You might spot the new round file and handle we bought, didn't have one this small, because another option would have been to round out the 1/4" hole a little.


 30 Jul 22:

We had a question about how we attached the boom to the mast on the Nutshell Pram, we tied a vintage Sunfish sheet snap shackle to the sail lacings with 1/8th inch diameter New England Ropes Dacron cord. I suppose the cord could have also been run through the boom beehole. The attachment point on the mast is marked on the plans, where we screwed on a vintage Sunfish eyestrap.


 13 Aug 22:

Work continued on EXCUSE ME's mast, we drew out the tapers on the base and cut them with our DeWalt cordless planer. The base of the mast is 1 3/8 inches in diameter, so we cound center and measured off either side of that, then used a straight edge to put down a Sharpie line.


The line goes up to the widest point, 2 1/8 inches. Be advised that the plans call for 2 3/8 inches, we missed that on the plans. 


When done tapering all  four sides, we'll have the 1 3/8 inch square center section.


Skipper designated a new Summer time work area behind the Boat Works, it's shaded most of the day. Long term plans will have us installing a french door on this end of the shed on the right to improve airflow, lighting and tool access. It will also be a bigger door that the front to roll boats in and out. We may or may not put down some stones or brick, but the dirt and grass work for now.


We paused shaping to make some spar supports, which securely held the spar while planing, spokeshaving, etc. Of course I waited until almost being finished with the mast to make these, and they made a huge difference.


With the guidance of the spar gauge marks and support of the spar chocks, we planed down to eight sides, then used a spokeshave to take the spar to 16 sides (+). The random orbital sander with 80 grit pads was used for final shaping.


And voila, a Nutshell Pram mast.


Our cordless tool collection is growing, very handy for making small boat parts. 


EXCUSE ME checking out her new mast.


 14 Aug 22:

We made 2 of the 6 thwart cleats. First we found the bevel from the side plank to the bottom of the seat, and set that angle on the bandsaw.


You can see the bevel on the top of the cleat that the thwart will rest on. We rounded the inner top edge of the cleat to encourage water runoff, and also the lower edge just for looks. The cleat was attached with TotalBoat THIXO Flex and screwed from the outside with #10 silicon bronze Frearson head wood screws. We also coated the cleat with the excess Thixo.


Starboard side cleat.


17 Aug 22:

We're a week or two behind on the blog, so we'll jump forward to a few days ago and fill in blanks later. We are making patterns for the thwarts in the Nutshell Pram using a technique from the Wooden Boat School video series, so why not start with the hardest one, the middle thwart? It has a frame that we have to trim around, but, if we chowder it up, it is also the widest thwart, so we can try again with the butchered piece on the narrower bow or stern thwart.

First we needed to decide how wide fore and aft our seat will be. Plans call for 8 inches, but that was 40 years ago, so we are bumping it out to 9 1/2 inches. This will let us know how wide to make the pattern piece.


We use a calibrated Tips From a Shipwright carpenter's pencil to set the slat width, happens to be 1/4 inch.


We cut two pattern bits of the same thickness stock and to the same width...


...and attached them to crosswise braces.You may note where the frames intrude, we have to scribe around that, find the plank bevel and also scribe the fore an aft plank curve.


We used a small scrap od wood to bring the fore and aft plank curve over to the pattern piece. And a straight edge to extend the side markings for the frame.


Side plank bevel scribed fore and aft to the pattern piece.


Here we marked out how far the frame intrudes into the thwart.


We placed the bevel under the pattern piece and against the side plank. This will show us the top to bottom bevel on the end of the thwart. I used a different pocket bevel on each side to see if the bevels matched, and they did, so the boat is not twisted.


Next we'll cut those bevels and scribe lines, then we can slide the pattern pieces all the wat outboard to check the fit against planks and frames.

 20 Aug 22:

We attached cleats towards the middle of the thwart, leaving clearance to work the thwart through the bandsaw. The pattern was marked on the thwart and both ends run through the bandsaw. We got lucky and got a nice fit from the first pass, did final fairing on the sides of the thwart with a random orbital sander.


21 Aug 22:

Took a measurement from the plans to figure out how far forward the aft thwart goes from the stern transom. From there we can determine thwart cleat placement. 3 inches is what I came up with.


We want the thwart about 1/4 inch below the plank line, so we used some scrap to mark the thickness of the thwart, which then shows us where the cleat support will be attached underneath. Mark around the cleat with a pencil. 


Now that the cleat position is marked we can drill small holes from the inside, to show us where bigger holes will be drilled from the outside.


The cleat need a bevel on the top so that the thwart will sit flat. With the hull level side to side...mostly...we can use a level and pocket bevel gauge to find the bevel for the cleat.


Then we transfer the angle over to our saw or handplane of choice, which today is a bandsaw. OBTW we haven't used a bandsaw a lot, in fact we just bought this used Delta 12 inch over the Winter. 


If your cleat stock is square, you can cut any edge and the bevel will work. Ours is rectangular, and we want the wider face to be the "side" that is glued and screwed to the plank. So we scribble a pencil mark to show which way we want the cut to go. It's not a line to cut to, just a way to make sure the stock is oriented correctly.


We used the corner of the cleat as our cut line, seems I wandered a little but I'll fix that with a hand plane or sander....Spoiler Alert...the sander was faster.


TLAR Method...That Looks About Right.


Now we drill those small reference holes from the inside face of the plank, only deep enough to get through the plank. The larger pilot/counterbore will come in from the outside of the plank. I goofed here, can you see what I messed up? I marked the top and bottom of the cleat, but not the fore and aft. So my SWAG (Sophisticated Wild Ass Guess) for where the aft hole could go was too far back. Look close and you can see the little 3 inch pencil mark just above...and forward...of the new hole. I figured it out when I drilled the pilot hole from the outside with the cleat in place...and missed the cleat. Oops. No time for The Moaning Chair, there's quite a few designed epoxy holes on this boat, anyone who points out one more hole can watch us have fun boating from their vantage point ashore. A new pilot hole further forward and some thickened epoxy got us back on course.


Another thing to check, and we've goofed before, is that the depth of the counterbore is set for the screw we are using. It's good here, but sometimes I have set the combination pilot bit/countersink for a longer screw, then forgot to reset it for a shorter screw. The pilot bit gets larger the deeper the pilot hole, so the correct length screw will not bite. It's not a problem if you can say "Oh well" and use a longer screw, but it becomes a problem if the screw pokes through the other side of the pieces being fastened. You could go up a screw size, say #8 to #10, but Sir Richard will notice that. Or fill the hole and redrill.


Pilot holes and counterbores. We go deep enough so that the head of the screw will be a tiny amount below the surface of the plywood, which allows a skin coat of fairing compound. On 1/4 inch (6mm) ply it is easy to get overzealous and drill the counterbore entirely through the plywood, which leaves a useless hole.


We set up the thwart pattern jig as before and scribed the hull plank curve, more significant aft that amidships.


Ready to cut the curves and bevels as we did before on the middle thwart. Ignore the measurements,  they are wrong!


Using the WoodenBoat School method, they screw the pattern end pieces to the cross battens, remove the clamps and use the full pattern to mark the stock.I tried something different, I measured the widest part of the seat, unclamped the pattern ends and placed the pattern ends out to that width, then tried to get the pattern front and back edge as flush (square) as possible with the blank stock. Can you see already my introduction of error(s) for the sake of trying to avoid drilling a few screw holes into scrap teak? My idea worked great on the middle thwart, but not so much on the aft thwart. Luckily my error was in the "too big" range, so I scribed and trimmed the aft thwart down to the proper fit, which is what the pattern method is trying to get us to avoid in the first place.


Bandsaw still life. 


Ahhhh, the dry fit glamor shot. Not quite as snug a fit as the middle thwart, and certainly not on the first pass, but I'm going to say that I left a small gap in spots to allow for wood swelling and water drainage.


 23 Aug 22:

Installed forward thwart cleats with THIXO and bronze screws.


Tried a variation of Doug's pattern maker. 


Transferred pattern to the thwart.


No bandsaw? A jigsaw will get you close, we did final shaping with a random orbital sander. 


Forward thwart.


We've really enjoyed the portable cart for the table saw.


 27 Aug 22:

I took out my calibrated Sharpie and marked the hole to cut for the daggerboard trunk. It is offset per design to keep the keel backbone strong, and so the keel will slide up onto a dock or boat or whatever without catching on a spot where a hunk is cut out for a trunk. Per design.


28 Aug 22:

 Time to cut a hole in a perfectly good boat. We drilled a pilot hole for the jig saw, cut what we could from the inside then flipped the boat. Oops, first we shaped the ends of the trunk posts, they stick through the hull and will be cut flush with the bottom. Shinto rasp does the trick for this bit of butchery. Rounding the post keeps there from being hard corners, which can lead to stres points, cracks and leaks.


Used the Japanese pull saw to finish the straight line. Those cuts will be our reference on the bottom for where to start the curved ends.


I rough trimmed the curved ends with the jigswa...that's spelled wrong, but I like it... then used a half round file to clean up the cut. Next was a test fit of the trunk and we dropped the daggerboard in to see if we made the slot wide enough. We did.


We rolled out the boat and tested out the shade behind the Boat Works, the French door will open onto this area. Skipper approved. We'll make a little quarterdeck with bricks we found in the forest, where Skipper can Skippervise from. 


Trunk fastened with THIXO Flex. Fastned from the bottom with #10 Frearson head silicon bronze screws, piloted and countersunk. 


29 Aug 22:

Finished shapin the thwarts with a 45 degree chamfer along the lower edge, primarily to lighten the look of the thick teak. I could have run the teak through the planer and thinned them down, but Skipper wants the weight. Once the ends were trimmed we attached the last set of cleats to the forward thwart with silicon bronze screws, piloted and counterbored with a combination Fuller bit.


The heavy hitters from this router bit set have been the 45 degree chamfer and the 1/4 inch roundover bit.  And sometimes the flush bit.


A bit of TotalBoat Gleam Satin varnish for the seats.


Thwarts, gunwale and knees will get varnish. The rest will get a coating of paint. Teak oil might be considered down the road.


 02 Sep 22:

While I was out flying the French Door Fairy dropped by and installed a hatch in the bow of the Boat Works. Skipper was complaining that her cabin was too hot, now there is a nice breeze, almost a wind tunnel, more light and a cargo portal to the foredeck (coming soon). 


12x20 foredeck will appear here soon, level with the shed floor.


We used a hole saw to cut the mast hole in the forward thwart, hereafter and forever now known as the mast thwart. We leveled the boat side to side to get the mast mostly vertical...


...and then leveled the boat fore and aft to set the aft rake of the mast. Skipper and one of our Trusty Crew used their calibrated eyeballs and the TLAR method (That Looks About Right) to establish plumb and rake, while I adjusted the mast step. Once all was settled we marked the location of the mast step in the bilge with a calibrated Sharpie.


TotalBoat THIXO FLEX was our adhesive of choice, and you might just make out the calibrated Sharpie marks in the bilge. 


Adhesives have a memory, so if a work pieces is placed in position and then moved, the adhesive may try to drag the piece back to the original position. To prevent the mast step from sliding around we used a small clamp. Thickened epoxy also needs light pressure to ensure proper coverage, so we used an orange dead blow hammer to press the piece down. Any color dead blow hammer will work.


We also cut and fit a teak cap for the daggerboard trunk, it notches into the middle thwart. We fastened it with TotalBoat THIXO FLEX. 


03 Sep 22:

Skipper picked out the colors for our Nutshell Pram and I sent in and order early this morning. I had a question about the primer we are using so I sent George, George IV in George Kirby Jr. Paint Company, a query. He responded immediately and I jokingly asked if he was in on the holiday weekend so he could make the paint for our pram. He said he was in every Saturday until Noon, and a little while later we got photos of George mixing EXCUSE ME's colors, which are Maynard Bray Off White, Fighting Lady Yellow and See Red. We also ordered some brushing liquid and a t-shirt.


I don't know about the customer service that most folks are getting in 2022, but Kirby has been delivering their legendary colors and the goods since 1846. 

From their website:

Our proud and rich family heritage began in 1846 along the historic waterfront in New Bedford, Massachusetts. Since then, Kirby Paint has had a front row seat as a key supplier to this historic industry.  The company rose to prominence as one of the first manufacturers of copper bottom paint. At that time, a revolutionary product, made to eliminate the buildup of barnacles and other sea life that accumulates on the bottoms of boats, which is still a popular choice in our product line today. 

George A. Kirby IV continues the family tradition of producing fine marine paints, primers, and other finishes. Our Kirby Signature Color line features an assortment of our timeless classics that you’ve come to know and trust. We also custom match an endless selection of classic, as well as modern, colors in a variety of finishes. We have always handcrafted all of our marine paint. This is what makes our paint different from the rest, premium ingredients and small, handmade batches. Thank you for choosing Kirby Paint!  We invite you to visit our store at 163 Mount Vernon Street, New Bedford MA. 

~George and Shari Kirby"

If you need some custom, quality marine paint, we'd highly recommend giving George a call. He answers the phone too!

04 Sep 22:

We cut and fit the keel, and per plan neither the top or bottom of the keel is straight from bow to stern. I wondered for a bit on how to mark our not-so-cheap piece of sapele mahogany so as to get an accurate cut line and optimize the amount of lumber left over. An expensive way to do it would be to cut a piece with plenty of excess along the cut lines, and scribe the top of that piece to the.....anyway, ask 7 boat builders how they do it and grab some coffee, you'll be there a while listening to 7 x infinity answers.

What I did was find a long stick and marked out 4 inch increments to scale to represent "stations." Once the marks were made we basically have a scale ruler, and I laid the measuring/marking stick on the plans. The stick was placed on the 2 high points of the keel drawing at the bow transom and stern transom. Station Zero we'll call it, was the mark that touched the bow edge of the keel drawing, and stations were numbered by inches then feet, so 0, 4, 8, 1, 4, 8, 2, 4, 8, 3... Confusing? Yes it was. To make things even better, the stick was numbered right to left.

Here's a photo of the stick. 

That clears things up, right? A wider, flat stick would have been better, but this is what I had. And for this photo I took it later and the Station Zero tick mark, shown on the lower face of the stick to the far right, is not touching the uppermost bow end of the keel drawing. FYI, it was when I took the measurements. And there a lot of lines there, the top and bottom of the bottom plank lines, the tip of the keel, and the top and bottom lines of the chafing strip. The first bit of error can be introduced by using scaled plans vs full size patterns (which are not offered) but it's all part of the so much fun of messing about with boat building. Actually the first bit of error was to begin building a boat at all, if prescribe to Capn R. D. "Pete" Culler's philosophy (he was a serial boat designer and builder). Pete prefaces that belief with the wisdom that boat building was simply about correcting one mistake after another, with the first mistake being in beginning at all. "But oh what fun." He also advises that experience starts when you begin.

Oops, I wandered off there. The scale for these plas is 3" = 1'. Each mark on the stick represents 4 inches. It would have reduced my confusion if I had marked the stick using the Feet-Inches-Eighths convention. See how there are two four inch marks on the lower face of the stick? The one to the right is at zero feet, four inches, zero eighths, it's mark would be 0-4-0. Since we're reading measurements right to left, the four mark to the left is at 1-4-0, or one foot, four inches, zero eighths. These "Station" marks go out to almost 6 feet, and the problem with my lazy scheme is that I left a lot of fours and eights hanging in space with confusing context.


Still with me? My plan was to now take my 2 foot folding carpenter rule, which is marked in inches and eighths, place the rule on the plans below the stick and then take measurements down from the stick to find the top and bottom measurements of the keel per plan. Then we'll transfer those measurements to the full size piece of mahogany, with our baselines being the straight edge of the stick and a straight line on the mahogany.  So at Station Zero, the tip of the keel, those measurements are 0 inches to the top of the keel and 0 inches to the bottom of the keel, those numbers are barely legible on my soon to be patented Keel Stick 2000. These points become Sharpie dots on the mahogany. At 4 inches aft of the keel tip, the top of of the keel is 1 1/4 inches down from Keel Stick baseline and the bottom is 2 1/4 inches. A 8 inches aft of the keel tip, top of keel is 2 inches down and bottom is 3 inches. And so on.

When WE, yes, you are in this with me now, no escaping...When WE get further to the left on Keel Stick v1.0, around 4 feet, numbers get confusing. Does that 4 mean 4 feet or is it 4 feet 4 inches? Here's where the Feet-Inches-Eighths numbering would come in handy.

Should we talk about Introduced Error now? Sure. Those lines on the plan are at least 1/8 inch wide when you scale them up, and the lines on the ruler are about the same. Plus what if the plan line falls between a mark on the ruler? Then you can use you best guess and add +/- to the measurement, example 0-3-4(-). Once the cut lines are drawn on the work piece, use judgment to decide how much slop to leave when you cut to the line, or in other words, don't cut exactly to both cut lines. For our butchery that day we cut outside the top-o-the-keel line first, not To the line, and left plenty of reserve wood on the keel bottom cut line.

Zoom in on this photo of the keel and you may see the Sharpie mark of 4-8. It is nowhere near where the keel ended up being cut, the mark is at least 1/2 inch (+) off the final cut. 

Once we got the measurements on the stick we transferred those measurements to the expensive mahogany with a Sharpie dot, with the only measurement and Sharpie dot that we certain of being the Station Zero measurement and marking. Then we connect the dots using a batten to get a mostly fair curve, and make the first cut outside of the top-o-the-keel cut lines. At one point you have to cut of excessive lengths and widths of the lumber, leaving enough wiggle room for the scribing and fitting to come. 

Did we get pictures of the Sharpie points before the battening and first cuts? No. Did we get photos of placing the rough cut keel on the bottom for scribing? No. But for our first scribe we were almost an inch off in one area, because we accepted that variance in measuring and rough cutting. I scribed the bottom to the keel, cut to that line and actually got close enough that thickened epoxy could have filled the small gaps we had in 2 areas, less than 1/8th inch. Still no pictures. I made the second scribe cut to the line and had a nice fit, so we were done with the top-o-the keel fitting. 

Since I was remiss in my photog duties, here's a picture of a turtle.


Next we marked the keel bottom points, drew the cut line with a batten and a Sharpie and cut outside that squiggly line with a jigsaw. We faired the bottom of the keel to a pleasing curve with 40 grit belts on a belt sander, backyard boatbuilding at its best. 

Voila, the keel is cut! This is how most blogs explain these complicated maneuvers at the late stages of construction.

"Next, we need to make the keel..."

"The keel is attached!"


So we offer our method to you so you follow us down this trail, or you can decide we are crazy and blaze your own trail. 

Some folks amy ask, what did the Nutshell Pram Build Guide offer in the way of keel cutting instructions? The answer is nothing, as the Guide is written for those assembling the precut kit for the rowboat version, and the keel comes precut. There are however, detailed instructions and photos for making the sailing version spars, daggerboard trunk, daggerboard and rudder.

Once again I apologize for dropping the ball on getting photos of the cutting, scribing and fitting. So here is a consolation photo of Skipper's Drascombe Lugger ONKAHYE outbound on East Bay. Taken 2013ish from inside the air conditioned and well provisioned house on the bay with high speed wi-fi, by the crew who were told we were shoving off at 0900.

04 Sep 22:

Rolled some TotalBoat 2 Part Epoxy Surfacing Primer onto the Nutshell Pram. It went on quick and easy and smooth.


Next we took measurements on the keel from the plans and transferred those to a piece of mahogany. We got close on the first cut with the jigsaw, then scribed for a final fit to the hull. Then we cut the bottom shape of the keel and fastened it with TotalBoat THIXO Flex and silicon bronze screws, piloted and counterbored.


EXCUSE ME then posed for some glamor shots.


 06 Sep 22: 

Applied TotalFair to the hull, it's easy and fast to mix, and fun to apply. Sanding next.


 07 Sep 22:

After a coat of primer revealed a few spots we missed, we applied some more TotalBoat TotalFair with a plastic spreader to the pram. Thin coats are best if a large divot is being filled, so that the compound dries properly.


Sanded the primer with 120 grit pads on a DeWalt cordless random orbital sander, with the sander connected to a Dust Deputy cyclonic separator and ShopVac wet/dry vac. The random orbital sander does just as its name implies, it uses a random circular sanding pattern vs a rotary pattern or vibrating pattern, reducing the chance of sander swirls or deep straight scratches. Sanding disc grit and sander pressure also play a role in surface smoothness, we could have attained a smoother surface by doing a second sanding pass with 220 grit with light pressure after a second application of primer. While the surface may appear smooth, small sanding marks, the kind that can be seen upon close inspection, will appear when paint is applied. We have found that our series of steps gives us a "Three Foot" paint job, it looks nice and smooth from over three feet away, and fantastic when viewed from a galloping horse. Given that a pram spends a fair amount of amphibious time seizing and defending advanced naval bases, we think a Three Foot finish is more than adequate. Our side business prices reflect the final grit that we use, you can get great deals at 40 Grit Marine Construction. If you shop at 2000 Grit Small Yacht Restoration, several zeros are added to the invoice.


In some areas with low spots we sanded all the way through the primer in order to get the fairing compound smooth. Since the goal of this first coat of primer was to fill and seal the grain of the raw plywood that was okay. This primer was a smoothing primer which is meant for surfaces that are smooth enough for painting, and since we still had some very small hills and valleys we may have been better advised to try a "high build" primer that contains more surfacing solids. We've never used a high build primer, Capn Jack always advised 2 coats of primer with the first coat of primer being the "show coat," to show where some more prep work was needed. The caution with most primers is to sand them in a timely fashion, especially high build, as the longer they dry, the harder they fall to sanding assault. 


She looks like she went supersonic during her stealth speed trials. I kind of like this look, but Skipper has other Directives for the final finish.


08 Sep 22:

Applied the soaker coat of TotalBoat Gleam Satin varnish to the Nutshell Pram thwarts. We prefer the satin finish to reduce glare and it will compliment the buttery glow from our paint selection. 

Video: https://youtu.be/shiyFDsnQpQ

Skipper smelled the varnish and came out to do it the correct way, vs my mop technique. Her Dad Capn Jack was a varnish Master, she learned from cell memory and observation. She's been boat building since 1969, when she puttied all the screw holes on the family's Petrel sailboat with her little fingers, no gloves. Peeled off her fingerprints, she'd make a good bank robber to this day.


Skipper and Capn Jack looking for prizes on the Bay.


 10 Sep 22:

The sailing version of the Nutshell has a daggerboard, and when in Tow Mode, a plug is recommended for the trunk, unless you like bailing swamped dinghies. Since we made the trunk a tiny bit bigger to repurpose a Sailfish daggerboard, we thought why not find another crusty Sailfish board and use the top part for the plug? So we put out a query to our Sunfish Guru Alan, to see if he had a board with suitable patina in his boat barn, and of course he did. We traded him a gudgeon backer plate and he sent us the top  1/3 of the board, so as to save on shipping costs. There were several emails back and forth with him checking to see if we sent the correct trunk depth measurements, 8 3/4 inches, as this small of trunk wouldn't register in his brain. He left an inch or so on the cut pieces and dropped the package off with USPS (Uncle Sam's Pony Service).

We cleaned it up with water and TILEX, then ran it through the dishwasher...


...okay I didn't really run it through the dishwasher, but if Skipper hadn't been around...

Later we put a sealer coat of TotalBoat Gleam Satin on the plug and the daggerboard.


This damage is common on the older daggerboards, and at one point we'll replace the handles with handles that are bigger, to match the top of the trunk and create an effective plug. Right now this plug is good for show. 


Turned our attention to paint, here is the first coat of dry Kirby paint.


And here is the second coat going on.

Our tips on how to roll and tip paint onto a small boat. You'll have to peek around the shop rag at times and a brief period where the shot is out of focus, but the information is there. If you like, you could send us money to hire a videographer and editor, we accept paypal and patreon...We'd also like to read your suggestions on your favorite materials and methods.

Video: https://youtu.be/kW8g0kBLmRw


11 Sep 22:

We watched Geoff Kerr's Caledonia Yawl build series a few years back, incredibly informative. It was there or in another of his videos that he talked about a few different types of tape that he uses to get different border results when painting. But first a turtle, an Eastern Box turtle named Carolina came by to check out the our fancy new French door.


Most folks are familiar with low stick blue painter's tape, but some brands are more susceptible to edge lifting or paint soak in. 3M Scotch Fine Line 218 tape is ideal for long crisp lines.


ScotchBlue™ Sharp Lines Painter’s Tape 2093 is a multi surface tape that can be left on for longer periods of time, but it does not have the level of sharp line performance as 218. What we do sometimes is use 2093 on the base coats and transition over to 218 for the finish coats. As far as sharp lines go, it's not bad to have lines overlap on base coats, to tie the different coatings together. 


Scotch® 2080 Delicate Surface Painter’s Tape is great for surfaces that require a little extra care such as  freshly painted surfaces (painted at least 24 hours ago).

These different tapes have different temperature ranges and can be left on for different periods of time without lifting the coating beneath. If you're not sure which tape to use you can post a question below, or wander over to the 3M Tape Selection Guide.

Our video: https://youtu.be/vLXnNdn-sxs


We pulled tape and had a few small spots lifted, caused by not letting the base coat dry for 24 hours. The other 31 feet of tape pull came out great!


Many thanks to Geoff for sharing his painting materials and methods with the metaverse!

Here's the best video we've found on the paint process, from bare wood to the finish coat. Well worth a membership to Off Center Harbor to take a look at this video and the 42 part series on building a glued plywood lapstrake boat, in this case a Caledonia Yawl.

12 SEP 22:

Rolled out the keel chafing strip


Second coat of Kirby Maynard Bray Off White.


Ready for second coat of interior primer! Video: https://youtu.be/MVpIgTZdGaM


First coat of Kirby Paint Maynard Bray Off White applied to the oars, the wood was so dry it sucked the paint out of the can.


 13 Sep 22:

We rolled the second coat of interior primer onto EXCUSE ME, but first, TETRIS! Our Alcort Catfish SMEDLEY moved onto the Wheel Deck, inching his way towards hull(s) repairs this Fall. As the weather cools we'll use the back patio to enjoy the sun, or the new space behind the Boat Works. We also moved the mower out of the Heuer Garage to make room for our little punt SCUPPERS. (L-R) 1965 ALCORT Catfish SMEDLEY, SCUPPERS, 2017 Penobscot 14 ST. JACQUES, 1965 ALCORT SUnfish WAVE, 1981 AMF Sunfish MADISON (in hoist), 1982 AMF Sunfish PHOENIX, 1960s Grumman 17 SCOUT and 2021 Carry On HUEY II. Maybe if I strapped beach rollers to HUEY II he would make a nice amphibious landing craft of floating dock...


For the second coat of primer for the inboard, we transitioned to Kirby White, since we're using Kirby Paint. Rolled with a Mighty Mini roller.


Also applied a second coat of TotalBoat Gleam to the mahogany and teak. The we tried out Doug's tip to store leftover varnish on a jar with a better sealing lid.


14 Sep 22: 

We rolled and tipped the first coat of Kirby Paint Fighting Lady Yellow and wow, it has a lot of fight! The photos don't do it justice, it dried to a beautiful low luster, to compliment the sating finish on the brightwork, or "satinwork" in our case.

We put the thwarts back in for glamor shots. 


Several weeks back we had to decide what to paint and what to finish bright (varnish). We wanted a low maintenance approach, the thwarts can be removed easily and then everything below the gunwales gets paint.


The oars got some attention also.


 15 Sep 22:

Build a boat the drill holes in it. This one for the painter aka bow line. We used the heirloom ratchet brace and an auger bit to drill the hole.


A tip. Drill until the tip if the bit pokes out the other side...


Then come around to the other side and drill the other side.


This helps prevent tearout of the wood and leaves a hole even a carpenter bee would be proud of.


Found some surplus dock line to be the painter.


Next I turned my steely gaze to the rudder. Except my gaze was rusty, and I cut the first rudder from 1/4 inch ply vs the required 3/8 inch. And even shaped the edges. Oops.


 I regrouped and cut out the correct thickness blade and rudder cheeks.


But now I have a nice pattern.


 16 Sep 22:

Today we glued the rudder cheeks to the rudder blade using TotalBoat THIXO Flex, a flexible thickened epoxy. Thickened epoxy fills joints better than straight epoxy, and the Flex is formulated for movement of materials used in the marine environment. Light clamp pressure was used, only enough to see a good seam with epoxy beginning to squeeze out. No squeeze out could mean not enough epoxy was applied, so keep plastic syringes handy to inject epoxy as needed. Too much clamp pressure can force most of the epoxy out of the joint, and there will be poor adhesion. 

Video: https://youtu.be/rI1WMXfSXg8


Tiller profile was taken from the plans, transferred to a scrap of teak and cut out with a DeWALT 20V jigsaw.


The rudder head measured 7/8 inches thick, and we want to make the tiller the same thickness...


...so we rolled out the DeWalt 13 inch planer to thin the tiller. We took off about 1/8 inches of thickness, 1/64th inch per pass, flipping the tiller each time. 


We ran out of Kirby Primer, and we prefer to stick with the same line of thinner, primer, fairing compounds, epoxy, paint etc when we can. So TotalBoat Topside Primer was called into action for the rudder. It is a good primer, covers well and we have found it will work with Kirby Paint. 


We also had cut out the two tiller straps from 1/4 inch marine grade plywood. The straps and the tiller got a coat of TotalBoat Gleam Satin varnish.


 17 Sep 22:

At this stage of a project we keep a punch list, a list of things left to do, and we try to prioritize the sequence of fun so we don't end up at the end needing to fair, sand, prime, sand, prime, sand, paint, sand, paint, sand, paint and wait for paint to dry on a boat part. I'm  not sure when the first bit of fairing compound went onto the boat, but it's been a few weeks. On this build I'm glad we took care of spars, sail and daggerboard midway through, and that's what we recommended to someone recently, actually we suggested that they build the rudder and daggerboard first, then spars, while they waited for bigger parts to appear.

I broke our Punch List down into the Row, Tow, Scull, Sail design categories and decided we needed to work on the row items, one of which was to screw down the aft thwart. To do that I needed the rudder so I could check the stowage space needed behind the thwart. So we installed the traveler and then placed the rudder and daggerboard behind the aft thwart to check for fit. That sounds kind of like yak shaving doesn't it? We then fastened the thwart with Frearson head silicon bronze wood screws from Fairwinds Fasteners. We leave the screw heads visible so that the thwart can be removed as needed, especially down the road when it's time for a topcoat of varnish and inboard paint, hard to varnish the bottom of a thwart.


For Tow Mode we needed to seal the inside of the hole we drilled in the bow transom. I had taped the back of the hole shut and dispensed THIXO Flex into the hole a day or so back, so it could soak into the raw wood. Today I redrilled a slightly smaller hole, so essentially there is a small epoxy bushing in there now, and reinstalled the painter. An buddy suggested a double stop knot both inside and outside of the transom to limit water ingress, we did that and it looks good


So she can Row and Tow now.

18 Sep 22:

A few tips on installing the rudder hardware for the Nutshell Pram. We used a dowel to find the spot for the lower pintle bracket, leveled with the top of the gerboard plank.


Up top we found center from side to side.


The holes for the hardware need to be marked, then the hardware removed to drill the holes. The top bracket has to be installed first because the pintle will be in the way of the bottom hole once the bottom bracket is attached.


Probably best to paint the rudder before installing the rudder straps, but we were too excited to do that. The rudder can be riveted on or a good option is to use marine grade machine screw, washer and nut.


We used a wooden dowel to make the tiller bushing, and then used the bushing as a guide to drill the tiller bolt hole and mark where to cut out for the tiller. 


It seems that EXCUSE ME escaped the work dolly.


Sail Mode.


Scull Mode.


Row Mode.


Oar lock.


Oar lock.


Time to roll up the plans! Video: https://youtu.be/yZYuBcXWVNs


Kirby Marine Topside See Red and Maynard Bray Off White brushed onto the rudder.


TotalBoat Gleam Satin Varnish on the tiller.


 20 Sep 22:

Hauled EXCUSE ME to the James River for a Float Test and Rowing Sea Trials. She passed both with flying colors. Easy to row and she doesn't need much space to get around. As for towing, the dolly/trailer combo worked out great, a few simple tiedowns and she's ready to roll right down to the beach.


A full review on the Nutshell Pram is being prepared for WoodenBoat's digital publication Small Boats Magazine, and it should be published in the October issue. Once we see which Sea Trial photos they chose we can post more here. 

22 Sep 22:

Took our Nutshell Pram EXCUSE ME out for sailing trials, she performed much better than I expected, very responsive and a lot of fun.


Video: https://youtu.be/qwGFwkbUxY0

Skipper Skippervised and took photos, still awaiting medical clearance for high speed sailing.


Sail Trial Notes Video: https://youtu.be/IHmCWQgh868

This trailer/dolly combo has been working out great, parking lot right to the beach. 


03 Oct 22:

Our boat profile article in Small Boats Magazine is hot off of the digital press, we relate our experience with the tow, row, sail and scull attribute of this capable little pram.


Small Boats Magazine 

 04 May 23:

We tried a little experiment of leaving EXCUSE ME outside for a few months without a cover, under the roof of the Sunfish Shack, during pollen season(s). As we might have expected, she was coated with a fair amount of dust and pollens, and picked up a few leaves. So she got a bath as well.


We sucked the bilge dry with our DeWALT 20V Wet/Dry vac, that is fun and quick, then dried off the interior with a shop towel. We also completed a round of TETRIS, EXCUSE ME is back in the Carriage House with ANNA and ST. JACQUES moved back out to the Sunfish Shack. The John Deere WILEY went into the garage, and bikes will soon follow. This opened up space in the Carriage House, which we like, as it is a pain to have to move 4 or 5 large items when we want to knock out a small project or reach the work bench.


26 Feb 24:

 Capn jack always said "Take 2 hats." Skipper has plenty from WoodenBoat Launchings and Relaunchings, she's in the latest issue with our Nutshell Pram EXCUSE ME.


And we got stickers too!

to be continued...

References:

Technical Support:
Maynard Bray
Eric Dow
George Kirby Jr. Paint Company
Jamestown Distributors TotalBoat Tech Team

Materials Support:
TotalBoat

No comments:

Post a Comment