Here is what the boat will look like.
 |
| From SBR 2013 |
I spoke to Arch a few weeks earlier about the boat and it sounds like it will fit well in our Bay. I also may be able to use local cypress for the build. Ordered the plans, patterns and guidebook and they arrived quickly, just before Christmas.
 |
| From SBR 2013 |
 |
| From SBR 2013 |
 |
| From SBR 2013 |
Sped off to the Lowes Christmas Eve day to get lumber for the building jig. Found some white pine that will get us started. It is only 12 feet, ideally I needed a 12'3" piece, but I'll adapt. Used the Highlander trailer to bring the lumber home.
 |
| From SBR 2013 |
Laid out two 12 foot sides for the jig and made the first cut for the jig end pieces.
 |
| From SBR 2013 |
Captain Jack picked the truest edge for the top of the jig and held the boards steady while I screwed on the ends. Used 2 1/2 inch exterior screws.
 |
| From SBR 2013 |
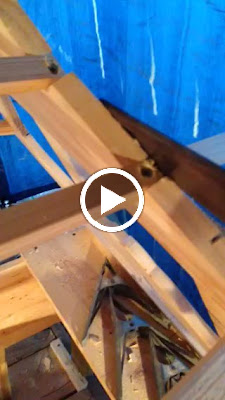
The jig is being built upside down right now. I cut out a board for the stinger that will hold the stem (bow).
 |
| From SBR 2013 |
Cut another 1 x 12 diagonally to be the stinger knees, flipped the jig and screwed the into place.
 |
| From SBR 2013 |
 |
| From SBR 2013 |
Cut 6 legs from pressure treated 4x4s.
 |
| From SBR 2013 |
Installed legs on each corner and mid span.
 |
| From SBR 2013 |
Cut a diagonal brace, but goofed up and cut it too long. The brace is only supposed to go from the corner to inside the first cross brace.
 |
| From SBR 2013 |
Here's the jig brace recut and screwed in with drywall screws. I cut a nice notch to try and fit the wrong board :)
 |
| From SBR 2013 |
 |
| From SBR 2013 |
Some of the power tools used so far.
 |
| From SBR 2013 |
Made a leg for the stinger and decided to add a little tool and supply shelf. Maybe the Pettit Paint fairy will see this and drop off some gifts :)
 |
| From SBR 2013 |
Cut boards that the station frames will be attached to.
 |
| From SBR 2013 |
I set Station Zero 2 inches back from the stinger end and screwed the station frame jig board into place. They need to be placed exactly every 2'4". It was getting late so I'll recheck the measurements when the sun is up. That little scrap piece on the stinger was added to provide a level surface for the tape measure foot, and it will be removed once measurements are approved.
 |
| From SBR 2013 |
The bateau is 14'0', just a bit longer than a Sunfish. Here is Merci checking out the building jig.
 |
| From SBR 2013 |
Here's what the tool shelf looked like at the start of the build. It will be interesting to see what tools get added before launching.
 |
| From SBR 2013 |
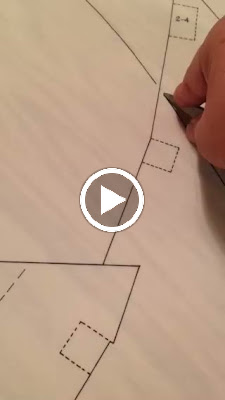
Traced the stem onto a 1/4 inch piece of oak plywood. Placed carbon paper under mylar pattern, taped edges of pattern down and used the rounded end of a pair of scissors to rub marks on vs pricking with an awl. It came out pretty good, now I need a batten to fair out the curves.
 |
| From SBR 2013 |
 |
| From SBR 2013 |
 |
| From SBR 2013 |
 |
| From SBR 2013 |
26 Dec 2013: Cut out the notch for the stem.
 |
| From SBR 2013 |
Cut out the stem pattern. Cut out a little of the diagonal brace also, oops.
 |
| From SBR 2013 |
The pattern will be used to cut out 3 3/4 inch stems, which will be laminated. The top of the stem will rest in the jig like this.
 |
| From SBR 2013 |
I didn't notice that some of the stations were marked on the forward edge of the jig braces. After I got them measured and placed correctly, I marked the Station on each frame with an arrow to the proper edge.
| From SBR 2013 |
Also marked the centerline from Station 0 back to the transom.
 |
| From SBR 2013 |
29 Dec 2013:Moved the jig into the sailboat shack, the other boats will keep St Jacques company and tell sailing stories while he is being built.
 |
| From SBR 2013 |
Put a 4 wheel dolly under one end of the jig and it rolled real nice.
 |
| From SBR 2013 |
Traced out 3 stems, made them a little proud so they can be routed flush to the pattern.
 |
| From SBR 2013 |
 |
| From SBR 2013 |
The teak Arne Vodder swivel back chairs make nice supports!
 |
| From SBR 2013 |
Took a break to mail out some signed 1st Edition Sunfish Owner's Manuals! Get one today
 |
| From SBR 2013 |
Cut out 3 stems, 6 pieces total because they are cut from 1x10 lumber and then butt jointed and glued together.
 |
| From SBR 2013 |
 |
| From SBR 2013 |
Screwed the pattern to the stem and used a flush bit router to trim the blanks to size. Ideally you'd glue up a 3 stems and then route therm all at once on a router table with a larger bit, but I had neither the bit or the table, so I opted to route one individually then screw them together.
Update: Then I re-read the builder's instructions and what I should have done was trim the center stem flush to the pattern by itself, then add the outer stems and trim those flush to the center stem. Witchcraft! :)
 |
| From SBR 2013 |
 |
| From SBR 2013 |
 |
| From SBR 2013 |
 |
| From SBR 2013 |
 |
| From SBR 2013 |
Gluing and screwing all 6 pieces of the stem.
Update: Follow up with Arch, epoxy is optimum for this, learning along the way :)
 |
| From SBR 2013 |
 |
| From SBR 2013 |
Cutting out frame 2-4, the forward bulkhead. I used pine frame and oak plywood for this, would have preferred cypress and okume, but it will be sealed with epoxy. I may put another face on this bulkhead when the marine plywood shows up.
Update: Yep, I took the bulkhead off of the temporary frame, trimmed out the center of the oak plywood, flipped it over and put marine grade okume on the flip side.
 |
| From SBR 2013 |
 |
| From SBR 2013 |
 |
| From SBR 2013 |
 |
| From SBR 2013 |
Built the temporary frame for the building jig.
 |
| From SBR 2013 |
01 Jan 2014: Selected a "moaning chair" for today's activities. For those of you not familiar, the moaning chair is defined by Chapelle as "a comfortable seat from which the boat can be easily seen and in which the builder can sit, smoke, chew, drink or swear as the moment demands. Here he should rest often and think about his next job. The plans should be at hand and here he can lay out his work. By doing so he will often be able to see mistakes before they are serious and avoid the curse of the amateur boatbuilder: starting a job before what has to be done to get it right." (Chapelle, Boatbuilding 1941). Now for our purposes, Ms Adrienne has also suggested that we have "cheering chairs" for the "usual visitors."
 |
| From SBR 2014 |
Since I glued the routed the stem pieces THEN glued them together, I needed to trim them a bit after the glue dried. I set the flush trim bit bearing to ride on the center stem piece, routed one side, flipped and sanded the other.
 |
| From SBR 2014 |
Sanded the stem with 80 grit.
 |
| From SBR 2014 |
Skipper Audrey and Capn Jack test fit the stem to the jig and Station 2-4 bulkhead.
 |
| From SBR 2014 |
Stem test fit in the jig and Station 2-4. Edit: The stem is sitting high in the notch. The face still needs to be beveled and the notch needs to be beveled also to match the rise of the stem. Once done, the stem will fit deeper in the notch and a piece of plywood for the garboard will lay flush from stem to frame.
 |
| From SBR 3: Jan 2014- |
 |
| From SBR 3: Jan 2014- |
02 Jan 2014: Went to Ozark Hardwoods in Pensacola, FL to pick up some 1/4" okume marine plywood. Turns out the plywood is 6mm.
 |
| From SBR 3: Jan 2014- |
 |
| From SBR 3: Jan 2014- |
 |
| From SBR 3: Jan 2014- |
They had some cool Lineberry lumber carts.
 |
| From SBR 3: Jan 2014- |
The owner Richard made an awesome kayak.
 |
| From SBR 3: Jan 2014- |
 |
| From SBR 3: Jan 2014- |
I like the epoxy shadow.
 |
| From SBR 3: Jan 2014- |
OBTW the shop, tool, stock of hardwood, and 50 unit storage facility on 2 acres are for sale for 550K. If you by it tell Richard I sent it and I get the kayak as a commission.
 |
| From SBR 3: Jan 2014- |
I love my Dodge Grand Caravan, it carries a full sheet of plywood! Or 7 people. Or pulls a trailer.
 |
| From SBR 3: Jan 2014- |
Capn Jack tried out our coffin smoothing plane on the stem. Blade needs to be dressed and sharpened, but otherwise it did some good work.
 |
| From SBR 3: Jan 2014- |
 |
| From SBR 3: Jan 2014- |
 |
| From SBR 3: Jan 2014- |
The boatyard cat is LOTS of help, she secured this piece of plywood for us...
 |
| From SBR 3: Jan 2014- |
03 Jan 2014: Headed to Wilson Cypress in Milton and grabbed 2 1x10x16s for the stringers and sheer clamps. They take great pride in hand picking great, clean board for my projects. The Sunfish trailer works great as a high speed lumber cart.
 |
| From SBR 3: Jan 2014- |
 |
| From SBR 3: Jan 2014- |
Richard at Ozark Hardwood ripped the stringers and sheer clamps, even let me help and didn't charge me extra for my labor. My brother Kirk used to have 3 labor rates at his shop, $10 per hour for labor, $20 if you watched, $40 if you helped :) Then we picked a piece of 1x10x12 white oak for the keel, put a straight edge on it, planed both sides and ripped it to 3 inches.
 |
| From SBR 3: Jan 2014- |
 |
| From SBR 3: Jan 2014- |
 |
| From SBR 3: Jan 2014- |
 |
| From SBR 3: Jan 2014- |
 |
| From SBR 3: Jan 2014- |
 |
| From SBR 3: Jan 2014- |
 |
| From SBR 3: Jan 2014- |
Swung by Magnolia Bolt next to pick the stainless steel screws, they treated me great and I got to go pull the screws with them. I got 1100 screws for $42. And they ship!
 |
| From SBR 3: Jan 2014- |
 |
| From SBR 3: Jan 2014- |
 |
| From SBR 3: Jan 2014- |
Traced out the transom pattern, forward and aft bulkheads on the okume. Ooops, I could have used cheapo plywood for the transom pattern, oh well, now I have a real nice pattern.
 |
| From SBR 3: Jan 2014- |
04 Jan 2014: Going to use my new old P W Co clamp.
 |
| From SBR 3: Jan 2014- |
Cut out the transom pattern, and the bulkheads.
 |
| From SBR 3: Jan 2014- |
I redid the Station 2-4 bulkhead with okume, ditched the oak because it was not marine grade. Put the wood clamp to work.
 |
| From SBR 3: Jan 2014- |
Started beveling the stem with a Stanly SB 4, first time and it went ok.
 |
| From SBR 3: Jan 2014- |
 |
| From SBR 3: Jan 2014- |
 |
| From SBR 3: Jan 2014- |
05 Jan 2014: Drawing inspiration from Jack's boat, circa 1971.
 |
| From SBR 3: Jan 2014- |
Ripped a 1x8 to start building temporary frames.
 |
| From SBR 3: Jan 2014- |
Picked up some more tools and materials for the build.
 |
| From SBR 3: Jan 2014- |
Gave the boys a clamp each and then asked to borrow them.
 |
| From SBR 3: Jan 2014- |
Ripped 2 sheer clamps to 3/4x 1 1/2. I didn't realize that they were a different size than the stringers when we ripped the cypress yesterday, so we made them all 3/4 by 3/4. So now I have 14 stringers, plenty of spares and the 2 sheer clamps.
Put up some temporary wall on the sailboat shack, so now it is the Small Boat Restoration Shop :) The front and back walls can be rolled up. I'll set up the router, chop saw and band saw in there, and a couple of clamp lights.
 |
| From SBR 3: Jan 2014- |
 |
| From SBR 3: Jan 2014- |
 |
| From SBR 3: Jan 2014- |
 |
| From SBR 3: Jan 2014- |
06 Jan 2014: Working on the frame for the transom, picked up some select pine. Will cut rough shape for top, bottom and sides, put together with half laps, then trim to pattern.
 |
| From SBR 3: Jan 2014- |
Went to Miss Donna's Antiques and picked up a try square, plane, marking gauge and awl. I got the folding 2 foot ruler there a few months ago and I am amazed at how handy it is to use.
 |
| From SBR 3: Jan 2014- |
07 Jan 2014: Grabbed a couple of clamp lights so I can work early evening, move them around as needed.
 |
| From SBR 3: Jan 2014- |
Picked up a inexpensive Blue Hawk router with table for $90 at Lowes. Used it to trim the pine 2-4 frame to the new okume plywood frame. It was a lot nicer than doing it by hand and went quick.
 |
| From SBR 3: Jan 2014- |
 |
| From SBR 3: Jan 2014- |
 |
| From SBR 3: Jan 2014- |
Reattached the bulkhead to the temporary frame, used the framing square and try square to get a good centerline. Edit: I was excited to play with the plywood and got out of sequence with the build, Arch tells me how to build a nice square jig to line up the temporary frame parts in the plans, in sequence of course.
 |
| From SBR 3: Jan 2014- |
 |
| From SBR 3: Jan 2014- |
Going to put wheels on the jig so I can move it around if needed. oops, these wheel's attaching plates turned out to be too big for the 4x4 legs...
 |
| From SBR 3: Jan 2014- |
..so spend some time in the moaning swivel rocker to contemplate whether to get smaller wheels or jury rig these......time's up, off to Lowes for smaller wheels :)
 |
| From SBR 3: Jan 2014- |
 |
| From SBR 3: Jan 2014- |
I turned the jig on its side to put on the wheels, and hey, this would make a good spar bench!
 |
| From SBR 3: Jan 2014- |
Put swivel casters on the middle legs and extension, and swivel locking casters on each end leg. Now it can pivot like a lumber cart
 |
| From SBR 3: Jan 2014- |
I'll lock the wheels down, shim the wheels to leave jig as necessary, and maybe attach a strap before I start beveling. I foresee needing to move the jig out on turning day IOT flip the boat.
 |
| From SBR 3: Jan 2014- |
I use my Uncle's Craftsman tool kit a lot, mostly the ratchet, scredriver and standard wrenches. It's handy to tote out to my work site, saves me lots of trips to get the right size tools.
 |
| From SBR 3: Jan 2014- |
08 Jan 1014: Got the shop set up today, moved some saws in. Also put up dodgers all around the shed, so I can work during rain.
 |
| From SBR 3: Jan 2014- |
 |
| From SBR 3: Jan 2014- |
Cut out the spreaders for the rest of the frames. The cut out, not one, not two, but three transom frames before I got the right size blank. My fault, should have followed the building guide! Here is transom frame 2.0 lounging in today's moaning chair, I have plans for parts of it elsewhere.
 |
| From SBR 3: Jan 2014- |
The usual visitors...
 |
| From SBR 3: Jan 2014- |
Tried using the table saw to kerf the half laps by hand, couldn't find the miter gauge (which I have never used), that is scary without the right guide set up because you're cutting blind. Chewed up the the first board's lap pretty good, so I'll go contemplate for a while on something else.
Added some line, quick release snaps, rings and eyestraps to my "shade sail" aka dodger. Testing out some ideas so I can transform the shed/shop depending on wind/temp.
Wind died down, beautiful day on the Bay.
 |
| From SBR 3: Jan 2014- |
09 Jan 2014: Cut the shoulder at the top of the stem. I tried using a bandsaw, but the blade wandered on one side, so I switched to a jigsaw. The cut was very rough, so I smoothed it out a bit with a rasp. One side is cut a little short, so I am leaving it alone until I get to the point where I pull together the sheer clamp, stem, breast hook and stem facing and see what it needs. I might have to graft a piece back in.
I tried the bandsaw kerf for the half laps, I don't have the skill right now to set it up, so I switched to the router method. SO I needed a wider router bit. Went to Lowes and found a nice 15 piece router bit set for $45, came home and started routing the half laps. Of course I tried the easy way first, to just guide the router by hand along the cut line, and I wandered. So for the next 3 boards I clamped on a guide fence and got nice straight cut lines, When I put the frame together, the first piece was off, so I recut a new board for the portside frame, rerouted it and the transom frame half laps together great! Glue up tomorrow.
| From SBR 3: Jan 2014- |
Got too late to do boat building, so I started fiddling with a carpenter's trestle. I came across the term while looking for information on tools in a 1918 book called Farm Mechanics. Sounds like just the thing I need to steady pieces while I work on them. We had some hunks of cedar, beams from our covered porch in Texas, that were being used as benches and plant stands, so I decided to use those. They'll still get to be benches or plans stand when not being trestles, but now will have new legs. Here is my adaptation so far.
 |
| From SBR 3: Jan 2014- |
10 Jan 2014: Used epoxy and screws to glue up the transom frame. West System 105 Epoxy Resin, 205 Fast hardener because it is high 50s today, 406 colloidal silica for filler. Mixed it up between mayonnaise and peanut butter consistency. Because of the lower temp it did not kick off right away, but a helper might be needed to get all the clamps and blocks positioned, or use 206 Slow hardener. Another tip would be to use spring clamps to hold it while the blocks (to prevent clamp marks) and bar clamp were applied. And the Island of misfit boat parts keeps growing under the work bench.
 |
| From SBR 3: Jan 2014- |
Screws go in from the aft face, they won't show because the transom is faced with wood or plywood.
 |
| From SBR 3: Jan 2014- |
Forward face of transom frame.
 |
| From SBR 3: Jan 2014- |
Shop stove taking care of some yard debris and scraps.
 |
| From SBR 3: Jan 2014- |
Pricked pattern holes for frame 7-0.
 |
| From SBR 3: Jan 2014- |
Cut blanks for frame 7-0, bandsawed them out married up so I'll have the same wiggles on both sides :), them put on butt blocks, cleats, legs and spreaders.
 |
| From SBR 3: Jan 2014- |
 |
| From SBR 3: Jan 2014- |
Beveled the stem notch at Station 2-4, test fit the stem and Station 7-0. I need to level the jig before all the frames go on.
 |
| From SBR 3: Jan 2014- |
Quittin time.
 |
| From SBR 3: Jan 2014- |
11 Jan 2014: Every board for the frames and boat has been through the house so far.
 |
| From SBR 3: Jan 2014- |
Jack's sailboat circa 1971.
 |
| From SBR 3: Jan 2014- |
Beautiful day, waiting for the usual visitors to stop by. Added a flag.
 |
| From SBR 3: Jan 2014- |
Moved the flag.
 |
| From SBR 3: Jan 2014- |
Transom frame rough cut out.
 |
| From SBR 3: Jan 2014- |
Pattern screwed on for routing.
 |
| From SBR 3: Jan 2014- |
 |
| From SBR 3: Jan 2014- |
Inside edges done.
 |
| From SBR 3: Jan 2014- |
12 Jan 2014: Laying out frame for Station 4-8 and 9-4. Need to cut a miter so wood can be butt jointed.
 |
| From SBR 3: Jan 2014- |
 |
| From SBR 3: Jan 2014- |
 |
| From SBR 3: Jan 2014- |
|
| From SBR 3: Jan 2014- |
Cut both sides.
 |
| From SBR 3: Jan 2014- |
Marked the transom sheer clamp and stringer locations.
 |
| From SBR 3: Jan 2014- |
Pricked the pattern.
 |
| From SBR 3: Jan 2014- |
Stacked the frame parts and screwed them together so they can be trimmed together and match up port starboard.
 |
| From SBR 3: Jan 2014- |
 |
| From SBR 3: Jan 2014- |
Added cleats to the frames. This piece of old mahogany Sunfish backer block from Merci found its way into the fray.
 |
| From SBR 3: Jan 2014- |
Glued up Station 11-8 bulkhead.
 |
| From SBR 3: Jan 2014- |
Station 11-8 needs to be built up, and transom frame beveled. We will be ready for keel soon.
 |
| From SBR 3: Jan 2014- |
13 Jan 2014: Shop tour. Nothing like rain on a tin roof!
 |
| From SBR 3: Jan 2014- |
Keel is tacked down to bevel the bottom of the stem, fit transom and mark inside for routing the edges.
 |
| From SBR 3: Jan 2014- |
 |
| From SBR 3: Jan 2014- |
 |
| From SBR 3: Jan 2014- |
 |
| From SBR 3: Jan 2014- |
Measuring back from Station 11-8 to find position of reverse shear transom.
 |
| From SBR 3: Jan 2014- |
 |
| From SBR 3: Jan 2014- |
14 Jan 2014: Working on shear clamp notch on the transom.
 |
| From SBR 3: Jan 2014- |
Shadow puppets.
 |
| From SBR 3: Jan 2014- |
Shear clamps clamped on.
 |
| From SBR 3: Jan 2014- |
 |
| From SBR 3: Jan 2014- |
15 Jan 2014: Went to check out a small local sawmill, we might get some live oak or long leaf pine milled for the boat or our new shop.
 |
| From SBR 3: Jan 2014- |
Had some rocks delivered for the driveway, but the help was goofing off instead of spreading them.
 |
| From SBR 3: Jan 2014- |
16 Jan 2014: Took a trip to Schurr Sails in Pensacola to drop of plans for the Gunter rig main and jib.
 |
| From SBR 3: Jan 2014- |
Here are some sail color options.
 |
| From SBR 3: Jan 2014- |
Spread more rocks, and built up some parrel beads for the sliding Gunter rig.
 |
| From SBR 3: Jan 2014- |
17 Jan 2014: Cap'n Jack scored a Stanley No 4 block plane in original box. Inspectors approve.
 |
| From SBR 3: Jan 2014- |
 |
| From SBR 3: Jan 2014- |
Cut the keel to length at transom.
 |
| From SBR 3: Jan 2014- |
Added the offset centerboard keel strip, bonded with West System 105 epoxy and Fast Hardener (air temp 50 degrees F)..
 |
| From SBR 3: Jan 2014- |
Swung by Miss Donna's Antiques, found a rabbet plane and finger plane.
 |
| From SBR 3: Jan 2014- |
Marked off lines at bulkheads and removed keel in prep for routing 1/4 round edges on the inboard edges of the cockpit.
 |
| From SBR 3: Jan 2014- |
19 Jan 2014: Routed the inboard edge of the keel that shows in the cockpit.
 |
| From SBR 3: Jan 2014- |
Cut the centerboard slot.
 |
| From SBR 3: Jan 2014- |
Epoxied keel to stem, bulkheads and transom.
 |
| From SBR 3: Jan 2014- |
 |
| From SBR 3: Jan 2014- |
20 Jan 2014: Working on the stringer miter.
 |
| From SBR 3: Jan 2014- |
Cut and fit the sheer clamps at bow, bulkheads and transom.
 |
| From SBR 3: Jan 2014- |
21 Jan 2014: The dodgers are working great to keep the wind down. They are set on yardarms wirh parrel beads so I can furl them on nice days an open up the shed.
 |
| From SBR 3: Jan 2014- |
 |
| From SBR 3: Jan 2014- |
 |
| From SBR 3: Jan 2014- |
Split a stringer at the end, but there is still a lot of stringer left on the other end, so I moved it forward and cut the bevel again.
 |
| From SBR 3: Jan 2014- |
 |
| From SBR 3: Jan 2014- |
Fit 3 sets of stringers, 2 more sets to go!
 |
| From SBR 3: Jan 2014- |
 |
| From SBR 3: Jan 2014- |
 |
| From SBR 3: Jan 2014- |
23 Jan 2014: Fit more stringers.
25 Jan 2014: Fit last 2 sets of stringers.
 |
| From SBR 3: Jan 2014- |
 |
| From SBR 3: Jan 2014- |
 |
| From SBR 3: Jan 2014- |
 |
| From SBR 3: Jan 2014- |
I cut off each extra piece at the transom as I went along.
 |
| From SBR 3: Jan 2014- |
 |
| From SBR 3: Jan 2014- |
Looking good, maybe we'll stop here :)
 |
| From SBR 3: Jan 2014- |
 |
| From SBR 3: Jan 2014- |
26 Jan 2014: Sick day :(
27 Jan 2014: Removed stringers and rounded inboard edges that will show inside the boat. Then epoxied the stringers and sheer clamp to the stem, bulkheads and transom.
 |
| From SBR 3: Jan 2014- |
Used some painters tape to reduce the amount of epoxy that squeezed onto adjacent surfaces.
| From SBR 3: Jan 2014- |
 |
| From SBR 3: Jan 2014- |
Tied a bow line to the sheer clamp so the boat won't float away...
 |
| From SBR 3: Jan 2014- |
15 Feb 2014: Cut some pine strips for laminating the stem facing.
 |
| From SBR 3: Jan 2014- |
Wrapped the stem so the facing doesn't stick, the lamination will be shaped then removed for planking.
 |
| From SBR 3: Jan 2014- |
Started bending the laminations to the stem. Used West Systems 105 resin/ 206 slow hardener/ 406 filler to bond the strips.
 |
| From SBR 3: Jan 2014- |
Stem facing drying, we had some cracks at the sharpest bend, so we clamped it down and we'll check it out once it dries, it might have to be redone.
 |
| From SBR 3: Jan 2014- |
17 Mar 14: St Jacques moved to the garage for beveling and planking.
 |
| From SBR 3: Jan 2014- |
12 Jun 2014: Back in the garage!
 |
| From SBR 3: Jan 2014 - Jun 2014 |
13 Jun 2014: Picked out some cypress to make a new stem.
 |
| From SBR 3: Jan 2014 - Jun 2014 |
16 Oct 2014: The first stem was cracked at the sharp bend at the base of the stem, so it was scrapped. The first stem's laminations were not a consistent thickness, that contributed to them cracking when they were bent. I went over to Fred's house and he helped cut out another stem using his larger shop saws. Fred has built two Penobscot 14s and has become an invaluable resource, one of his boats was an award winner at the Madisonville Boat Show.
This time I am trying cypress from my local mill, and Fred mentioned that he used white oak for his boats.
1x6 cypress, ready to rip lengthwise. The boards were cut from a 10 foot board, and are long enough to wrap the stem.
 |
| From SBR 4: Jun 2014 - |
Cutting the strips to about 3/16 inch thickness. Fred used push sticks to hold the board tight to the fence and push it the last bit, I helped guide the board as it came out of the saw.
 |
| From SBR 4: Jun 2014 - |
 |
| From SBR 4: Jun 2014 - |
14 Oct 2014: Dilemma...work on St Jacques or read WoodenBoat Issue 241? I think I'll get the stem facing glued up first...
 |
| From SBR 4: Jun 2014 - |
Fred has built 2 Penobscot 14s, helped me by ripping some cypress into 3/16 inch thick strips. We ripped enough to build up the stem(bow) facing to 1 1/4 inch.
 |
| From SBR 4: Jun 2014 - |
Stem facing laminations will be epoxied then stacked up like this. I will also add a screw in the top end to keep that end stable as we bend the rest to the stem.
 |
| From SBR 4: Jun 2014 - |
WEST SYSTEM Epoxy 105 Resin with 206 Slow Hardener and 406 Colloidal Silica to thicken to about a syrup consistency. I mixed up 3 batches of about1/3 cup to cover front and back of boards. Left the outside facing boards as clean as I could. And put down some plastic trash bags to keep the work area clean.
 |
| From SBR 4: Jun 2014 - |
Clamping the stem facing to the stem. I put some plastic bags around the stem, because once the facing dries to shape it is removed, then reinstalled after planking.
 |
| From SBR 4: Jun 2014 - |
Stem facing clamped.
 |
| From SBR 4: Jun 2014 - |
Stem facing clamped. Also we wiped off the epoxy "squeeze out."
 |
| From SBR 4: Jun 2014 - |
Started rough beveling the keel using a power planer, cleaned up with a jack plane.
 |
| From SBR 4: Jun 2014 - |
Sunset.
 |
| From SBR 4: Jun 2014 - |
15 Oct 2014: Removed the transom frame brace.
| From SBR 4: Jun 2014 - |
19 Oct 2014: Tracing the transom face for the Penobscot 14 with the 1/2 pattern. I used the square to put vertical lines on the okume blank so I could square up the pattern piece to the grain.
 |
| From SBR 4: Jun 2014 - |
Cutting out the transom face.
| From SBR 4: Jun 2014 - |
DeWalt jigsaw used to cut out the transom face. The inner line will be helpful to know wher to brush on the epoxy and to line up the board. Tip: I like to tie my cords together so they don't pull apart.
| From SBR 4: Jun 2014 - |
Do you think the Skipper will share the chips? And check out those boat shoes!
 |
| From SBR 4: Jun 2014 - |
Transom face epoxied onto frame and clamped. Used my Alcort clamps. One end of the boat is complete!
| From SBR 4: Jun 2014 - |
19 Oct 2014: Clamps removed from stem facing and plastic wrap removed. The facing will be set aside, Need some planks now.
 |
| From SBR 4: Jun 2014 - |
21 Oct 2014:
I read an epoxy tip from Geoff Kerr of Two Two Daughters Boatworks, he said he leaves the epoxy cups out so he can check them the next day to see how the epoxy cured. That way he gets the warm fuzzy feeling that everything bonded together. I'd say this epoxy cured great!
 |
| From SBR 4: Jun 2014 - |
Trimming the transom face, showing the compact router positioning. I highly suggest two hands for this tool, it can get loose and gouge you or the workpiece.
| From SBR 4: Jun 2014 - |
Set the flush bit on the trim router to trim the transom face.
| From SBR 4: Jun 2014 - |
Finishing the bevel on the transom face.
| From SBR 4: Jun 2014 - |
Cleaning up the edge of the transom face.
| From SBR 4: Jun 2014 - |
Transom face trimmed, keel beveling is next.
| From SBR 4: Jun 2014 - |
?25 Oct 2014: St Jacques has a new Sister, we picked up a 1959 Sorg Runabout, a 15 foot cedar planked motorboat.
 |
| From SBR 4: Jun 2014 - |
"Willow" sits on a classic TeeNee trailer.
 |
| From SBR 4: Jun 2014 - |
05 Nov 2014: Shop stool will help me reach the keel of the Penobscot 14 for beveling.
 |
| From SBR 4: Jun 2014 - |
Rough bevel with the power planer, then cleaned it up with a jack plane.
 |
| From SBR 4: Jun 2014 - |
 |
| From SBR 4: Jun 2014 - |
 |
| From SBR 4: Jun 2014 - |
 |
| From SBR 4: Jun 2014 - |
 |
| From SBR 4: Jun 2014 - |
17 Nov 2014: Marking line for scarf. 6mm plywood is approx 1/4 inch so an 8 to 1 scarf would be about 2 inches per board. I put a scrap piece of shelving underneath that is white, so if I see white start to come through the bottom feather edge then that is a limit.
 |
| From SBR 4: Jun 2014 - |
Worked the belt sander back and forth, visualizing the slope of the scarf. Tried to get the edges as straight as possible, but when it is gued up all you see is the feather edge. I'd like at least one straight feather edge for the inside hull, in case I change my mind and finish the interior bright vs paint.
 |
| From SBR 4: Jun 2014 - |
Clamping first garboard plank on the Penobscot 14, I'll get a few screws in then do some rough trimming with a jigsaw.
 |
| From SBR 4: Jun 2014 - |
Half of first plank clamped. Marked the scarf edge so I can align it when it is ready for final installation. Plank is dry fit first, screwed down, then removed, trimmed and reinstalled with a bead of thickened epoxy along the stringer and keel. The keel screws are countersunk and will stay as part of the boat. The stringer screws will be removed after epoxy sets for a day and next plank overlaps.
 |
| From SBR 4: Jun 2014 - |
Using this folding ruler to transfer marks for the stringer edge onto the outer hull. Then I can see where to put screws into stringer. Black marks will be used to realign planks during final installation.
 |
| From SBR 4: Jun 2014 - |
These marks show edge of stringer underneath.
 |
| From SBR 4: Jun 2014 - |
Adjusting the countersink/pilot bit for a layer of 6mm plywood with 3/4 inch stringer underneath.
 |
| From SBR 4: Jun 2014 - |
Started rough trimming the stringer edge of the garboard plank and keel wit a jigsaw. Cleaned the plank edge on the keel up to the aft bulkhead with a hand plane then a chisel.
 |
| From SBR 4: Jun 2014 - |
18 Nov 2014: Fitting forward garboard plank on port side. Plank shifted a little, now I have a pilot hole to fill and new alignment marks to draw. Lesson Learned: Don't mark alignment of plank to stringer until after plank is screwed down.
 |
| From SBR 4: Jun 2014 - |
Plank clamped in place until I can get a few screws in. This is a 3 handed job.
 |
| From SBR 4: Jun 2014 - |
I trimmed the keel edge of the plank with a reciprocating saw, then used a jack plane to get the correct angles. It is flush at the stem, then angled further back so the opposite side garboard will overlap it. Most of those plank angles further back will be planed to a one inch flat that the deadwood will attach to.
 |
| From SBR 4: Jun 2014 - |
Keel edge roughed out, the opposite side garboard will overlap it starting just aft of where the stem ends and keel starts.
 |
| From SBR 4: Jun 2014 - |
This looking at the fist plank from inside the boat. Keel is at the top, first stringer at the bottom. I used a pencil to trace the outside edge of the stringer onto the plank. Now we'll remove the plank and rough trim it to size. Then reinstall with glues and screws and trim it flush along the stringer with a compact router.
 |
| From SBR 4: Jun 2014 - |
First scarf in progress. The ragged edge at the bottom is from where I dropped it But luckily most of that edge will be trimmed off and then lapped by 3/4 inch by the next plank. Those lower screws will be used to hold the plank in place for about 24 hours while the thickend epoxy dries, then removed before the next plank is laid.
 |
| From SBR 4: Jun 2014 - |
19 Nov 2014: Picked up more 6mm okume from Ozark Hardwoods. First plywood run for the Odyssey, it was a tight fit.
 |
| From SBR 4: Jun 2014 - |
05 Dec 2014: Pensacola Boat Store has great tech advice, low prices and they ship! Just ordered some Cetol from them for the Sorg.
 |
| From SBR 4: Jun 2014 - |
26 Dec 2014: Port garboard plank trimmed to keel and stringer. I used a trim router to trim the edge along the stringer. Rough trimmed the keel edge with a reciprocating saw then used power planer and jack plane to finish the keel edge of the plank. I'll use it to mark a rough pattern for starboard side then glue and screw it.
 |
| From SBR 4: Jun 2014 - |
Used the port garboard as a pattern for the starboard side.
 |
| From SBR 4: Jun 2014 - |
Epoxy was thickened with bridging filler to mayonnaise consistency.
 |
| From SBR 4: Jun 2014 - |
When the plywood is screwed to the stringer, we want to see a thin bead of the thickened epoxy squeeze out. Wipe the excess off and clean residue with acetone.
 |
| From SBR 4: Jun 2014 - |
Port garboard epoxied and screwed, Scarf clamped. Stringer screws will be removed in 12-24 hours.
 |
| From SBR 4: Jun 2014 - |
Scarf lightly clamped with homemade clamps. Blocks are wrapped in saran wrap.
 |
| From SBR 4: Jun 2014 - |
29 Dec 15: Transferring upper edge of stringer to outside of plank using carpenter's rule.
 |
| From SBR 4: Jun 2014 - |
Rough trimmed the edge with a jigsaw then used a trim router with a flush bit to clean up the edge.
 |
| From SBR 4: Jun 2014 - |
Trimming keel edge of starboard hardboard with reciprocating saw.
 |
| From SBR 4: Jun 2014 - |
07 Jan 2015: Happy New Year! Starboard garboard glued, screwed and clamped. Scarf clamps added.
 |
| From SBR 4: Jun 2014 - |
 |
| From SBR 4: Jun 2014 - |
Next up for Penobscot 14 "St Jacques" we glue and screw the starboard garboard and then plane a 1 inch wide flat down the keel. Or the keel can wait til more planks are attached. We'll make sure the jig is level before we do that.
 |
| From SBR 4: Jun 2014 - |
This clamp will be used to hold planks while we fair them. A plank will be rough fit, marked and then taken off for fairing at the bench. Picked up the clamp at Live Oak Traders in Gulf Breeze.
 |
| From SBR 4: Jun 2014 - |
07 Apr 2015: Rounded up oars and anchors.
 |
| From SBR 4: Jun 2014 - |
 |
| From SBR 4: Jun 2014 - |
Took some time off to enjoy Summer boating!
10 Nov 15:
Added strips to fill the reverse bevel on the garboard, just follow Arch's instructions. Fastened them with thickened epoxy.


19 Nov 15:
Took the big chunks off the garboard bevel strip with a power planer, then belt sander, finished with a rebate plane. The strip makes a landing for the next lap and gradually disappears to nothing forward of the aft bulkhead.


22 Nov 15:
Used 18 inch craft paper to make a rough pattern for port plank #2

I creased the paper along the edge of the stringer then trimmed it a little fat, didn't want to end up short in one spot.

I creased the paper along the lower stringer by running my finger along the stringer. Then I used this 3/4 inch block to draw the lap. Next I'll cut the paper and leave some room for error.

I'm using 8 foot plywood so there has to be a scarf joint. I marked the pattern where the scarf joint would be, and now I'll cut each fore and aft section of plank 1 1/2 inches past that line, that will give us the 3 inch overlap for scarfing the 1/4 inch plywood (12 to 1). That pattern is for the aft section of plank on the second row. Also keep in mind that the scarfs on each row of planking will be off set so they don't all lay on top of each other.

Roughed out the scarf with a power planer, smoothed them with a belt sander.

The plywood has to be screwed to the stringer so we can mark it for trimming. So how do we know where the stringer is? This fancy tool will be used to reach under the plank and hook onto the stringer. Then I can use the shorter leg to mark where to drill pilot holes for the screws.

We marked stringer lines onto planks. We have to mark the inboard edge of the lower stringer and the outboard edge of the upper stringer. Once the plank is removed we flip it over and add the 3/4 inch lap for the lower stringer.
Trimmed as close as I dared to the stringer lines. Final trimming will be done on the boat with a plane for the lower stringer and flush bit router for the upper stringer.

Trimmed the upper stringer with a compact router flush bit.
Used a small handsaw then belt sander to finish the bow. Next we'll take the plank off and use it as a rough pattern for the starboard side, then epoxy and screw it for good.

23 Nov 15:
Made some more clamps so I can work 2 scarfs at a time. Cut them from a 2x6 and picked up the bolts/washers/wing nuts at Ace hardware.


24 Nov 15:
Beveled the ports side plank. Took off big chunks with a belt sander then finished it with a hand plane.

Started tracing pattern for plank 3.
01 Dec 15:
The scarfs on the planks are alternated every other plank so they don't all fall together. And with a 14 foot boat and two sheets of 8 foot plywood overlapped by three inches, there is not a lot of wiggle room when laying out the planks. This top scarf is backwards, the bow of the boat is to the left, so I should have overlapped the forward plank over the aft plank. Not a big deal, but that is the convention. Then what happened was I forgot that I did that incorrectly and laid out plank number 3 using that scarf line to judge a center for the next scarf location. That moved the 3rd plank even further forward and the aft plank ended up being too short by about an inch. After studying the issue in the moaning chair for a while I determined that I could re-cut a longer forward plank and shift everything aft.


For a 12:1 scarf, a 1/4 inch piece of plywood will overlap 3 inches.

Marking the stringer location onto the plank from inside. We'll take it off, add 3/4 inch for the lap and trim it close with a jigsaw. The plank on the stringer closest to the sheer is trimmed with a router flush bit.

3rd port plank rough fit. I marked the location of the stringers from inside the boat, next I'll remove the plank, flip it over and add 3/4 inch to the lower edge of the plank IOT account for the lap. That new line will be the trim line to follow with a jigsaw. After it gets trimmed I'll plane and sand the lower edge as fair as possible, because once it goes back on the boat I don't want to do a lot of sanding or planing, as that could remove the edge of the plank or damage the plank that it laps over.


05 Dec 15:
Sunset at the casa.

Trimmed port plank 3 and sanded it fair.

Grabbed some one inch screws from Jamestown Distributors, I 'll use them to screw down the lower lap of each plank.

A shipwright suggested I scuff up the head of each screw so it will hold fairing compound better. The screw on the left was scuffed up with the belt sander. I also washed the screws in acetone to remove the coating that keeps them shiny during shipping.

Tracing starboard plank number 3. The usual crowd is supervising.

Warm enough to epoxy, I'll use the Fast Hardener to help the epoxy set up faster.

Epoxy resin and hardener before mixing.

Epoxy thickened with filler, somewhere between mayonnaise and peanut butter consistency.

Scarf buttered up and stringers ready for the forward section of port plank 3.

Trimming the plank close to the transom, final fit will be done with a plane iron.
Light clamping on the upper stringer, so all the epoxy doesn't squeeze out. Lower stringer is fastened with screws.

Starting to look boatish.

I bought clamps for the family and initialed them so they'd know who was holding what....sure was nice of everyone to let me "borrow" them

Put a coat of WEST SYSTEM Epoxy 105 with 207 Special Clear hardener on the transom, that will help keep gunk from staining it.
06 Dec 15:
The Penobscot 14 is being planked with 6mm (1/4 inch) marine grade okume plywood. Marine grade means there are no voids and waterproof glue, per British Standard (BS) 1088.

Fitting and trimming starboard plank 3.

Made the pattern for port plank 3, remembered to add 3/4 inch to the keel edge for the lap.

Port plank 4 pattern, I think I'll cut it like that

The tool trolley has been working out great.

Willow keeping an eye on St Jacques. Starboard plank 3 attached with thickened epoxy and lap also has stainless steel screws. Sheer edge clamped until it dries.

12 Dec 15:
These stringers required a significant bevel IOT allow the plank 5 lap to lay flush with plank 4.

Starboard plank 5 epoxied and screwed. Skipper supervised and helped.

Starboard plank 5 epoxied and screwed!

13 Dec 15:
Trimmed, epoxied and screwed port plank 5.

Ducked under the boat and took a picture of the bilge, looking towards the bow.

Keel slot for the centerboard, I drilled small holes along the inner edge and will use them to draw a cut line on the bottom.

Drilled holes along the inner edge of the centerboard slot, then connected the dots. That line was my cut guide, I used a jigsaw and left it a little proud.

Started the cutout for the centerboard with a jigsaw then finished it with the router. You can see how the centerboard will be offset to port of the one inch deadwood (keel).

One of the next steps is to plane a one inch flat along the keel, that is where the deadwood will attach. The level is marked for one inch. Before I proceed further I'll level the jig.

15 Dec 15:
Attached the whiskey plank today, time to celebrate.


14 Jan 16:
Stem and deadwood epoxied and screwed.

Skipper wandered by to see what was fascinating me today....

Fair. Sand. 1 coat of epoxy. Sand. Another coat of epoxy. Sand. Prime with tinted primer. Sand. Paint another coat. Sand. Final coat.

20 Jan 16:
Made some railways to roll boats out for sanding, got tired of dragging the jig through the dirt. They'll stow under the carriage house when not in use.

01 Feb 16:
Sanded the second round of fairing compound, vacuumed the hull and wiped it down with acetone. We are ready for the first coat of epoxy. St. Jacques chatting it up with Barbashelas floorboards.

04 Feb 16:
WEST SYSTEM Epoxy 105 resin with 205 Fast Hardener first coat. Used the foam roller


WEST SYSTEM Epoxy 105 resin with 205 Fast Hardener first coat. Brushed the seams then made sure I goot a good thin coat.

Trying to organize my tools, they are kind of mobile so I can move the saws around to where the job is. The tool trolley has been a great success, it follows me around alot. And the wagon has been chugging along for about 20 years.

05 Feb 16:
Rinsed off the blush from epoxy coat 2, light scrub with scotchbrite.

2nd coat of West System on the Penobscot 14 St Jacques.

Epoxy coat number 2 drying.

06 Feb 16:
First coat of 50/50 primer and Rustoleum Topside Oyster White (oil based).

08 Feb 16:
Rolled and tipped first coat of Rustoleum Marine Topside Oyster White. That is the same color that is on our 1959 Sorg Runabout Willow and we liked the color. The Rustoleum is also oil based and we wanted to experiment with that a bit on wood boats.
Roll and Tip Tips:
1. We have used Interlux Brightside, Pettit EZpoxy and Rustoleum Topside with great success. We pick based on what color we need and sometimes what is locally available. The tip here is to pick a brand and use their thinner (if needed). Read the direction, don't thin at all or thin 5-10% if it is going to be 80+ degrees while you are painting or if your paint is not flowing well.
2. The first area you do can be splotchy until the roller gets fully wet out, not dripping paint everywhere but just fully wet. So get a piece of 2x2 scrap and roll that first to get your roller and brush wetted and get a feel for how your chosen paint and roller combo will flow.
3. Make sure you buy a roller meant for the type of paint that you are using, some paints can eat the foam. On the last project I cut a West system 7 inch roller in half and slid that onto one of those small roller frames, it worked great on the planks. Don't use a basic roller from the hardware store.
4. I use a china bristle paint brush to tip the paint, but if you use a foam brush, buy a good one, not the cheapo pack.
5. For the lapstrake, I worked up and down, plank by plank about 18 inches at a time. I was concerned that if I went all the way down one strake I'd come back and have to deal with tacky paint along the lap. Start with about a one foot section until you get the hang of it. I brushed the lap seam first, then rolled a section of the plank and tipped it. Brush the next seam down, roll and tip. Repeat til you're done. For a flat hull many people recommend rolling vertically then brush it out horizontal for best coverage.
5. Keep the brush wet so it doesn't drag and use very light passes.
6. If an edge gets dry/tacky, work a little fresh paint into it to wet it out again. Do smaller section or add a little thinner.


25 May 16:
Turnover cradle. Got the boat off the jig and onto the cradle while the crew was in town.


Click here for St. Jacques' Log.