The Drascombe Dabber is a great little family sailboat, easily powered by sail, oar or small kicker. The balanced lug yawl carries 118 square feet of sail, distributed over a jib, balanced lug main and self tacking mizzen, further increasing the versatility of the boat.

(Image: Sailboatdata)

(Image: Sailboatdata)
15 Nov 17:
Pretty little boats. We picked on up recently, Hull Number 530, built in 1979 by Honnor Marine in Devon, England. Known to look better than this.


Very popular boats to date, over 900 produced and they are still being built by Sharon and Simon at Churchouse Boats.

(Image Credit: Honnor Marine Drascombe Flotilla Brochure)

(Image Credit: Honnor Marine Drascombe Flotilla Brochure)
Jib and mizzen. Missing the main.


16 Nov 17:
Removed non standard plywood floor that covered mast step and centreplate eyebolt. Took her to carwash, put on HazMat suit, vacuumed out leaves and acorns, then spent $70 giving her a fresh water rinse. Hey, there's a boat under there, in pretty decent shape.


Measured some cleats to order the right size line for centerplate uphaul, jib sheets, mizzen sheet, mainsheet etc...kind of reverse engineering. R&W Ropes was kind enough to send me marked samples of New England Rope Vintage a while back, so that helped take out the guesswork.


17 Nov 17:
Stepped the main and mizzen mast, they are in good enough shape to be saved. Stays are in good shape as well as the halyards.

Picked up some cumaru (Peruvian teak) for the floor, started cutting out new floorboards.


18 Nov 17:
Skipper and Capn Jack inspecting my work. Capn Jack has wanted a Dabber since 1979, coincidence that VICTORY is a 1979?

20 Nov 17:
Worked on the floor boards for the Dabber. Laid the boards inside the boat upside down, on opposite side of where they will fit when finished. Set the spacing and attached cleats to hold the boards together with silicone bronze screws.


We found a used main and it arrived in the mail today.


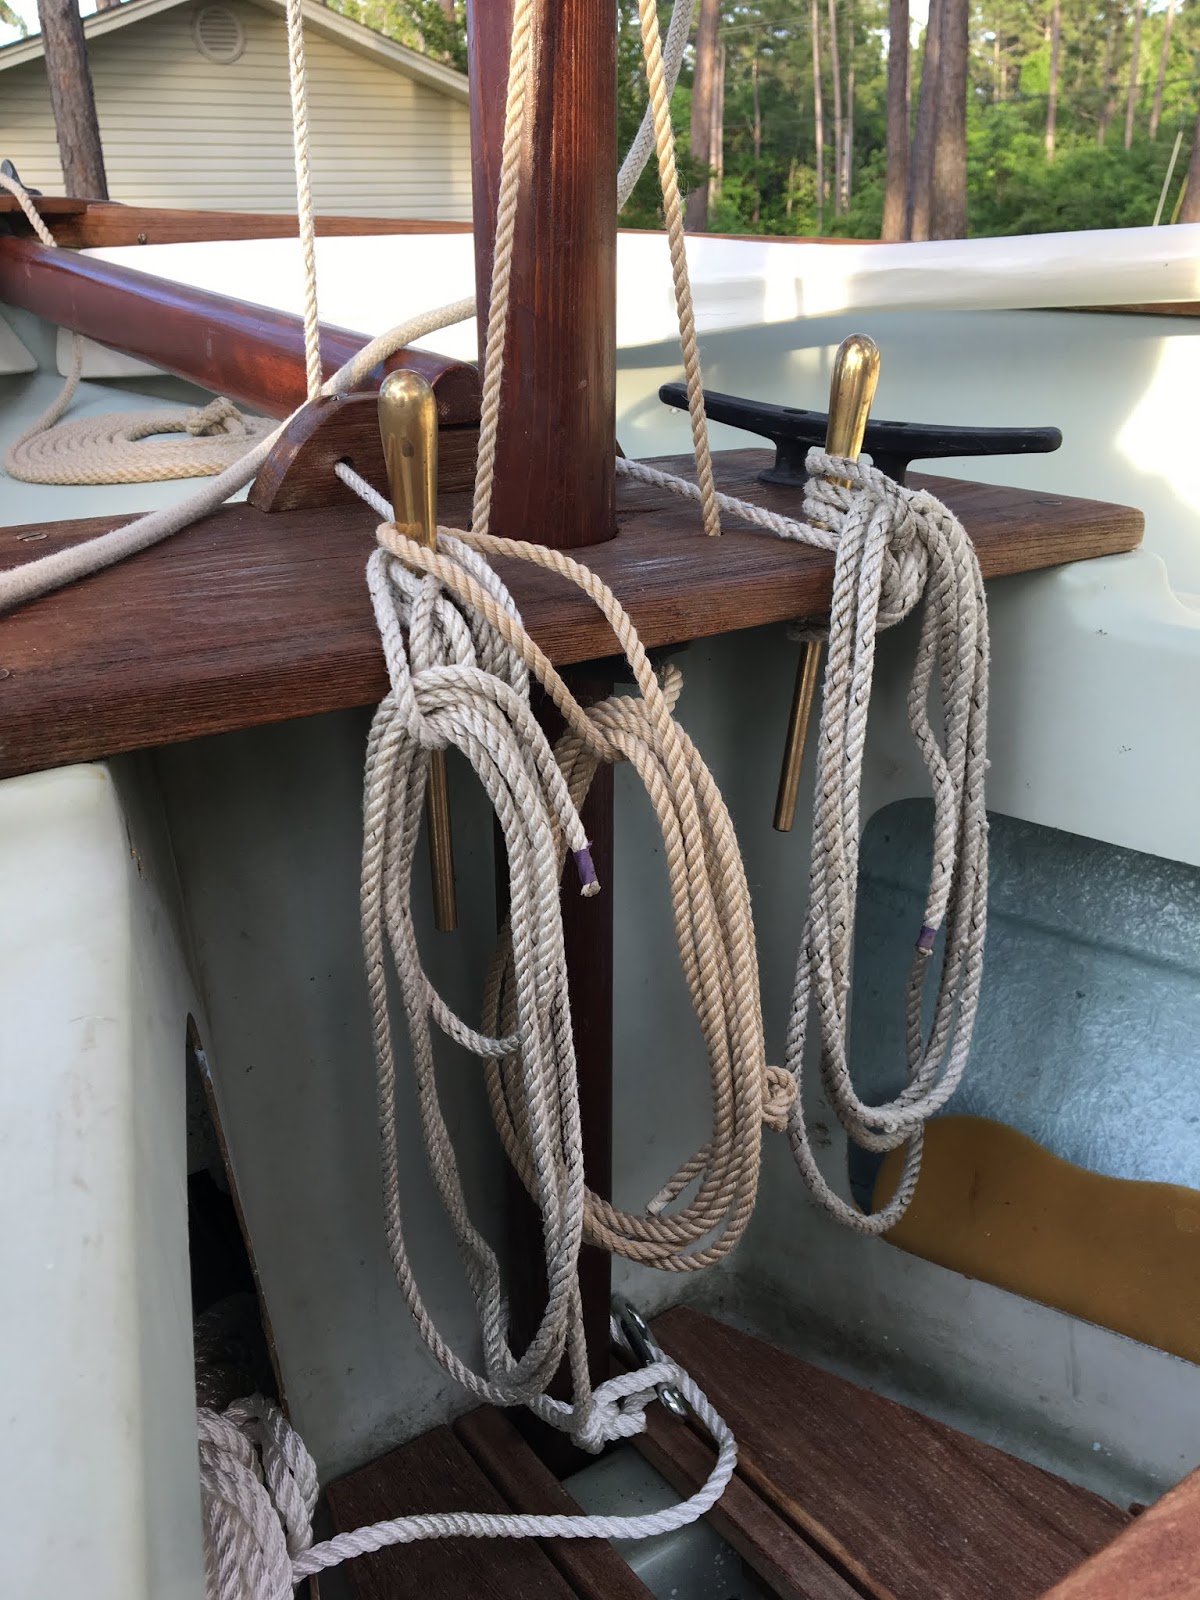
Jib halyard on portside pin, main downhaul in the middle that cleats underneath the thwart in a jam cleat, and main halyard on the starboard pin.

Yard is tied about 3 grommets up.


26 Nov 17:
Rigged the centreplate uphaul with New England Rope Vintage and Tufnol blocks, purchased from R&W Rope.


Reattached the bilge rubbers.


27 Nov 17:
Test fit for our Suzuki 4 stroke 2 1/2 hp. As configured the motor will not tilt up enough to engage the uplatch. We may just add a line and tie it to the ubolt on the inner transom if we need to raise it, or cut the new outboard pad just a bit lower.


28 Nov 17:
Dropped VICTORY in the bay for a leak test and yes there were leaks. The water was coming in through the holes where screws go through the hull to hold on the bilge rubbers. So we pulled the boat back out, then used the tilt trailer to place the boat in the yard.
Once the boat was on the grass we careened it by pulling the main halyard, which is attached to the top of the mast. One person was able to pull it over and another tied some lines to a large pine tree and the carriage house pergola.

The centreplate looks almost new.

Small area of rot on the keel.


Removed the bilge rubbers, they pried off easily with a tiger paw pry bar. The screws were very corroded and had lost their grip.

Sanded the portside hull with 60 grit on a random orbital sander. The bottom paint and some flaky paint came off easily.


29 Nov 17:
Filled the old bilge rubber screw holes with TotalBoat THIXO. We will drill through that to make the right size not leaky hole when we reinstall the rubbers.


Thought I found another hole to be filled but it turned out to be the mizzen mast step drain hole.


30 Nov 17:
Rolled and tipped a coat of Pettit EZPrime on the garboard, let it dry 4 hours the applied second coat. We hope to get the bottoM painted and dry a few days while the trailer is being repaired at Eddie English Boat Trailer.


01 Dec 17:
Rolled and tipped the first coat of Pettit Easypoxy Blue Ice on the garboard.


Painted the bilge. Skipper started removing more grime with Tilex, it worked great. She got the port side cleaned up.

Removed rotten section of the keel rub strip, about 12 inches.


Cut new section from teak and fastened with TotalBoat THIXO.


02 Dec 17:
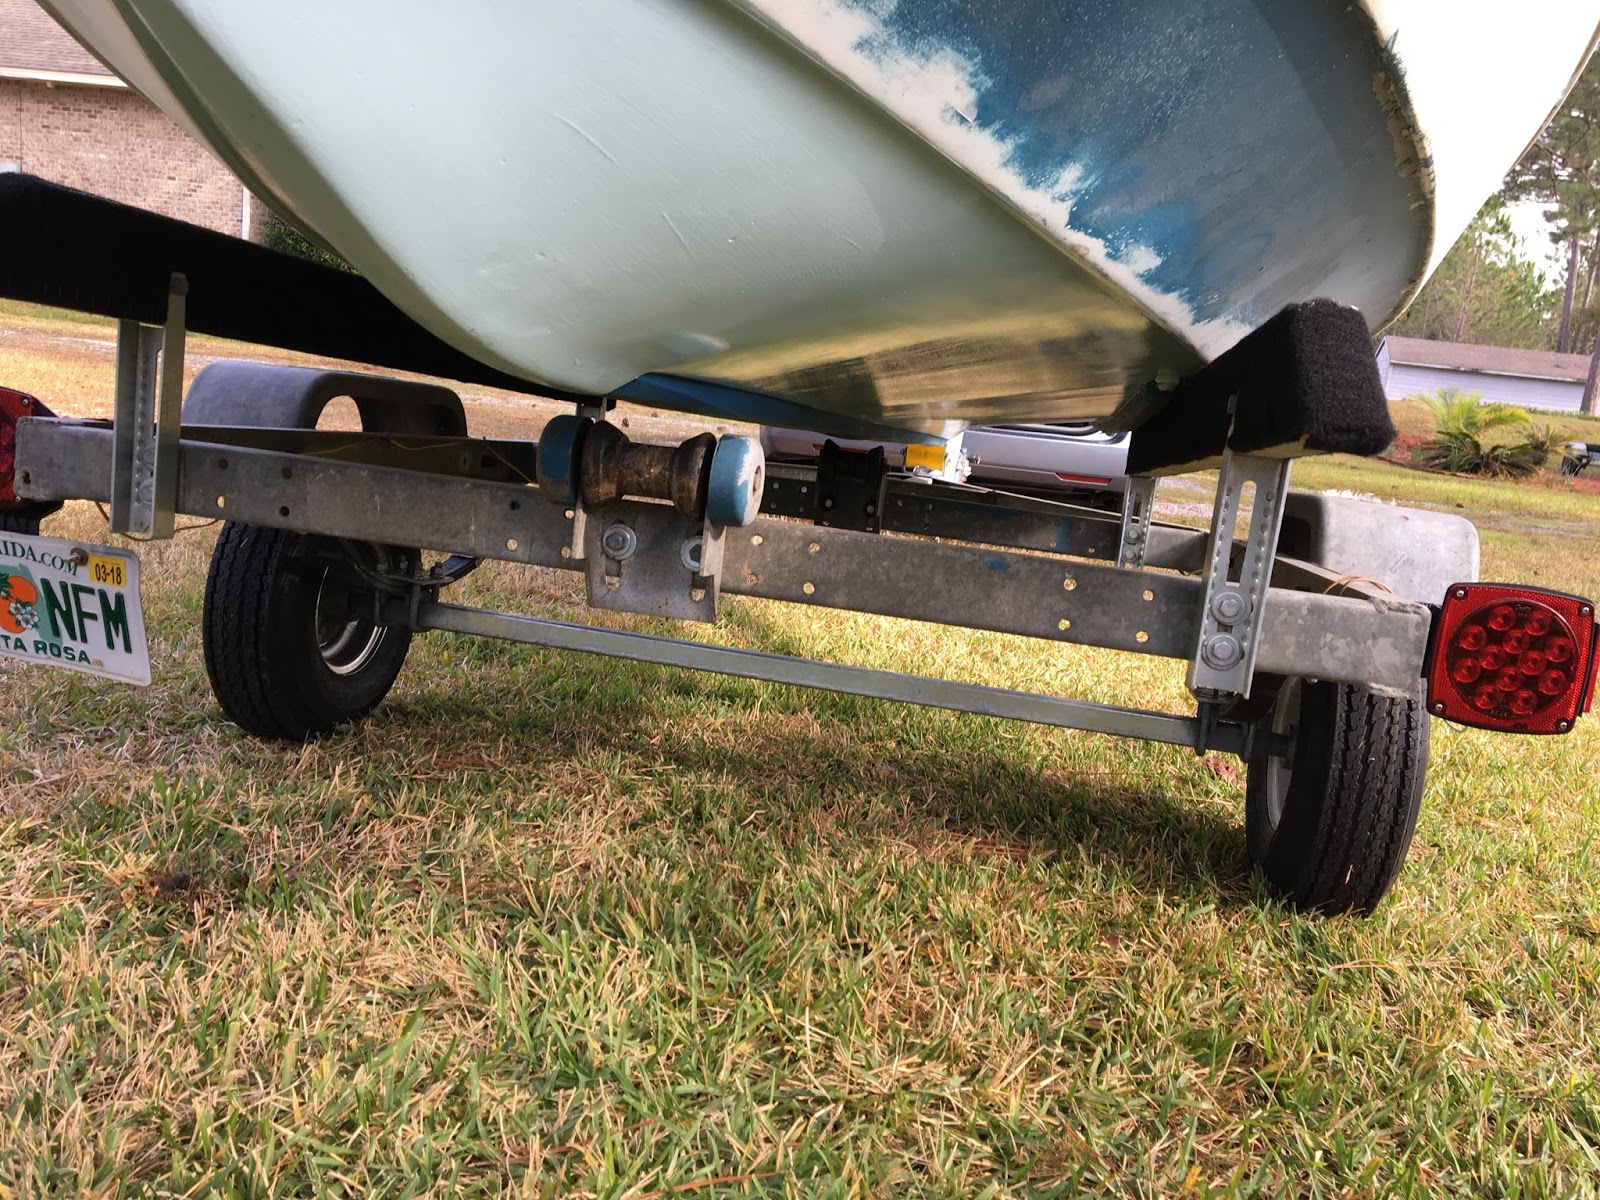
Tongue was a little bent! Eddie English and crew got the trailer road ready again, added 6 inches to the new tongue, put on new axle, springs and upgraded tires. Also got the new lights that I put on working, I learned that tilt trailers sometimes need a jumper ground wire to best ground the tongue to the main frame. Otherwise the ground tries to go through the rusty tilt bolt.


Sanded the keel rub strip with 60 grit on the belt sander then 120 on the random orbital sander.


Second coat of Pettit Easypoxy Blue Ice.

Cut a new outboard mount from cumaru, fastened it with marine stainless bolts, washers and stop nuts.

The centreplate!

04 Dec 17:
Bottom repairs are finished and trailer is back from rehab, loaded the 550 pound boat with ease.


New tilt latch and safety chain.


The boat is balanced great, just need to adjust the keel rollers.

Went to buy a piece of 1/4 inch marine grade fir plywood to laminate a new transom cap. The first piece they pulled was cupped and they were going to put it aside. I told them it looked perfect for what we needed and sure enough it has a perfect curve to match the transom top.


The boat and trailer have not needed chocks for a long time.

05 Dec 17:
VICTORY enjoyed camping out on the work deck, under cover of a tarp. Much better than uncovered under a tree.

Part of the transom cap flange was gone, probably damaged when the original cap was removed years ago. Those holes in the flange are for screws to hold the cap in place. In this photo we have smoothed and beveled out the fiberglass around the repair area with 60 grit on a dual action sander to get a nice clean surface for epoxy and glass. Multiple layers of 4 oz fiberglass strips were used to fill the void, wet with TotalBoat High Performance epoxy and THIXO. Another strip wrapped the adjacent flange, then plastic sheet was applied, wood strips to hold the repair to shape the patch and finally clamps to hold the patch while the epoxy dried.

Multiple layers of 4 oz fiberglass strips were used to rebuild the transom cap flange, wet with TotalBoat High Performance epoxy and THIXO. Another strip wrapped the adjacent flange, then plastic sheet was applied, wood strips to hold the repair to shape the patch and finally clamps to hold the patch while the epoxy dried. We also filled the old screw holes and splits in the gunwale with THIXO. In other news the planer in the background was used to plane a piece of teak down to 1/4 inch, to be the top layer on the cap.

Traced the aft curve of the transom cap on the boat, then used the old cap to get the fore-aft measurement. Cut the profile with a DeWALT jigsaw.

Sanded the aft end and sides of the cap to fit with 60 grit on a belt sander.

Once the aft curve was defined we moved it 8 inches forward to get the foward curve. Also marked the approximate location of the mizzen mast partner.

The transom cap will be 3/4 inches thick, two 1/4 inch layers of fir plywood and a top layer of teak. the teak cap had to be cut from two pieces.

Transom cap layers epoxied with TotalBoat THIXO, clamped to the boat to form the proper curve.

There's a Drascombe Dabber transom cap under there somewhere, two 1/4 inch layers of marine grade fir plywood capped with a top layer of teak. Glued together with TotalBoat THIXO. I had to piece together the teak, those fore and aft strips are clamping down the seam between the two pieces, with plastic sheet underneath to keep the from becoming part of the boat.

Cut pieces of teak for a new forward seat and edge glued them with TotalBoat THIXO. The seat is removable and is placed just forward of the centerboard to be a rowing station.

VICTORY liked sleeping on the work deck that she asked to bunk inside with ZIP and WINNIE, raining outside.

07 Dec 17:
Took some of the clamps and plastic off of the new teansom cap, it looks great and is ready for sanding and final fitting. Skipper suggested we keep the clamps on until it is attached to prevent springback as it finishes drying. The fir plywood already had a curve to it but the cumaru teak strips did not, so they might try to straighten out a bit when unclamped.

13 Dec 17:
Repaired broken fiberglass on the transom cap flange with TotalBoat THIXO.


14 Dec 17:
Trimmed the middle cleat to clear the centreplate case flange with a circular saw.


Cut the forward seat to width and beveled the edges to fit with a circular saw.

Trimmed the transom cap to fit with a belt sander, 60 grit and a random orbital sander.

Float test, small leak forward of the keel strip, appears to be coming from a stem strip screw hole.


Cut handles for the floorboards, centered them so the floorboard would be balanced when we have to carry them.
Marked a hole big enough for 4 fingers wearing a glove. Drilled pilot hole for the jigsaw blade.

Cut the hole with a jigsaw.


Made a pattern to send to a friend.


We think this is where the stem leak is....seeing as it fell out on its own...

We could see where the threads on the old fastener were corroded and the old sealant had failed. This was the wrong kind of replacement fastener, it was a stainless machine screw and had fine threads vs the coarser threads of a wood screw.

Repaired the enlarged fastener hole with Pettit Flexpoxy.


Inserted a new #8 silicone bronze screw to dry in place.

18 Dec 17:
Float Test 2 for the Dabber identified a leak up in the stem area. Skipper spotted a loose screw after we pulled the boat out.


Repaired the hole in the stem with Pettit Flexpoxy and put in a new #8 screw. Used the screw driver to hold the screw in place while the epoxy cured.


Float Test 3, the stem leak is fixed but now we noticed 3 very small leaks, 2 coming from keel screws and one at the drain plug. Tightened one screw to stop one leak. Removed a sheared keel strip screw, sealed up the hole with Flexpoxy and put in new screw. Resealed drain plug with Flexpoxy as well.


10 Jan 18:
The Drascombe Dabber has a neat rudder head with a notch that the tiller just slips over. From the Drascombe Owner's Handbook description "Ship the rudder in shallow water and fix the tiller by holding the thin end high in the air while passing it down over the rudder head until it engages with the notch in the rudder. You may then raise the tiller a considerable distance before it comes clear of the circular arc on the rudder and hence in danger of coming off." In addition to having to raise the tiller a considerable distance before it comes off, a length of the mainsheet horse (the length of line across the transom on which the lower block runs) is adjusted to give it about a foot of slack over the top of the tiller, which acts as a tiller bridle.
The rudder that came with VICTORY (shown below) is not the stock rudder, it is a homemade variant. It is also constructed of plywood that is not marine grade and has serious rot and delamination. The top shape is similar to the stock rudder but the blade area appears to have been enlarged, extending below the keel and aft a bit further. We question if the enlargement was necessary, as Watkinson designed the Dabber waterline to be double ended and the hull is designed for inshore fishing from tidal beaches. From the sales brochcure, "Her well-veed after sections give responsive steering and ease of handling even at lower speeds. The built in "bustle" pushes the stern wave aft where it keeps the shallow rudder well centered."

We need to make a new rudder to replace the rotting plywood rudder, and in the process we want to make a pattern of the rudder head so we can use it for other future rudders. Here is the start of the pattern, copied from the old rudder head. We need to trim it a little at a time to get the proper clearance and angle for the tiller.

In the meantime we are trying to get measurements of a stock rudder.
16 Jan 18:
VICTORY did not come with a bowsprit, so we made one out of spruce. Found the measurements for the aft end notchfirst, it is a little wider than the stem hole.


I cut a 72 inch blank, it's ready to have the edges eased. I shaped the spar to 8 sided firts where I could on the table saw, then 60 grit on a belt sander, 120 grit on a disc sander then hand sanded, Rough shape first, got the stem fit then did the final sanding.
Shaping the bowsprit pattern for where it goes through the stem (right) and notches into the aft stop (center). Tuned up the cut with my new Stanley 12-101 finger plane, it works great.

The bowsprit ia about a 1/4 inch wider at the aft stop than where it goes through the stem, so we'll get to taper it at one point.

Stem port profile.


I marked the stem face line so I know where I can start tapering the oval forward to a circle on tip.

Used the Lugger bumpkin to get some ideas on shaping the bowsprit, they we built by Honnor Marine within a year of each other. We marked the taper where it will start at a circle on the tip and flow into an oblong shap by the stem.

Once the rectangular blank was cut, we made it 8 sided on the table saw where we could, then belt sanded with 60 grit to 16 sided, then tuned it a bit more with 120 grit on a disc sander and finished it off with 120 grit by hand. The Dabber jib is set off of a bowsprit that extends about 3 feet off the bow. That'll take a little getting used to, I almost clocked myself on it as soon as I installed it. ZIP wants one now...

The jibstay loops over the end of the bowsprit, I'll have to add some chocks to keep it from sliding aft.

I'm happy with that.


Removable. Might have to for launch, I'm not sure if it will clear the tow vehicle.

Wow the spruce didn't darken at all with the first coat of varnish! I'll see of the Skipper likes the lighter wood, otherwise we'll put some mahogany stain on it to make it dark like the spar that is way back in the corner.

The spar off the stern that leads the mizzen sheet is called a bumpkin. I made a little pattern piece to get the shape of the hole in the transom.


Fun day!
19 Jan 18:
Bumpkin - a short spar projecting over the stern of a sailing vessel to sheet the mizzen sail. Also spelled boomkin or bumkin.
Spoiler alert, here it is!

Now back to how I cut out a new bumpkin from spruce for the Dabber VICTORY today. The transom slot for the bumpkin happens to be about the same height as the thickness of the 2x4, so we didn't have to cut that. Check your boat, as your measurements may vary. For the width of the transom slot, on our Dabber it angles out on the top, inboard side about 3 degrees, so I set a 3 degree bevel on the table saw and ripped a 6 foot long piece (it will be shortened later). Remember to allow for the blade angle when setting the width. I cut the blank a little wide, took it to the boat and marked how much to shave off, and brought the blank back to the saw for another cut.
Once I got the blank to fit through the transom slot we marked the position of the dowel pin on the end of the blank. In this picture I had ripped the blank to the right size and made a square cut with a jigsaw around the dowel pin.

Public Safety Announcement (PSA) for Shop Safety time. When I used the table saw I forgot to reinstall the blade guard after removing it for a curved cut. That was not a good idea. There are a few cuts where the guard might be removed for some advanced wood butchery, but this was not one of them. A friend who lost a finger to a table saw reminded me to USE THAT GUARD. The time I saved was not worth the potential for losing a digit, trip to the ER, rehab and all. And I know we see it gone in all the DIY shows and youtube so maybe we think it is not that big a deal for it to be removed. It is.
The only way I could think to make the little dowel shape where the bumpkin pins into its step was to cut it square and then shape it with a rasp. That turned out to be pretty easy and fun, another option would be to buy a dowel and drill a hole in the end of the spar, then glue it into place.
Here is the little step that the bumpkin pin goes into, I shaved off a little at a time with the Shinto rasp until I got the fit I wanted.


INTERMISSION: Glamor shot of the carriage house.

Back to our irregularly scheduled programming. Wow it's long, about a foot too long here, but we cut it that way and we'll sneak up on the proper length. The measurements I was given said that the fairlead for the mizzen sheet should be about 60 inches, measured along the spar form the transom to the fairlead position. That should also give a measurement of 57 inches from the fairlead straight forward to the transom, isosceles triangle and all that.

Scribed a circle on the end so we can cut the corners off and make it 8 sided on the table saw.

I made the blank 8 sided from where it exits the transom out to the tip by shaving off the corners. I marked the spar where I would cut only the section aft of the transom. This picture shows how we cut just the corners off at a 45 degree angle to reduce the amount of wood we have to plane. A spokeshave and patience will produce the same result. Do not cut all the way to the forward end of the spar, you will lose the fit going through the transom hole.

Marked the spar at 61 inches, the fairlead will be centered over the 60 inch mark.

We sanded the big ridges with 60 grit on a Black and Decker belt sander and shaved some areas with a Stanley. Took the ridges further down with 120 grit on a Dewalt random orbital sander and then hand sanded with 120 grit.

A spar is born. Not as long as the camera angle makes it look.


21 Jan 18:
We have a lot of new parts on the Dabber, so we thought we'd take them over to Capn Jack so he could inspect them. I planned to grab the bumpkin and bowsprit and Skipper said "Why don't we take the whole boat!." Hooked VICTORY up to BLUEBELL and headed across the bridge.

We rigged the boat minus the bumpkin, worked on that later. I've been told that the gaff halyard and jib halyard run through the holes in the mast thwart, so here that is.

Skipper and Capn Jack supervised.


Tied things down, this is how we'd hit the road.
https://www.youtube.com/watch?v=yt7CKOzhxG0&t=7s


VICTORY passed mid restoration inspection and we were cleared to continue. Once we were home we cut the opening for the mizzen mast. I leveleled the boat port to starboard, then started a small cut but cut too far forward and to starboard. I ended up cutting a shim out of teak to finish out the hole. Epoxied the shim into place using Pettit Flexpoxy.


30 Jan 18:
Our buddy Steve sent us a pattern of the factory rudder and bowsprit from his 1979 Drascombe Dabber. I fell asleep trying to decide between teak, mahogany or marine ply for the new rudder.

01 Feb 18:
Steve sent us a pattern for a Dabber rudder, we traced it onto a teak blank that we glued up, edge glued with Pettit Marine Paint Flexpoxy. The planks were left over from the floorboard, we cut square edges onto them to remove the radiused deck edge that they came with. In this photo I had started to sand the entire blank to remove epoxy squeezeout, then I thought, hey, why not cut out the rudder first, and save a lot of sanding?

Straightened up the tracing with a 2 foot Stanley Tools folding carpenter's rule and Sharpie, then cut out the rudder with a DEWALT jigsaw.

Cut the aft notch for the tiller dowel, cut kerfs up to the line then I was able to cut along the line without binding the blade.

Drascombe Dabber Rudder edges eased with a 3/4 inch roundover bit on a DEWALT compact trim router, except for the leading edge where the pintles will attach and the tiller notches. Then sanded with 60 grit on a Black and Decker 3 inch belt sander, finished with 120 grit on a Dewalt random orbital sander. Cleaned up the tiller notches with a Kobalt ceramic tile file. The Shopvac collected most of the sanding dust but not the jigsaw creation.

The bronze pintles (pins that attach rudder to transom) are vintage, we found them on ebay. They are tapered and the lower pintle is longer so that it slips into the lower gudgeon (tube part of the hinge) first, so we can concentrate on seating one pintle at a time while the boat is bobbing around.

Skipper usually feeds me if I bring her new boat parts!

03 Feb 18:
Sanded the mizzen mast shim and wiped on some teak oil.

Tried an epoxy repair on the tip of the mizzen mast, it was too soft to take a drill. So we cut a scarf piece from Douglas Fir, 12:1 scarf to replace the top 12 inches of the mizzen mast. Fastened the scarf with Pettit Flexpoxy.


Color coded the top of the mast to help me get it lined up correctly when I step it.

Sanded the spars with 120 grit on a random orbital sander. Stained the spars with Minwax Wood Stain Red Chestnut.


04 Feb 18:
Sanded the mizzen mast scarf.

Found some cool bronze oar locks on craigslist. The pin is short but they will work for light duty.


Second coat of Minwax Wood Stain Red Chestnut.

05 Feb 18:
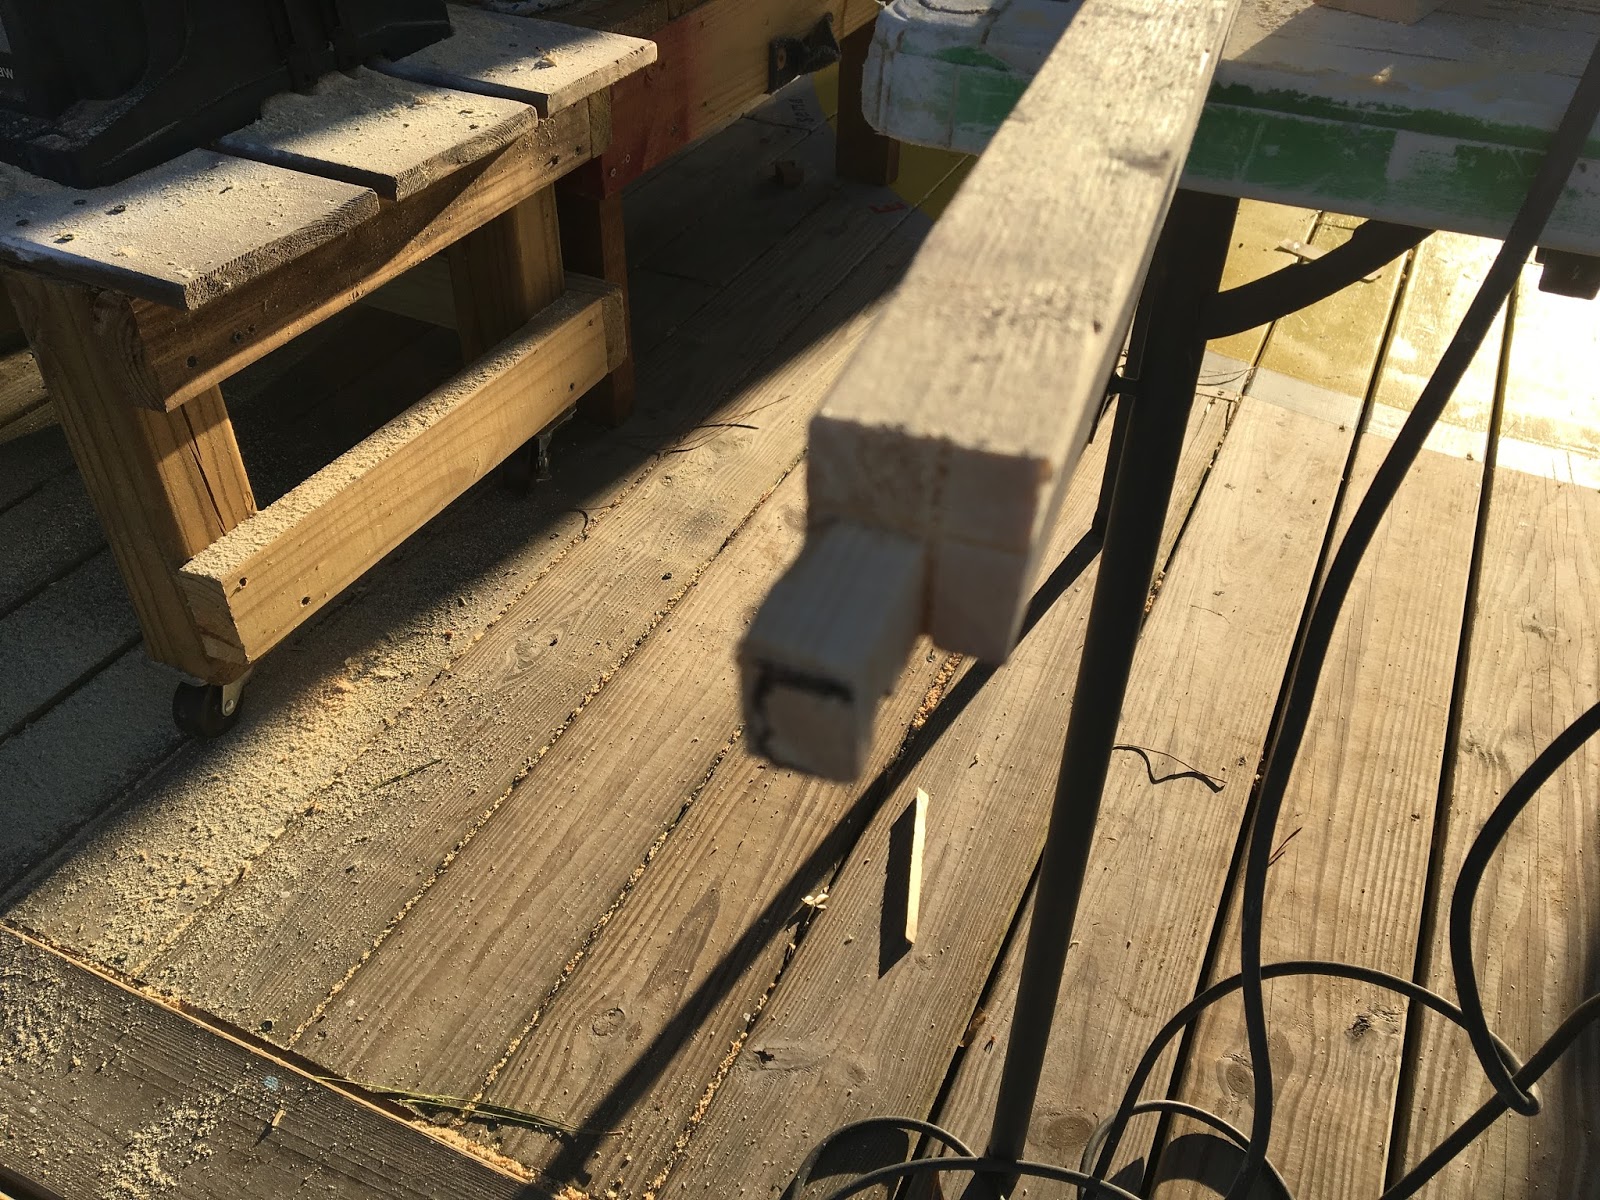
Cut a chunk of rot off of an oar and started shaping a scarf piece from cypress.


Cut the scarf angle first, tried to leave as much good material as possible, then cut one side of the profile.


Cut the other side of the profile then fastened the scarf piece with Pettit Flexpoxy.


Broke out the box of line from R&W Rope to work on running rigging. We like the vintage 3 strand line for this boat.

Hung the new rudder and rigged the main sheet.


Used a marlin hitch to attach the mizzen to its mast and the mainsail to the yardarm.

Main and jib.


West Country whip on the bosprit until we get a dowel


Added parrel beads to the gaff arm.

Rounded out the holes for the halyard fairleads. Not sure if that is how they are intended to be routed but it works for now.


Mizzen sheet rigging.


Centreplate uphaul


Forward rowing seat.

21 Mar 18:
Sanded the planks on the 1979 Drascombe Dabber VICTORY with 60 grit on a random orbital sander to get rid of loose paint. Applied first coat of Pettit EZPrime, thinned 5% with 120 Brushing Thinner. I rolled with Mighty Mini foam rollers and Skipper tipped with a 2 inch brush. Also prepped an anchor and secured a dime to go at the base of the mast.
From right to left there is the original gelcoat, old sanded paint and new primer.

WINNIE and ZIP supervised VICTORY's first coat of Pettit EZPrime. One more coat of primer and then we will finish painting the hull with Easypoxy 3213 Blue Ice, like seen on the bottom plank.

All the supplies available through Jamestown Distributors.

VICTORY's anchor, chain and line.

Dime to go under the base of the mast. Sailors and shipwrights have been putting coins under masts of ships for several thousand years, and still do today. They’ve been found in the mast steps of ancient Roman shipwrecks, even recently. The hope, still, is the offering will bring good luck and safe passage.

22 Mar 18:
Filled number plate holes on the bow with Pettit EZFair.


Sanded the strakes with 120 grit on a random orbital sander, prep for second coat of Pettit EZPrime rolled and tipped.

Applied first coat of TotalBoat Gleam Marine Spar Varnish Satin to the spars, used a Retdree Fooler brush.


23 Mar 18:
Rolled and tipped the first coat of Pettit Easypoxy Blue Ice. Mighty Mini rollers and a Redtree double thick Fooler brush. Thinned the paint 5% with Pettit Brushing thinner.


24 Mar 18:
Sanded out a few runs with 120 grit on a random orbital sander.

Rolled and tipped second coat of Pettit Easypoxy Blue Ice.

04 Apr 18:
Lightly sanded some runs and sags with 220 grit discs on a random orbital sander then rolled and tipped the third coat of Pettit Easypoxy Blue Ice. Used Mighty Mini rollers and roller kit from Jamestown Distributors, tipped with a Blue Hawk 2 inch sash brush. Thinned the paint with about 5% Pettit Brushing Thinner, outside air temp 70F.


We had scarfed a new handle cut from cypress onto one of the oars and needed to shape it. I sanded it at first with 40 grit on a belt sander, but that was taking a while and making a lot of dust, so I switched to a Stanley spokeshave and that rapidly took off the excess. I cut the shoulder for the grip with a shinto rasp and shaped it with a tile diamond file. Then I finished sanding the grip to shape with 60 grit discs on a DeWALT random orbital sander.

Once the grip was shaped I sanded both oars with 60 grit on a random orbital sander. There was a lot of excess epoxy and plastic wrap residue on the blades, left over from when we had glued the blades back together last year. It took a lot of sanding but I got everything smooth and ready for paint.

05 Apr 18:
First coat of Rust-Oleum Marine Topside Oyster White brushed with a Redtree Fooler chip brush.


30 Apr 18:
Cleaned up the rough surface of the gunwale with 120 grit on a random orbital sander. Lesson learned, wear a dust mask, I got contaminated with some moldy teak!

Luckily the job went quick, and we applied 2 coats of TotalBoat Gleam Marine Spar Varnish Satin. I wasn't sure how it would look, but after a few brush strokes it looked fantastic, we are very pleased with how it turned out.


We also finished attaching the transom cap with some #8x3/4 silicone bronze wood screws.

All of the sudden VICTORY seems ready for final rigging and sea trials!

30 APr 2018:
Skipper approved of the rigging.


01 May 18:
Sea Trials! The Dabber sailed great, carried along great under oar as well. The main was very powerful and set nicely. We had a fun time and look forward to more easy sailing.


She's got new flags now.

01 Jun 18:
VICTORY will make a nice daysailer for a singlehander or small family. She is ready to go, available to a hew new Master and Commander. Asking price $3200 USD (Edit Aug 2018: SOLD.)
sailingtexas

28 Jun 18:
We have an offer from a nice couple to buy VICTORY, they hope to come hook her up soon and show her a new homeport in North Carolina. Details are being worked out and the plan is for her to take off in early August. We went out and told her the news, she was chillaxing with ST. JACQUES, MADISON, WAVE, PHOENIX and PINKY.

Our plan now is to make her a nice road cover for her trip, so she doesn't go down the road under a tarp or unadorned :)
16 Jul 18:
She's ready to roll.


More information on the Drascombe Dabber Boat Cover.
06 Aug 18:
Here are some pictures on rigging for a Drascombe Dabber, just in case you run across one. Our helpful assistant today is our 1979 Dabber VICTORY.
Easier to rig if boat strap and cover are removed.

Side locker is a good spot for an anchor. The mast steps through the thwart. The lines tied around the mast during transport are the side stays, forestay, jib halyard and main halyard.

We keep the rudder on a towel to protect the deck. Main mast, mizzen mast and yard are stored off to one side with towels to protect the gelcoat. For long trips it's best to carry the anchor in a tub or in the car.

Dime for the base of the mast, for safe passage and tribute to the wind spirit.


Step the mast. Therre are 3 stays at the top, the forestay tang at the top of the mast has a block for the jib halyard right below it, that faces towards the bow. Side stays go through the U bolt 2-3 times.

Side stays secured with a couple of half hitches. Tie off the forestay at this time.

Step the mizzen mast in the transom cap cutout. Actually best to do this first and get it out of the way.

Mizzen mast step.

The line on the right is the main halyard. The parrel beads and line hold the yard close to the mast. The tan line is the tack for the main.

The other end of the main halyard is tied to the yard, about 3 grommets up on the sail.

Ready to raise the yard, we put the yard on the opposite side of the mast from the halyard, so that the yard does not drop on our head or cover up the halyard fairlead and belaying pin. Port side pin is for the jib halyard.

Mainsheet rigging.

Bumpkin steps through the starboard side of the transom, pins into a small hole. We like to store the sheet with the spar.

The mizzen sheet runs through a jam cleat on the aft deck.

Mizzen sheet runs from tack of sail, through bumpkin fairlead and forward to another fairlead on the mast, then to the jam cleat.

Mizzen sheet runs from tack of sail, through bumpkin fairlead and forward to another fairlead on the mast, then to the jam cleat. The line on the transom cap is the bridle or traveler for the mainsheet. It also restricts the tiller from being lifted too far up and coming off of the rudder head, as the tiller is just notched on. It is a good idea to add a retaining line to the rudder head or pin the pintle into the gudgeon, if it gets nudged out of the gudgeon it can fall off.

The cutout and pad are part of the outboard motor well, and 2hp is plenty.

Bowsprit slides out through the stem.

Bowsprit notches into the mast thwart.

Jib halyard.

Jib halyard attaches to the head of the jib.

Raise the jib then coil the line, pull a small loop through and throw that loop over the top of the belaying pin.

Jib sheets run outside of all of the stays, through a fairlead and to the cam cleats.


We add a few wraps of line around the jib tack loop, keeps it from slipping. Some boats have a dowel there and others have roller furling.

Oops, main halyard should be reversed so that the line on the forward face of the mast runs down to the fairlead and pin, and the halyard on the aft side of the mast ties to the gaff.

Jib sheet runs outside of the forestay.

Simple overhand knot for the jibsheet to minimize snags on the forestay.

L-R looking aft: Bow line cleat, mainsail halyard, mainsail tack line behind mast and jib halyard.

Bow line.

Good look at mast head, stay tangs, jib halyard block and main halyard sheave.

Mast thwart, halyard belaying pins and tack downhaul. The tack downhaul line has a nice little jam cleat hidden under the thwart.

She's ready to go. Just add water.

August 2018:
VICTORY has new Skippers and a new homeport, she is heading to a very excited family in North Carolina. They made the road trip to pick her up, we spent a few hours visiting and showing them the ropes...how to rig their new boat. She spent one more night with the Gulf Coast Squadron then made a quiet departure the next morning, we can't wait to hear about her further adventures. Huzzah VICTORY!
21 Jan 23:
We got an email from a gent wanting to know if we had a pattern for a Drascombe Dabber tiller. As it turns out we did. Fortunately we took time to take a few measurements and trace out paper patterns of the rudder, tiller, oars, centerboard and a few other bits...mast, mizzen mast, bowsprit, bumpkin.

Sometimes we make plywood templates or wood shapes, for the Dabber we took the time to make a centerboard pattern and wood shape for the bowsprit.

...to be continued...
FMI:
Churchouse Boats - New Luggers, Dabbers and more
Drascombe Association - Low dues, quarterly newsletter, nice sticker, a Forum and great people
Drascombe facebook page
Sailboat Data Dabber
Re: Capt Jack wanting one of these since '79, & this one built in '79:
ReplyDelete"Coincidence is God's way of remaining anonymous."
-Albert Einstein
Thanks Joanie, It is.
DeleteTry a Topsail Halyard Hitch on the gaff https://www.youtube.com/watch?v=xR3wMzsJn8o
ReplyDeleteI have used it for 44 years on my Drascombe Lugger Muckle Flugga - it is very secure and snugs up nicely to the mast.
Thanks John, we'll give it a shot, looks like a good knot.
DeleteBeautful boat. Good job restoring her.
ReplyDeleteThanks Rik, they were made to last, we have a lot of quality material to work with.
DeleteFantastic project and well documented, excellent Sir.
ReplyDeleteThanks, we had fun.
DeleteI had a Drascombe Lugger but realised that she was a bit too long and I hated the slot rudder. I am now looking for a Dabber and hopefully I can find one like yours!
ReplyDeleteKeep an eye on ebay, craigslist and facebook marketplace. You should also join the facebook Drascombe page and let them know you are looking for a Dabber.
DeleteI have a Dabber and love restoring small boats, Mirrors, Lasers, Enterprise etc. This project of yours was superb! High quality work and thoroughly documented. I now have a few ideas to improve my wee Dabber. I take it you do this for love, not for money - $3k wouldn't pay the labour and time you have given it. Thank you.
ReplyDeleteYou are correct, for the fun and to get the boat back on the water. She languished under an oak tree long enough. Have fun with your Dabber! Cheers, Skipper and Clark
Delete