Showing posts with label daggerboard retainer. Show all posts

Saturday, June 29, 2019

Sunfish TETRIS CHIP and WAVE

29 Jun 19:

Our 1963 Alcort Sunfish CHIP is ready for Sea Trials, so she needed to get off the finishing dolly and onto a Dynamic Dolly. I asked Skipper how to organize Sunfish TETRIS and she said she wanted her 1965 Alcort Sunfish WAVE to take a turn on he finishing dolly, get her purtied up like the other boats, fix the amateur patches I put on 20+ years ago. So first we dollied WAVE up to the Carriage House and dropped her in the grass. Next we used Skipper's field expedient Sunfish hoist to get CHIP off of the finishing dolly.


Lowered CHIP onto the Dynamic Dolly and rolled her out next to WAVE.


WAVE loaned CHIP her spars on deck Sunbrella cover, a fine cover that we got fro SLO Sail and Canvas. It has nice straps!


Rolled the finishing dolly out into the yard and walked each end of WAVE up onto the dolly. Rolled dolly into the Carriage House. WAVE telling fish stories to ZIP and WINNIE.


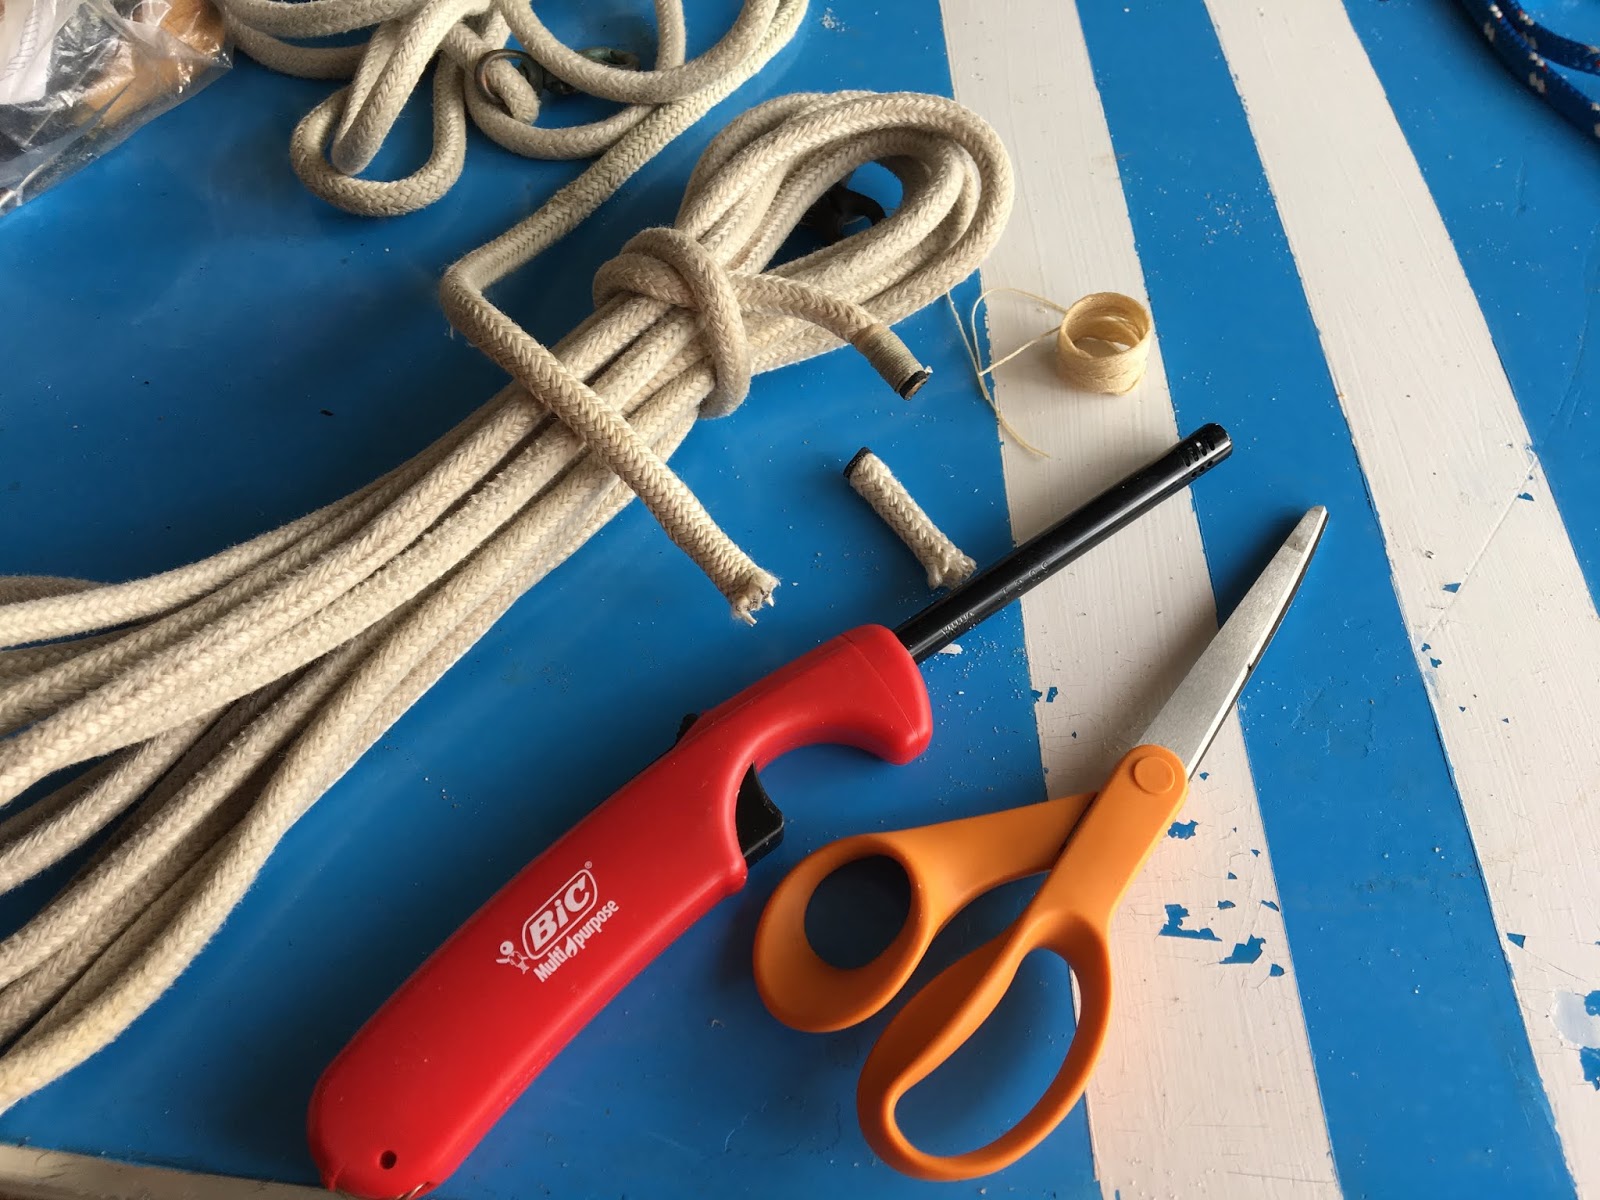
While we were in the Carriage House we shaved some yaks. "Yak shaving" is what we call it when we find other jobs to do while avoiding the primary job, which in this case was getting CHIP out back to the Sunfish Shack and finishing cleaning some air vents inside the house. Today's yaks to shave were cutting some 1/8th inch nylon line to make daggerboard retaining lines for WAVE and PHOENIX and whipping the ends of a couple of vintage Sunfish/Sailfish sheets.

We cut the nylon line to length and seared the ends. Line is long enough so that daggerboard can easily be removed, but not much longer than that. The retaining line is there to keep the daggerboard from floating away after a capsize.


Tied the line with a bowline. Make the little loop, the run the rabbit (end of the line) up through the hole...


...around the tree (long end of the line) and back down into the hole.


Snug down the bowline. Cut another line for PHOENIX. Yak 1 shaved.


Old School. Simple.


Yak Shaving Take 2. Wrapped the end of the sheet with a piece of gaff tape and seared the end. Then whipped the end with waxed line. Yak 2 shaved.


How to whip a line.


Back to our original unscheduled program, CHIP taking up WAVE's slip in the Sunfish Shack, ready for Sea Trials!

Log of CHIP.
Log of WAVE.

Thursday, May 17, 2018

Sunfish Sailboat Hull, Spars and Line Specifications

Here is a list of Sunfish Specifications, provided by Sunfishsailboats.com aka Yankee Boating Center. They have great a great parts and service department, even live people to talk to on the phone. I have bought several class legal sails, line kits and other Sunfish parts from them. One neat thing they will do when you buy a line kit is pick out line colors that will compliment your boat's color.

From Sunfish Sailboat

We bough this Mackinaw sail from them...

From Sunfish Sailboat

and this red and white sail...

From Sunfish Sailboat

and this Newport sail...

From Sunfish Sailboat

and this Mai Tai sail...


Here are specifications for the spars:

Material: 6061-T6 Aluminum Alloy
Mast -
Style: Round Tube
Finish: Clear Anodized
Length: 10' (3.05 m)
OD: 2-1/4" (57.15 mm)
Wall Thickness: .083" (2.11 mm)

Spars -
Style: Round Tube
Finish: Clear Anodized
Length: 13' 8" (4.17 m)
OD 1-1/2" (38.1 mm)
Wall Thickness: .065" (1.65 mm)

Have a great sailing season! Check out our book The Sunfish Owners Manual for more great information

Thursday, November 9, 2017

1980 AMF Sunfish Viper 09 Nov 17 Final Fitting

09 Nov 17:

Finished up the final bits before sea trials for VIPER. Inspection ports, deck hardware, coaming, gudgeon, bailer.

Cut a larger hole for the aft inspection port with a DeWALT jigsaw, taped the deck first to reduce scratches. The hole is drawn using the port cap, flipping it over and tracing around the outside of it. Don't trace around the outside of the mounting ring, you'll have a really big hole :)


Sealed the port with a bead of TotalBoat Seal. One trick we have is to run a bead of sealant around the port outer ring, put the ring in place and give it a 1/2 turn to spread out the sealant. Drilled holes for the hardware. Secured the ports with #6 stainless steel machine screws, washers and stop nuts. I bought screws that were long enough so I can reach them to put on washers and stop nuts, plus I bought a deep socket that will hold the nut while the screw is tightened. One BIG tip is to buy a couple extra washers and nuts, because they are hard to find if they get dropped inside the hull.


Drilled pilot holes for the bow handle #8 x 1 inch stainless wood screws, oval phillips head.


Drilled piilot holes for the halyard cleat and halyard block, installed with #8 silicone bronze screws long enough to catch the 3/4 inch wooden backer blocks under the deck. It is a good thing to see dry wood shavings come out when the pilot hole is drilled.


Drilled the 3/16th inch pilot holes for the coaming rivets. It is important to buy the proper rivet, aluminum 3/16th inch closed end. They need to be closed end so water will not get into the hull. I also put a small bead of sealant in the rivet hole before installation.


Tapped the edge trim into place with a rubber hammer. Drilled 1/8th inch pilot holes for the edge trim rivets, which do not need to be closed end but they need a grip range of about 1/2 inch. Once again it is easiest to buy the rivets from a Sunfish Dealer. Be careful to only drill through the top of the trim and the deck edge, not all the way through, that is enough to hold on the trim. If the drill goes all the way through, take a file and remove any sharp burrs that are finger slicers. We also go back and file the top of the rivet to make them smooth.


Installed the gudgeon with #10 stainless machine screws. The metal backer plate inside is tapped for the screws, no need for washers and stop nuts. I add a small dab of sealant around each screw hole before installation.


Installed the swivel cam cleat and the sheet hook. The screws for the swivel cam cleat come through under the cockpit lip, they do not go inside the hull.


Added a retaining line to the daggerboard, so it doesn't float away during a capsize. Skipper prefers the simple line over a bungee, it makes it easy for her to pull the board out one handed when beaching. Otherwise she keeps it down most of the time, or if on a run the water pressure holds it where she wants it.


Complete Log for VIPER.

Monday, March 18, 2013

Sunfish Rigging

West Marine is having a 25 percent discount sale on rope this month, so we went by their store in Ft Walton Beach and picked up 25 feet of 3/16 inch sta-set line for a halyard, red and blue fleck. Also 25 feet of 5/16 inch sta-set line for the mainsheet, we like ours just a little smaller for hand grip and also goes through boom blocks and cleat better when new. And 8 feet of 3/16 inch shock cord with 2 shock cord hooks for the daggerboard retainer. I already had a 50 foot piece of New England 1/8 inch rope at home that I have been cutting up for for outhauls. It would also make good daggerboard retainer line if the daggerboard still has the old style brass spring.
I normally can get a complete line kit from Yankee Boating Center for $49.99 plus shipping. The West Marine sale price was 75 cents a foot for the sheet and 43 cents a foot for the halyard, so my total Sunfish rigging purchase out the door, with tax, was $45.63. Add in some money for gas and both line kits are about the same, so I am guessing YBC must be able to get a dealer discount on rope.

From Sunfish Sailboat