v1.0 So we designed a low roof aka lean-to set on 6x6 pilings, with a shingle roof to match the house. Found out that a low pitch shingle roof is not a good idea, it became a mildew factory. Dirt floor not good either, mud pit at times. But it kept off the pine needles and bird poop! Halfway there. Overall, it was a huge design failure and excess expenditure of funds for materials, but I learned what Shack 2.0 needed. All of the old roof was cut off with a circular saw, I recommend using a dust mask and covering up exposed skin while doing that, I created lots of moldy sawdust!
 |
| From Small Boat Restoration |
Salvaged lumber from Shack v1.0
 |
| From Small Boat Restoration 2013 |
Free beach lumber!!
 |
| From Small Boat Restoration 2013 |
v2.0 Renovated our sailboat shed, aka the Sunfish Shack. We changed the roof over to metal, added a deck and a ramp. The main function of the shed is to keep the pine needles, rain and sun(UV) off of the boats, keep them ready to go sailing without having to spend 30 minutes cleaning them up first. The old shed roof was lower, with plywood and shingles, and it leaked. The goal for shed 2.0 was to raise the front edge, lower the rear edge, remove excess roof support 2x6s, and add a deck with ramp to get trailers out of the mud that likes that shaded area.
 |
| From Small Boat Restoration 2013 |
The new shed has 3 stalls, big enough to hold Seitech dollies or our double stack trailer. The roof is MasterRib 29 gauge metal from Lowes placed on 2x4 rafters and 1x4 purlins. The front 2x6 roof joist was moved up the 6x6 post to the top and secured on both sides with metal hurricane ties. That raised the front of the roof. The rear joist was lowered the width of a 2x4 on the rear posts, leaving enough room for the rafters and roof to clear the top of the posts. I also added a few racks by screwing 2x4s to the posts to store our restoration project boats CHIP (wooden Sunfish) and ZSA ZSA (Super Sailfish). These can be removed when the boats go into the restoration queue.
 |
| From Small Boat Restoration 2013 |
The wisteria likes the shed, it thinks it is one big trellis. I reused the 2x6x16s from the front and rear roof joists and to frame the deck around the bottom of the posts. I had to buy the 2x4x16 rafters and 1x4 purlins to support and secure the metal roof, and reused hurricane ties to secure them to the joists. The roof is secured with a special metal roof washer and screw, screwed into the purlins. Since the roof is low I had to find a screw long enough to get fully into the 1x4 but not stick out under the roof and poke me in the head :)
 |
| From Small Boat Restoration 2013 |
I framed the perimeter of the posts with rescued 2x6s. Underneath the deck I used 2x4s and 12 inch square pavers to support the deck. The deck was made from salvaged 2x6x16s cut down to 12 feet, with the scrap end beveled and used for the front ramp. I ran out of old lumber and ordered 2x6x12s to finish the deck, but 2x8x12s were delivered instead. I adapted and the deck/ramp came out real nice. There is enough room under the front half of the Shack to work on projects! Here is our Super Sailfish MKII SWEET EMOTION sneaking onto the new deck.
 |
| From Small Boat Restoration 2013 |
 |
| From Small Boat Restoration 2013 |
Before the 2x4 rafters go up permanently we like to cut decorative ogees into the ends. In this photo we were checking the spacing on the 2x4s.
 |
| From Small Boat Restoration 2013 |
 |
| From Small Boat Restoration 2013 |
The 2x4 deck joists are screwed into the 2x6 frame, I added some pavers mid span to prevent sag, although I don't plan to have much weight on the deck. I also leveled the dirt under the deck with sand to improve drainage. The deck is elevated off of the ground like a dock, so any heavy rain should run off behind the shack or is welcome to runoff underneath.
 |
| From Small Boat Restoration 2013 |
 |
| From Small Boat Restoration 2013 |
18 Mar 2015: Current state of affairs at the Shack. 3 fiberglass Sunfish, one wooden Sunfish and one wooden Super Sailfish.
 |
| From SBR 4: Jun 2014 - |
v3.0 The Sunfish Shack was so popular that we added 2 more stalls. Had to move the wisteria and it was not happy (fast forward it is growing back from underneath Bin 4). Note that in Bin 1 we are building our Penobscot 14 ST. JACQUES, and have put up some weather curtains. We had a table with some saws and tools out there for a bit, but there was too much humidity to leave them there for long. That was a lot of fun, we kept the little grill fired with offcuts and miscuts...lots of them...
v4.0 Added 2 parking spots for empty trailers at the end of the Shack, or if we get an oversize boat that won't fit under the low joists. Or if we get a catamaran that remains rigged and ready (SMEDLEY). Added wisteria on the end and extended the path behind the Shack. The Penobscot 14 is finished and reclaimed her spot, and there are a variety of wooden and fiberglass Sailfish and Sunfish sprinkled around. The wooden Super Sailfish and Sunfish storage rack was trimmed down so we had room to move around boat in Bin 2.
Looks nice, the little path? Didn't last long, a storm came up and washed most of it away, we have some beach erosion that needs to be addressed. (Edit: And it was, Winter 2019, 22 feet of yard on that corner was reclaimed, the damage was remnants of Hurricane Ivan from 2004, seawall was not repaired by previous owner. We finally saved money to have it done, and saved several heritage pine trees in the process.)
15 Aug 18:
Current state of affairs. VICTORY headed off to her new homeport so Shack slot #2 was open, SUGAR immediately filled it. Current fleet L-R St. JACQUES, SUGAR 2, MADISON, PINKY, PHOENIX and WAVE.
27 Feb 19:
PHOENIX is airborne to make a temporary spot for ZSA ZSA.
14 Apr 19:
AMF Sunfish BOOMER headed off to her new homeport, time for Shack Tetris. Super Sailfish ZSA ZSA moved into the open stall and PHOENIX landed back on her dolly.
(L-R) Penobscot 14 ST. JACQUES, Alcort Super Sailfish ZSA ZSA, AMF Sunfish MADISON, AMF Sunfish PHOENIX, KM SUP PINKY and the ship that started it all, Alcort Sunfish WAVE. To learn more about each boat click on their page link off to the right.
29 Jun 19:
Current state of the Sunfish Shack, (L-R): Penobscot 14 ST. JACQUES, 1955 Alcort Super Sailfish ZSA ZSA, 1981 AMF Alcort Sunfish MADISON, 1982 AMF ALcort Sunfish PHOENIX and 1963 wooden Alcort Sunfish CHIP.
02 Apr 20:
Current State of the Sunfish Shack (L-R): Penobscot 14 ST. JACQUES, empty stall, Finishing Dolly, 1982 AMF Alcort Sunfish PHOENIX and 1965 Alcort Sunfish WAVE. WILLOW's trailer and and empty stall to the right off camera. Empty stalls? Hmmmm. There is exciting news on the horizon about that....Stay tuned.
10 Apr 20:
(L-R) 2017 Penobscot 17 ST. JACQUES, 1963 wooden Alcort Sunfish CHIP, 1950s wooden Alcort Super Sailfish ZSA ZSA, 1981 AMF Sunfish MADISON, 1982 AMF Sunfish PHOENIX, 1965 Alcort Sunfish WAVE. Dollies by Dynamic Dollies and Racks, Covers by SLO Sail and Canvas, except Skipper made the custom cover for ST. JACQUES. Shack design by Clark.
01 Jan 21:
v5.0 Mother Nature reshaped some accoutrements to the Sunfish Shack last September, She removed the uncovered trailer parking at the end and the ramp. The Shack itself held strong, 6x6 posts set in concrete and the metal roof is strapped down with hurricane straps. We decided to only replace the ramp, and used 5/4 x 6 marine pressure treated decking left over from the pier project vs the previous 2x6 planking. Some remnants of the 2x6 ramp will be repurposed into work tables, suitable to hold various libations.
WAVE is ready for Sea Trials and she will need her slip in the Sunfish Shack back soon, so that generated a round of TETRIS. CHIP was in her spot, so CHIP got pulled out to move to MADISON's spot, But there was a wagon, RED 1, in front of MADISON, so RED1 1, and RED 2, got moved back to the porch as did the power washers and the carpenter's bench, which all had been removed when we painted the porch. MADISON was pulled up front to the Wheel Deck for repair to her damaged chine.
03 April 21:
Still moving bits around as the Armada shifts Homeport from the Gulf Squadron to the Atlantic Squadron. Carriage House was getting a little crowded with 2 Sunfish on dollies and a lawn tractor, and we wanted one of the Sunfish easily accessible for nice sailing days ahead before the final move.
11 Jul 21:
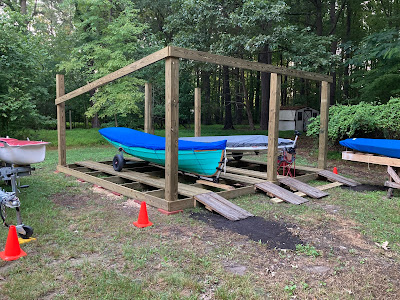
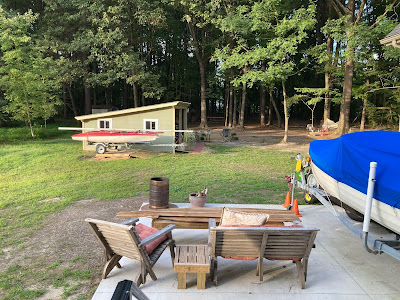
A new homeport for the Armada's Mid Atlantic Squadron drives the requirement for a new Sunfish Shack. We cleared a few areas in the Boat Yard and selected a spot for a 16x16 Shack to get started. We are making this deck 4 feet deeper because on the last shack we had to turn the Sunfish diagonal to get optimum protection, and in this Shack we will experiment with some vertical storage on racks or hoists vs having a 40 foot long structure.
A For The Record before picture. Oops, looks like the Shack has started to form.
12 Jul 21:
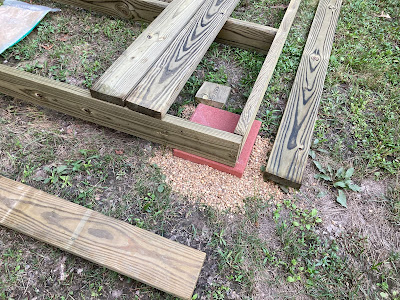
We framed the floating deck using techniques our friend Paul taught us years ago, leveled some spots and blocked the pressure treated wood on concrete pavers. First we went to our local builder supply and picked up some 2x6x16 pressure treated lumber, rated for ground contact.
13 Jul 21:
We placed 6x6x8' posts today for the Sunfish Shack, they'll be strapped in with framing and eventually hot dip galvanized lag screws.
16 Jul 21:
Today we marked out the spacing for the Sunfish Shack 2x6 deck boards, then put down the 12 boards that we had in spots where we could roll a few dollies up and check the fit. We found that the Penobscot deadwood keel barely clears because the deck joists are sitting on pavers now vs being set ground level in concrete, and we set the deck boards on top of larger 2x6 joists vs insetting them over 2x4 joists. Overall that raised the surface of the deck close to 3 inches over what it had been. Added to the increased deck height were some low spots in the yard that lowered the ramp entries, we added some topsoil at the base of the ramps to get the same drop all the way across the base. You might note in the photo that the ramps on the right side of the Shack have been shimmed up a bit with a 2x6 backer board set on another paver block, then we graded the ramp entry with more topsoil. A little more grading in the yard will be needed to eliminate some low spots and ensure that water flows away from the house and the Shack to an existing drainage ditch behind the line of bushes. The last adjustment we made to ensure ST. JACQUES deadwood keel would clear the deck before the dolly wheels started up the ramp was to cut a small notch on the end of a temporary deck board, per Skipper's direction.
03 Aug 21:
Cut a detail on the rafter ends.
04 Aug 21:
Video update for the new Mid Atlantic Sunfish Shack: https://youtu.be/sDw82Xx1sss
05 Aug 21:
Worked on the new Sunfish Shack, today we added a few extra purlins (the horizontal 1x4s that the roof gets attached to). The basic spacing we chose for our low wind, low snow load area was 3 feet x 3 feet, and then we added a purlin under each end of each panel overlap, if there was not one already there. We added these purlins so we could drive the roof screws and not have the bare ends of screws poking out on the underside of the roof. All of the purlins are also attached to the rafters, and once we got everything mostly square we drove screws along the panels ridges over each purling and along the rafter/purlin intersections.
09 Aug 21:
Skipper decreed that we would finish the deck for the Sunfish Shack before continuing with the roof. So fourteen 2x6x16 bits of pressure treated lumber later, the deck is finished. Might get a bit more roofing done early tomorrow, before the sun peeks over the pine trees, and get more ramp bits cut. A little grading of the yard will be needed as well.
ST. JACQUES and WAVE volunteered for static load testing of their new spots.
10 Aug 21:
15 Aug 21:
The sides are up, LP Smartside with cedar texture, ready for paint.
15 Aug 21:
Plenty of wall space for spare parts. And SCUPPERS.
17 Aug 21:
After draining TRAKER's bilge, Skipper towed the work dolly around to the Sunfish SHack. But first the John Deere E130 had a chat with an excavator, which was visiting the Mid Atlantic Station to extend our driveway.
27 Aug 21:
We built this 5x8 section of deck back in Florida, planning to use it as part of the new Sunfish Shack, then we added legs so we could put it in a PODS container and hide a Sunfish under it as part of our move.
04 Sep 21:
Cut new portholes on the starboard side for Skipper's cannon and got the windows tacked in.
14 Sep 21:
The port side portholes are in and trimmed with 1x4 PVC.
A coat of Sherwin Williams Coastal Plain (lightened) was applied to the sides and Whole Wheat to the trim pieces. The window trim was left white.
22 May 22:
The side and back walls came off of the Sunfish Shack today, we put them up to keep the boats out of sight from the street. Now that we have a fence, the walls seemed to be an impediment to the breeze and the view of our forest.
29 Jun 22:
Current State of Mid Atlantic Sunfish Shack, the Penobscot has the first stall, Sunfish WAVE is in the middle and Sunfish PHOENIX on the right. MADISON is hanging in a hoist. We are very happy that the walls are gone, the shack is not full of leaves, wasps and spiders and the boat get good ventilation. Also plenty of light to look for a few items stored there, like the first few catboat parts.
20 May 23:
Of the many things we needed to rebuild after our move, the Sunfish Shack was one of them. If you've hung around long enough you know that we like a roof over the boats to keep flotsam and jetsam off of them, and a deck to keep trailers out of the mud. We built the first 16 x 16 section of Shack in 2021, and we'll be adding on a 5 foot wide canoe cubby for SCOUT, aka the SCOUT SHACK, and then another 16 x 16 shack for the Penobscot 14 ST. JACQUES, Nutshell Pram EXCUSE ME and Catfish SMEDLEY.
Work began today to lay out and level the pavers that support posts and beams. This is the most time consuming and dirt-y part of the job. SCOUT supervised.
21 May 23:
SCOUT is filthy, so we moved him over next to the work deck for a bath. That opened up space for us to lay out the piers and beams for his new canoe cubby, aka the SCOUT Shack. While it is a bit of overkill, we use ground contact rated pressure treated lumber for the construction.
23 May 23:
Rim joists are set and posts are up.
24 May 23:
We tied the new top plates into the old section, cutting a nice ogee to nest into the old section.
29 May 23:
The joists are in, they support the deck boards.
03 Jun 23:
We finished decking the Sunfish Shack Expansion, with 2x6 planking pressure treated.
08 Jul 23:
We added 2 more rows of metal roofing to the Sunfish Shack, and now we can get all of the boats under cover, except of course poor ole SMEDLEY. But soon enough her time will come when we get the last 6 panels installed. TETRIS ensued.
The last 3 sections are ready for purlins, the 1x4 cross supports that go on top of the 2x6 rafters. The purlins keep the panel from sagging between the rafters.
16 Jul 23:
We had time today to get another section of the metal roof installed, just in time for the rain showers to pass over. Actually, we worked on the roof between bands of showers, it was nice to have some cloud cover at times and a little shade from the tree.
We left the purlins long as they will be trimmed to fit after the last panels are screwed down.
25 Jul 23:
We've stored Sunfish in the garage, leaned up against a fence and out in open fields. Some spots worked better than others, damage from wind, hail and critters happened when we stored the boats outside without proper covers or security.
The big problems we see with the boats that we restore is damage from time spent ashore, ranging from severe sunburn to being crushed by trees. So as funds allowed we built covered structures to store our boats. Here is our first metal structure, which went up in Texas, famous for hail and windstorms.
Yes, those are metal posts, they will not rot in our lifetime. We kept the roof low to comply with our Home Owner's Association restrictions, our other option would have been a more expensive shed built to match our home's brick siding. The dirt was okay but it is not optimum to rest tires on dirt over long periods of time, and mud can splash onto trailer components leading to accelerated corrosion. We keep trailers for a long time, and do what we can to minimize damage.
One other structure we had for boats was a hoop house made from PVC pipe and poly tarps. It protected boats from the sun in Arizona, and worked well for the year or so that we used it.
10 Aug 23:
We put the final bits of ramp on the Sunfish Shack, so we're going to call the 2023 expansion complete.
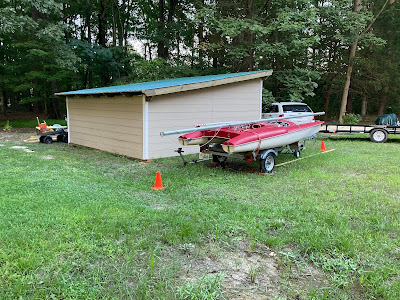
Here's a throwback to where we were in June of 2021, when the first few orange cones went out to mark the space for the new Mid Atlantic Shack.
Soon we'll get SMEDLEY repaired and into his end spot, but it is ready.
08 Jun 24:
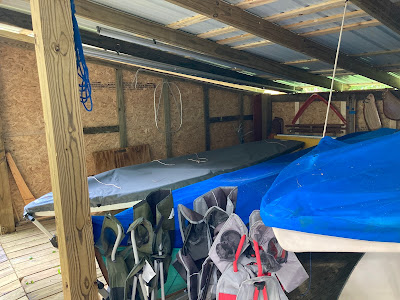
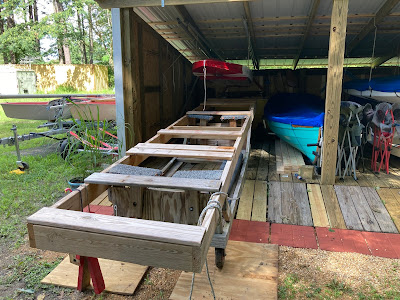
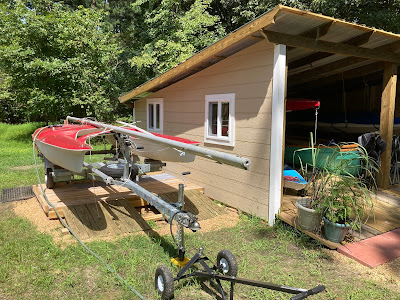
The new boat yard signs are finished and installed for the HEUER GARAGE, LEWIS BOAT WORKS and we have a new sign, OUTLAW TRAILER COURT INC. More on that later, but first, a look back at where we were back in 2021...
...before the two sheds arrived...


















No comments:
Post a Comment